D.I.Y Sturdy Photographic Reflector
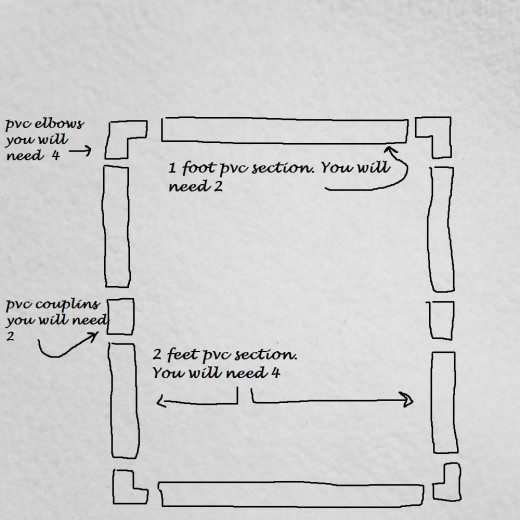
Figure 1
"Board reflectors
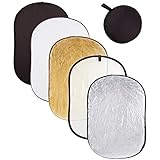
Also known as plane reflectors, "flats" or bounce boards, this kind of reflector is located independent of a light source; the light is reflected off its surface, either to achieve a broader light source, or control shadows and highlights, or both. This kind of reflector generally has a very low reflectivity factor that varies widely according to surface texture and colour.[2] As a result, it is most commonly used to control contrast in both artificial and natural lighting, in place of a fill light or "kick" light. In this case, light "spilling" from the main ambient or key light illuminating a scene is reflected back into the scene with a varying degrees of precision and intensity, according to the chosen reflective surface and its position relative to the scene.
Reflectors may also be used as a means of increasing the size of the main light source, which may (or may not) retain a direct path to the scene. By positioning a board reflector close to a light source, its effective size can be increased by "bouncing" the light off it.[3] A very common example of this technique is the traditional umbrella reflector, typically having a gold, silver or matte white interior onto which a lamp fitted with a circular reflector is projected, providing a broad, soft illumination. The lamp faces away from the scene to be photographed, allowing only reflected light to be thrown forward."Wikipedia
Many professional photographers regularly use reflectors to enhance the look of their images. This is especially true for any shot that involves people like portraits, weddings and many other similar styles.
This can also include some still life and table shots. In essence, all a reflector odes is reflect light from any light source back unto the main subject.
This is usually done to add some light into an otherwise darker portion of the main subject and it can also be used to create some subtle highlights.
Keep in mind that the reflected light is much more less powerful than that from a light source, thus the effect is subtle yet useful.
For this project I chose to make a rectangle although a square works I prefer the ability of shedding more light on a full body pose. See figure 1
The PVC pieces can be as small as 1/2 inch since PVC is durable. The take down is made possible because you do not need to use PVC cement on the joints.
The material that I chose was a windshield reflector bought at an auto supply store.
The cost of the reflector was about $8.00. They come in gold and silver. I wanted a strong reflection so for me the silver was my logical choice.
The total for the PVC pieces and fittings was about $6.14 so I have a professional looking reflector for about $14.14
I also got some Velcro strips to attach the reflective material to the PVC pipes and this was less than $2.00
Something cheaper can be made depending on where you get your materials from.
You can get some photographic reflectors for about $25.00 and the really sturdy ones which are professional grade can cost upwards of about $40.00.
Something else that I have found with the majority of professionally made reflectors is that they are mostly rounds. Although they do a very decent job, I have found that rectangles provide more of a light reach; in other words they cover more area.
I get an enjoyment from doing my own DIY projects and if they serve the function just as well as a $40.00 one then it makes perfect sense to make your own.
Will you make your own?
The majority of DIY reflector projects involve using cardboard and aluminum foil.
This works but the foil can be easily damaged and these are mainly to be used in a studio and seldom used outdoors.
There are other reflective materials such as reflected vinyl for about $8.00 per yard and reflective fabric for about $12.86 per yard.
Most have to be ordered online but windshield auto reflectors can be found in many places. This availability was the decisive point for me to use it instead of other materials.
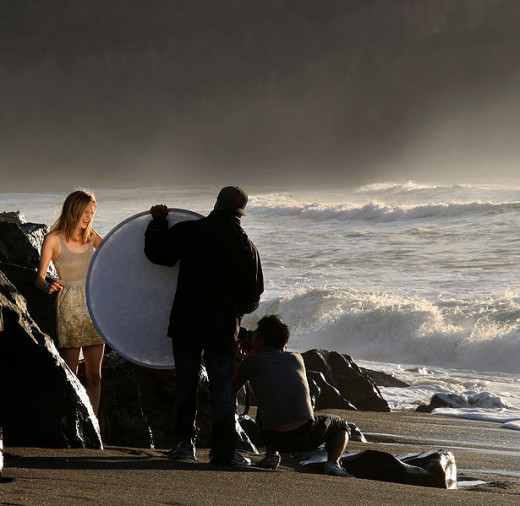
This project is meant for outdoor use and can be easily handled by an assistant.
Figure 2
Besides the PVC pipes and fittings and a reflective material plus some Velcro strips there is nothing more that you will need. However, once you cut the reflective material to size you should hem the edges to prevent flailing.
Once you have assembled the PVC pipes and fittings to form a frame, cut the reflective material to the same shape of the PVC frame but leave about two inches more on each side which you should fold over the PVC to ensure a stronger fit.
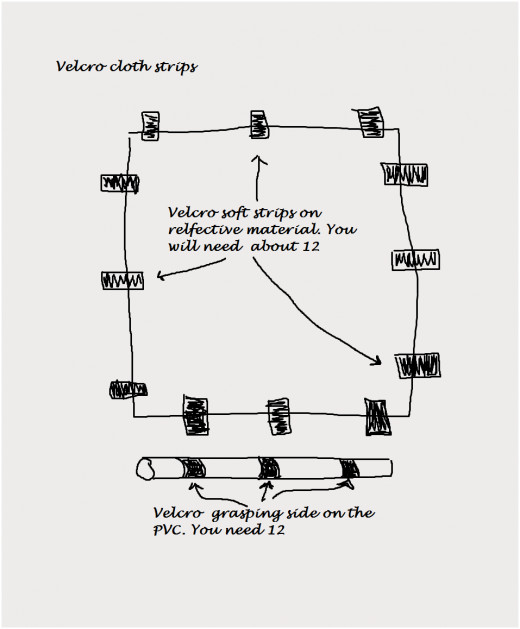
Place Velcro strips on each side of the rectangle/square of the material with each side having about three Velcro strips; one at each corner and one in the middle. See figure 2
Remember that one Velcro strip (felt) goes on the reflective material and the other (grasping) goes on the PVC.
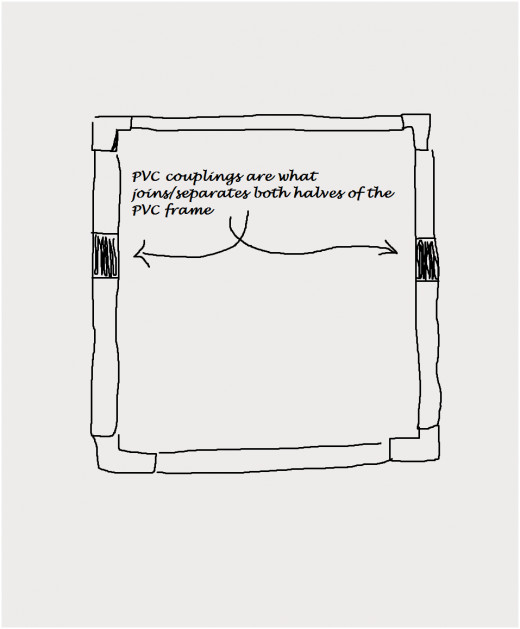
Be careful not to place any Velcro strips on the PVC couplings since they are used to join sides and separate when not in use. See figure 3.
However, if you do not want to take down and assemble the reflector, then leaving it in place works just as well. In this case then attach each joint; elbows, couplings, to each pipe with PVC cement and instead of Velcro straps use electrical zip ties.
If you don't mind spending a few more dollars to have a double reflector, then get another windshield reflector in gold and apply to the back of the silver one using the same basic Velcro/electrical zip ties steps.
Figure 3
Really got to watch this!
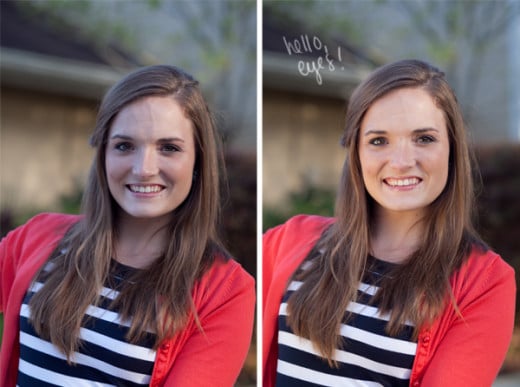
Without a reflector (left) & with a reflector (right). See the difference, especially in the eyes?
- How to Use a Reflector
In the world of photography, nothing happens without light. In most cases, there are two types of light that photographers work with: natural light and artificial light. Although I often find myself using artificial light sources, I prefer using natu
© 2014 Luis E Gonzalez

![Adobe Photoshop Elements 2018 [Old Version]](https://m.media-amazon.com/images/I/51AQ4wl7eOL._SL160_.jpg)
