DIY Angel's Breath Apothecary Bottle Gifts with Wings - Demo - Frugal, Fun, Chic

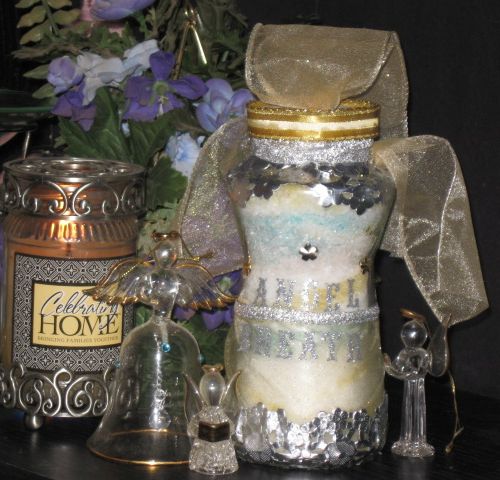
Angel's breath apothecary bottle I just made, easy, breezy style.

Do you like hand made angel themed gifts?
I like angels but this isn't for me. My aunt collects all things angels. It's the only things she collects.
Having done it most of her life makes it kind of hard for me to get her an angel gift that comes close to topping most of what she already has.
Seeing as how I dearly love my aunt and a challenge, I decided to invent something new. Come along to see just how to do it.
It wasn't hard at all. Better still, it was way cheap to make, fun and got the whole house smelling like vanilla heaven.
This one is filled with vanilla scented bath salts. I'll show you how to make that, too. It's way easy and takes just a minute. One of the best things about this project is that you can fill it with anything you want.
Materials list for this angel breath apothecary bottle:
- One Pace Picante sauce jar with the lid
- One silver paper doily
- One piece silver ribbon
- One piece gold ribbon
- One long piece wired gold ribbon
- Two gold star studs
- One silver star stud
- One gem stud
- One sheet sticker letters
- Gold and silver glitter
- Mod Podge
Let's bring in the little angels when making this project.
This would be a great project for older children, classes, parties, and groups, as well as adults.
Little ones love to give gifts, especially at the holidays.
Let's face it though, it can be hard for them. Most of them don't have an independent source of income.
While many a class will be making macaroni art and finger paintings for the guys and gals to send home, after a certain age, it really isn't the best option.
Oftentimes, children would really like to make something just a bit more sophisticated.
This is a project that children old enough to use a glue gun can easily do for very little if any money.
That's really important to me. I was a teacher.
I saw so, so many poor children who really stressed over being able to get anything nice for just family at Christmas.
Children can do this.
Let's see exactly how.
Kids can do more than we think.
Do you think kids can do more sophisticated projects than what they normally bring home from school?
Teacher tip -
This is good for functional level classes of older students.
It meets the IDEA requirements for age appropriate materials better than noodles glued on a page.
If doing the glue gun parts hand over hand for safety or training purposes, remember it is much less invasive to allow them to put their hand over yours than to put yours over theirs.
Angel's breath in a bottle made from re-purposing a glass jar.

Tools list:
- Scissors
- Glue gun
- Thimble
- Small Paintbrush
To make this jar craft project, gather up your gear and let's get going.
First up, plug in the glue gun. If doing this project with children, be sure they have been thoroughly instructed in how to safely use a glue gun. Further, be sure to monitor at all times.
Get everything needed to make the project together and be sure to protect whatever surface you will be working on, especially if it's Mom's good dining room table.
Mix salts and scent.

Divide scented salts and add food coloring.
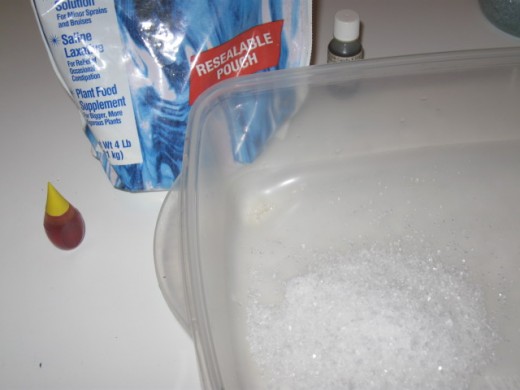
Step one for angel's breath in a bottle is to make the bath salts.
This is the easiest thing in the world. Even the tiny tots can help out on this part.
Divide plain Epsom salts into four bowls. About a 3/4 of a cup each should do it for a bottle this size with some left to spare.
Add one drop of food coloring for each bowl. Add several drops of your favorite scented oil. I used Vanilla Velvet. It smells so good! For colors, yellow, pink, white and blue were used in this bottle.
Let the little ones dive in with their hands. They just mix it around until all the color is absorbed. Be sure to remind them not to rub their eyes until done and then wash their hands.
If you really want to make it fun for younger kids in classes, bring in some science safety techniques providing them with safety goggles and gloves. They will get a huge kick out of it and teachers get a great hook for discussing safety.
Just keep filling the jar until you reach a leveled off top.

Leftover materials tip:
Take any leftover scented salts you made and put a few spoonfuls in some mesh or thin cloth and tie off with a ribbon. Disperse around the house to enjoy the scent for days.
When the salts are ready, it's time to mix up some angel's breath.
When I think of breath in a bottle, I think of something swirly looking, mists and vapors. Well, my dear aunt can't bath in vapors now can she?
To get the swirly look in the jar, just scoop a spoonful at a time of alternating colors here and there. Rotate the jar slightly as you go.
Be sure to fill the middle as you go too or the pretty side swirls you make will just cave into the middle changing the whole look.
Fill the container all the way to the top really tightly or things will move around and the appearance will change.
I like to keep the cap on tightly when I can just in case my kitty decides to knock it over. We will have to remove it to decorate it, though. Or, you could decorate the lid first.
Ribbons are a time tested gal pal for crafts.


To give the jar an angel look, grab the ribbon.
A seamstress tape could be used to measure the circumference of the bottom of the jar. Or, just wrap it around and cut using the trusty eyeball method as I did.
Be sure either way to give yourself at least a half an inch extra to overlap.
The ribbon used here is a wide, gold shimmer ribbon with a wire on top and bottom made by Offray. It's see through and very thin. You could use any kind you want. White lace would work well, too.
Attach the ribbon to the jar on what will be the back of the angel carefully with the glue gun. Over the top of the gold ribbon, I glued down another thin silver shimmer, metallic ribbon also manufactured by Offray.
WARNING - Do not use a glue gun on thin glass jars. It can break the glass. You could use a rubber cement or spray adhesive, even glue dots. I would not recommend Mod Podge or white glue for this step simply because it takes too long to dry and who wants to wait when you don't have to?
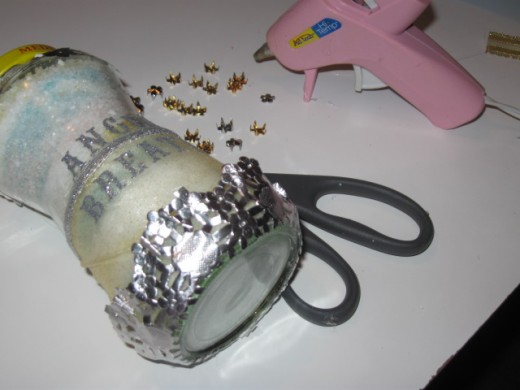
The ribbon and stickers used in this project.
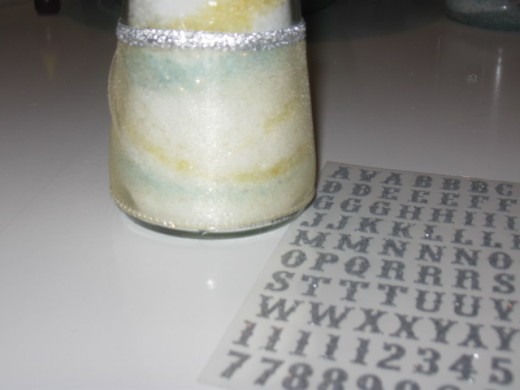
There are many ways to get the letters on the jar.
I used Sticko brand peel and stick silver letters. Using the thin silver strip of ribbon as a guide to get the letters straight, I just stuck them on.
Any kind of font desired could be printed out using a computer and applied with glue.
Temporary tattoo letters would be super easy to use. All you would need to do is cut it out, lift the film, lay it face down on the glass, wet and rub, rub, rub. Viola, instant letters.
If you use the temporary tattoo method, seal the letters with a few squirts of hairspray before moving on. If using the stickers, Mod Podge over them to prevent peel ups in the future.
Cover the cut doily seam line with another ribbon scrap.
Mod Podge is so ugly when wet but it will dry clear, eventually.
To get the somewhat scalloped affect, grab a paper doily.
Paper doilies are the bomb for crafts. They come in packages containing anywhere from eight to thirty of each for very little money.
The doily I used wasn't even a whole one. It was scrap bits left over from another craft project. Always save the little bits.
You never know when you can use them again. Because it's paper, it won't do well just sitting out. Toss it in a Ziploc baggie until such time as you're ready for it again.
The frilly doily edges were cut off and glued down using the glue gun. The hot glue will come through the little holes.
To press the doily down, use the end of your scissors or paintbrush to avoid burning your fingers.
Because the shapes don't match up, you will have to crease and fold the doily parts here and there.
At this point, things don't really want to lay down well. Don't stress over it. We will fix it with Mod Podge. Just paint the undersides and press down. Then, apply a coat to all the doily bits and the ribbon.
You will see the wrinkles in the ribbon add to the swirl look of the salts. It's kind of cool. This takes a while to dry. I don't always like to wait.
You could finish embellishing and do the Mod Podge last if you wanted to get a better idea of what the final product will be like before being stuck waiting for things to dry.
Attach the pretty bits and bobs with hot glue.
Options, choices, alternatives even.
What would you like inside to make angel breath?
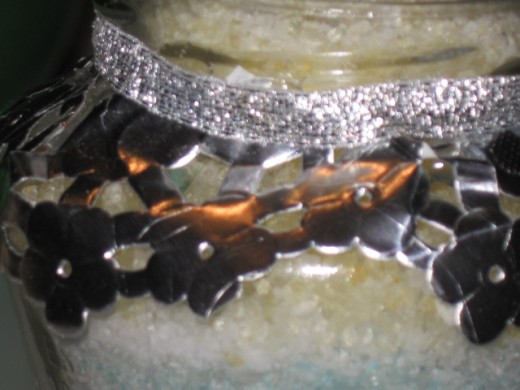
To further embellish the jar, get some gem studs.
I'm sitting on several boxes of pronged studs, so I'm using them on just about everything. They are not without problems.
The prongs for this project are meaningless and just get in the way. I use the tip of my finger to bend them all over flat before attaching with the glue gun.
Wear a thimble to do this if you use pronged studs. The prongs are very sharp and hurt like the dickens when they puncture your finger.
Alternatively, you could just as easily use beads or peel and stick gem stones instead of pronged studs.
CHEAP CHEAT -
Use colored sugar beads. You can get a big jar on sale for about a buck.
Be sure to spray coat them all over really good with spray on acrylic first so they won't melt, degrade or draw little critters.
Do this outside. The fumes are so not good for you.
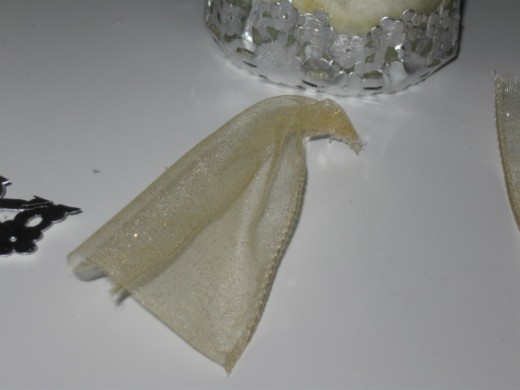
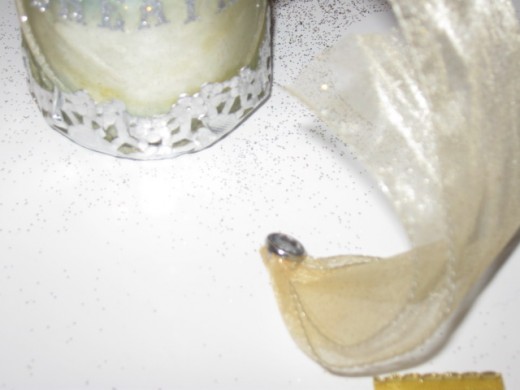
The wings before being applied.
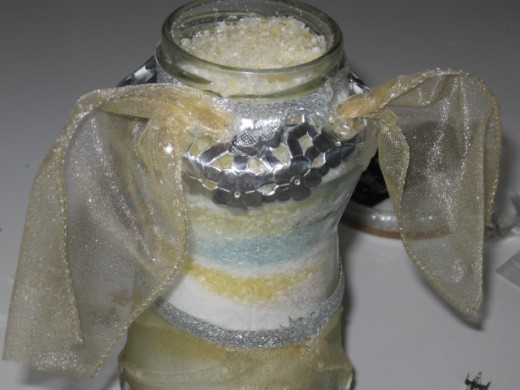
Cover the wing attachment points with ribbon.
How to make the wings.
The wings and the top are where the wires in the ribbon really work to your crafting advantage.
Cut two strips of double wired ribbon the same lengths. Pinch together an end of each. Use a drop of glue to be sure it will hold.
Now, bend the wire back over on itself a time or two, just a little will do it to ensure it holds together over time.
Lay one ribbon on top of the other. Use your finger to bend both ribbons in the same spot at the top. It's kind of like if you were making two half heart shapes.
Lastly, glue each to the back of the jar just under the rim.
Press and hold each for a moment allowing the hot glue time to set or it may slip on you.
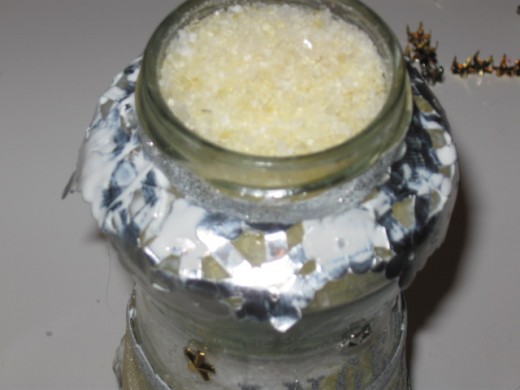
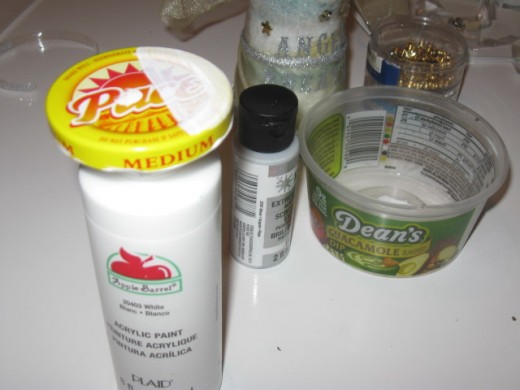
Paint the lid to cover the ugly.
Angels come in all shapes and sizes.
Lastly, how to make the lid.
The lid started with was really ugly. Don't get me wrong, no insult intended to the appearance of a Pace Picante Sauce jar lid but it really is not the angel look I wanted.
Paint the entire lid plain white to have a base to work with. Be sure to do the under side edging on the lid or it may show.
It took three coats of white craft paint with a dash of silver glitter paint mixed in to cover this one.
When the paint is almost dry, sprinkle on some glitter. A mix of silver and gold glitter was used here.
There was glued another, different, gold ribbon scrap around the entire lid rim but you don't have to do that step. You could easily glitter coat or dust the rim and it would look great.
When everything is dry, all that's left is to make the ribbon topper.
Cut two pieces of the wired ribbon one roughly twice as long as the other. Place the longer ribbon on top and pinch them together with your fingers.
Make a curl shape by bending ribbons at the same time over the back of your hand.
A pronged gem stud was used to cover where the the ribbon connects to the lid.
A bead, foam cut or many other things would work for this, even a gold star.
What ever kind of thing you decide to make, try your hand at creating something.
The hectic modern lifestyle we lead sometimes revolves around mass consumerism, power consumption and haste. Take a bit to kick back, tone it down and chill a bit by making something with your own two hands. Whatever you do, have fun!


