- HubPages»
- Arts and Design»
- Graphic Art & Design»
- Design Software
Designing Chevron Digital Paper In Adobe Illustrator
Introduction
We all use digital papers, in our daily life, in some way or the other. They come in handy in all creative projects like scrapbooking, wedding invites, birthday parties, tea parties, greeting cards making, children school projects, website backgrounds, crafts, and much more. Designing your own digital paper design mat look difficult but in real terms it is just 1 hour work. They are too addictive and once you finish this tutorial, you can call yourself a good graphics designer.
Let’s start making chevron digital paper in adobe illustrator.
Requirements – Adobe Illustrator should be installed in your computer.
First open the illustrator by double clicking its icon on your computer. It will take approximately 10 seconds to load. You will be presented with a blank screen.
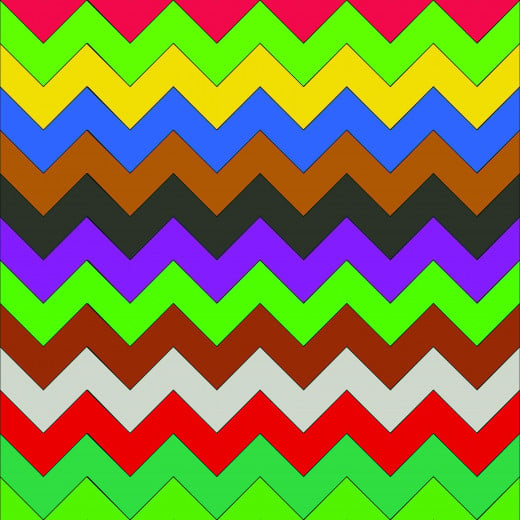
Chevron Digital Paper
Setting Up A Document
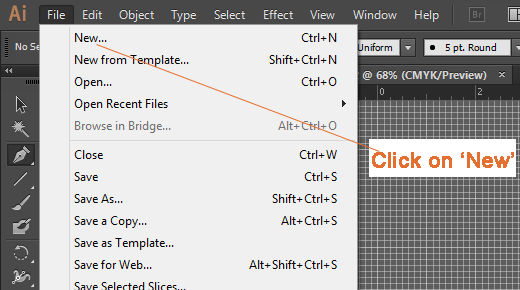
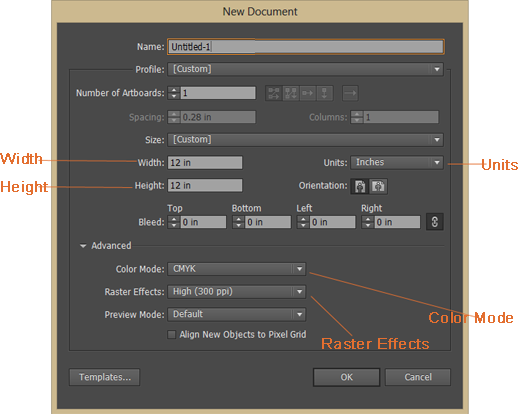
Click on ‘File’ then select ‘New’ (shortcut CTRL+N). In the screen presented to you do the following settings –
a) Units – Inches
b) Width – 12
c) Height – 12
d) Color Mode – CMYK
e) Raster Effects – High (300 ppi)
That means we are setting a document which is 12 inches in width and 12 inches in height. CMYK signifies the four colors - cyan, magenta, yellow, and key (black). It gives the best color effect for printable documents. 300 ppi in ‘Raster Effects’ option is same as 300 dpi (dots per inches).
New Document in Illustrator
Turn On Rulers and Grid
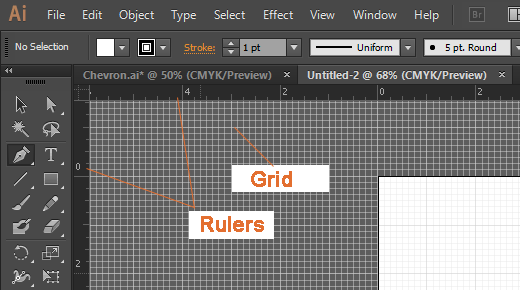
Turn on the ruler by going to ‘View>Rulers>Show Rulers’ (shortcut CTRL+R). You will see rulers both at the top and on the left of the document. See the rulers shown in the image given below. Similarly turn grid on ‘View>Show Grid’ (shortcut CTRL+”). Rules and grid help in accurately placing and measuring objects in the document.
Rulers And Grid
Color and Stroke Color
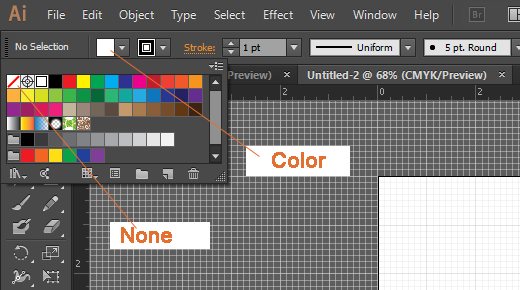
Here we need to set the Color as ‘None’, to do so, click the white rectangle on the top left corner which opens a small window. Click the first option to select ‘None’ (as shown in the figure).
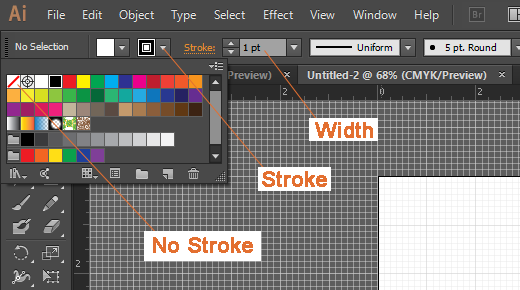
Stroke color is the border color of an object or text. You can select the stroke color by clicking on the ‘Two Inner Rectangle Icon’ just next to the rectangle you just click before (when you choose the color as ‘None’). Select stroke color as ‘Black’. Next to the stoke color is the option to set the width, here we just need 1pt for it.
Color And Stroke Settings In Illustrator
Drawing Chevron Patter with Pen Tool
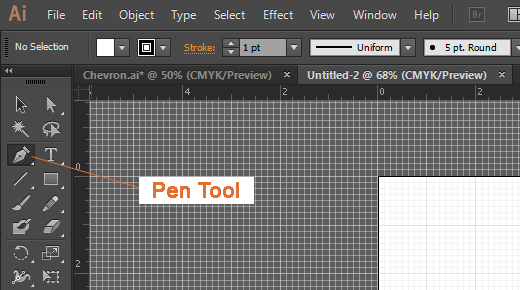
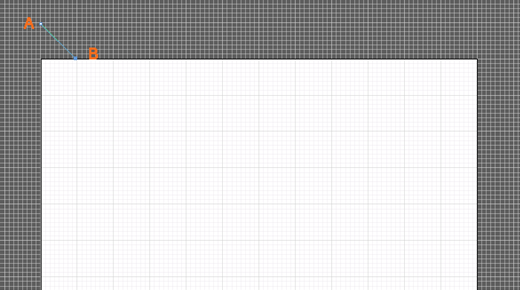
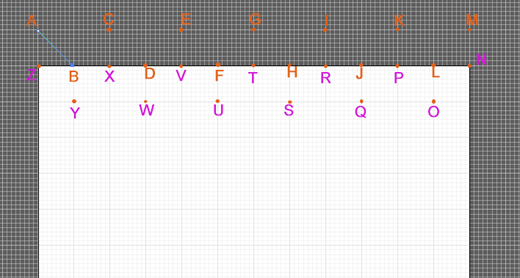
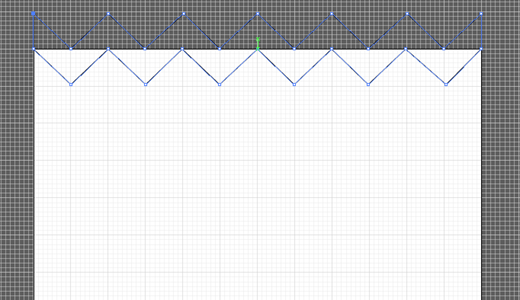
Select the pen tool by clicking on the pen icon on the left corner (shortcut P). Starting one row above the document board, click on the top left corner (Point A shown in figure) then click on the bottom right corner (Point B shown in figure). This will draw a blue line, continue clicking point C, then point D till you reach point M. After M click on point N then O, P till you reach point Z. After Z click on point A, this will complete the figure and you will get a zigzag structure (chevron pattern) as described in the image below.
Drawing Pattern With Pen
Duplicate the Chevron Patter
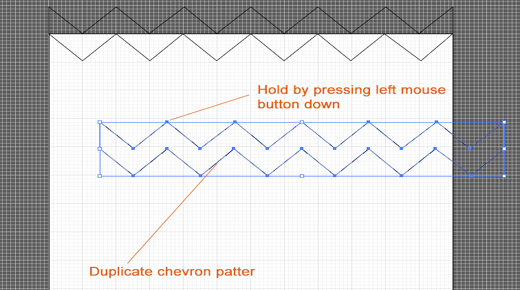
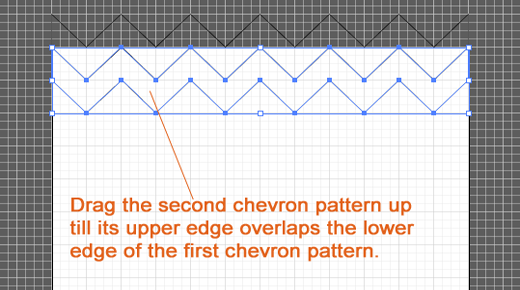
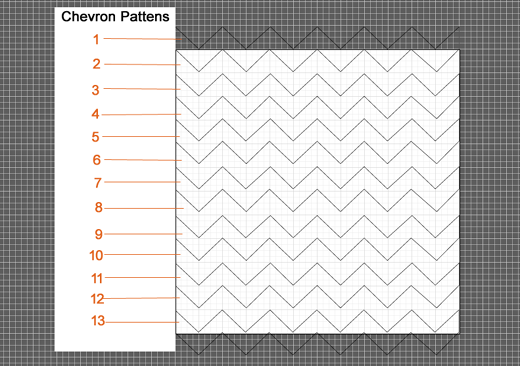
Select the ‘Selection Tool’ which is the black arrow icon on the top left corner (shortcut V). Click on any edge of the chevron patter. This will select the whole chevron pattern and it will be shown inside a blue rectangle. Copy it (shortcut CTRL+C) then paste it (shortcut CTRL+V). This will create a duplicate chevron pattern, now hold it by pressing left mouse button down on any ‘Blue Point’ in it and drag it up till its top edges overlaps the bottom edges of first chevron pattern. Keep on duplicating the chevron patter and adjusting them in the same manner till whole of the document is covered. You will get the complete figure as shown in the image below.
Duplicate Chevron Pattern
Filling Color
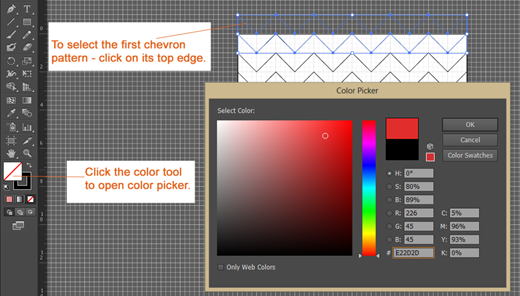
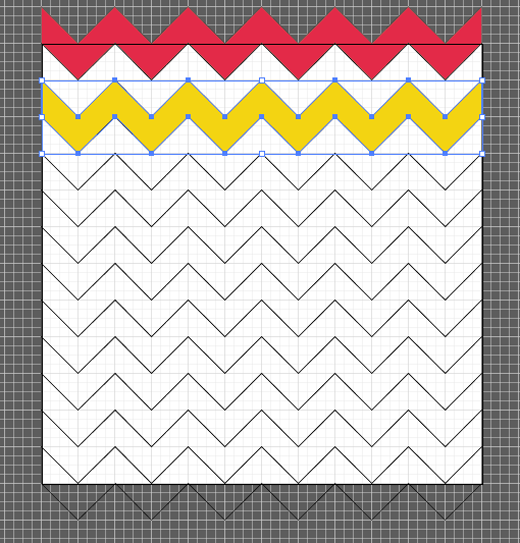
In this paragraph i will show how to fill colors to the different chevron patterns. Select the ‘Selection Tool’ (shortcut V), click on the top edge of the first chevron pattern. This will select it, then click on the ‘Color Tool’ rectangle on the left to open the ‘Color Picker’ window. Here i have selected a red color whose Hex code is #E22D48.
Similarly select the third chevron pattern by clicking on its top edge and give it yellow color – hex code #F4D30F.
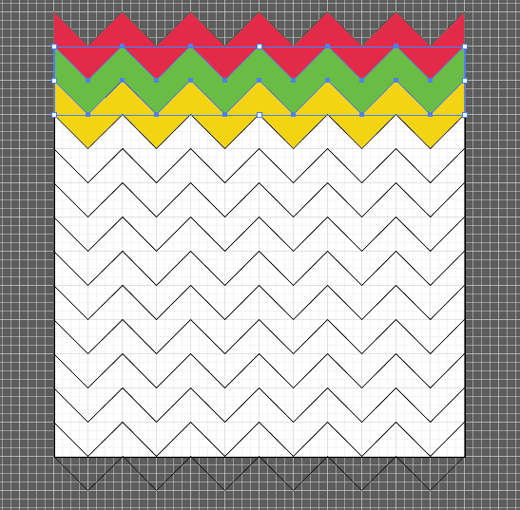
Select second chevron pattern by clicking on its top edge and provide it green color – hex code #F3D213.
Note – I selected the third chevron pattern after first one because the bottom edges of the first one are overlapped by the top edges of the second chevron pattern, so it becomes difficult to select the second chevron pattern just after the first chevron pattern selection.
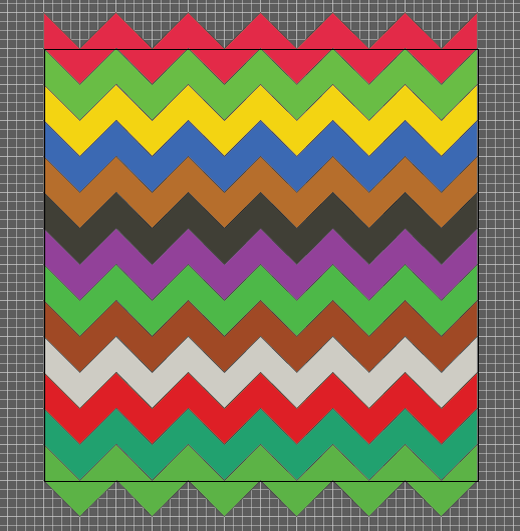
Do this for the entire remaining patterns by giving them different color you want. It will look something like in the figure shown below. This completes the designing of our digital paper.
Filling Color
Saving the Files
Now save your illustrator file by clicking on ‘File>Save As’. Give the ‘File name’ as Chevron and keep the ‘Save as type’ as ‘Adobe Illustrator (*.Al). Note that it is important to save this file as ‘.Al’ so that you can make the changes later on.
Exporting in JPEG Format
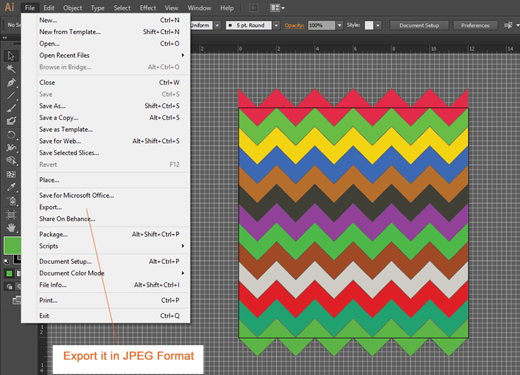
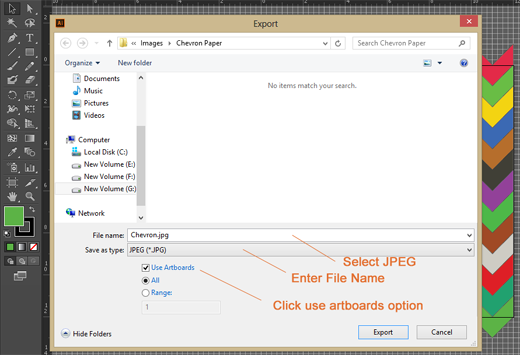
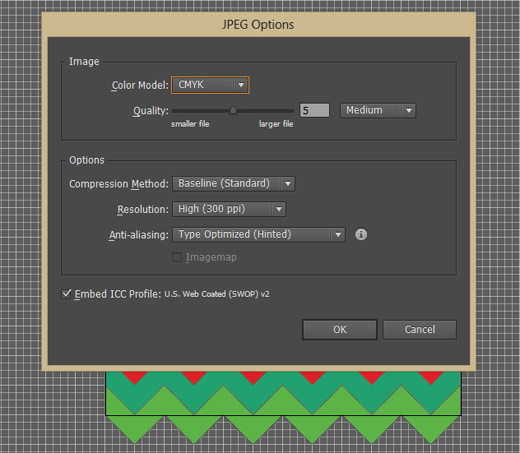
It is important to save the file in JPEG, so that it can be open in all computers and websites without the need of Adobe Illustrator. Click on ‘File>Export’, in the export window enter name as ‘Chevron’, save as type as ‘JPEG’ and check the ‘Use Artboards’ option. Click on ‘Export’ button. ‘JPEG Options’ window opens – select CMYK as color model, resolution High (300 ppi) then click on ‘OK’ button to create a JPEG file for it.
Now you have your ‘Chevron Pattern’ digital paper in JPEG format. Use it for printing purposes, projects and more. They will liberate your graphics creativity all in one go.
Exporting Digital Paper
Summary
This tutorial is a part of graphics designing and is very popular and involves so many people with great ideas and designs. Tools like illustrator, photoshop, corel draw & maya has brought it very near to common people who can learn it and become a good graphics designer. It can be source of earning good income too. You can sell your graphics by buying domain name registration and website hosting and then setting an ecommerce website for selling your graphics. The field of graphics designing involves immense creativity and an active imagination. Continuous hard work will bring good results from you.

