Designing Safari icon using Corel Draw

Today we are going to design safari icon in an iPhone using CorelDraw.
We learned some basic tools and options in the previous hubs. Hope you all tried it.
This tutorial also providing some basic awareness of CorelDraw designing.
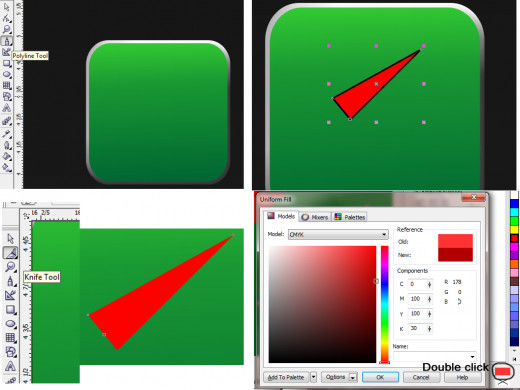
Use the polyline tool and draw a shape as in the figure. Fill it with red color and remove the outline. After that, use the Knife tool to cut the shape into two. Select the below part and change the color hardness by changing the values in uniform fill dialogue box like in the figure.
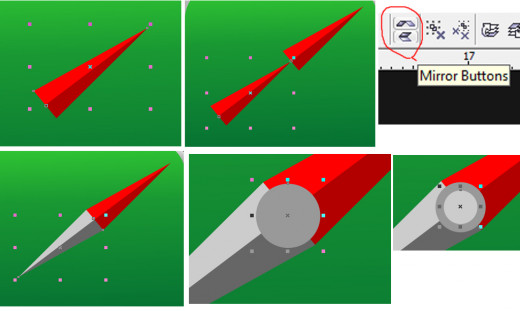
Now group the shape we have cut earlier by selecting two of them and pressing Ctrl+G. Now duplicate the grouped shape once and place it as in the figure below. after that use the mirror buttons. for flip it opposite.Click two of them one time. After placing the shape in the correct position, change the color to a gray color combination. Then draw an ellipse right in the middle and duplicate once and reduce the size a bit. Use the color appropriately.
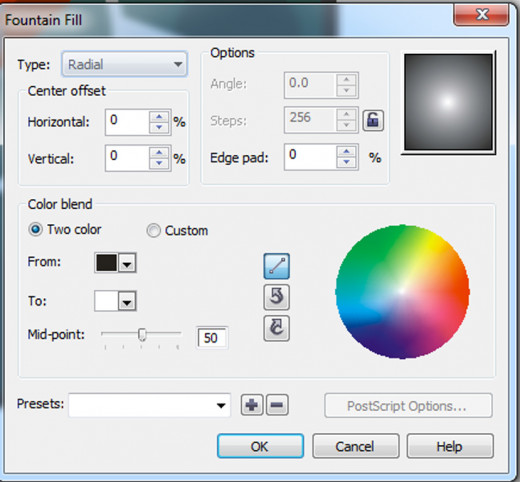
Use the fountain fill (F11) dialogue for giving the ellipse, a glow.
Now it's time to create the poles. use the ellipse tool and draw one shape. Fill it with a little dark green color and duplicate it to the top side also. Align the circles to the center by first clicking the circle, shift selecting the background basic shape and pressing 'c' key. After creating and aligning two circles, select the two circles and use the transformation option to rotate and duplicate it as in the figure below. Rotate it in a 900 angle and apply to duplicate. Create the poles by using the same principle.
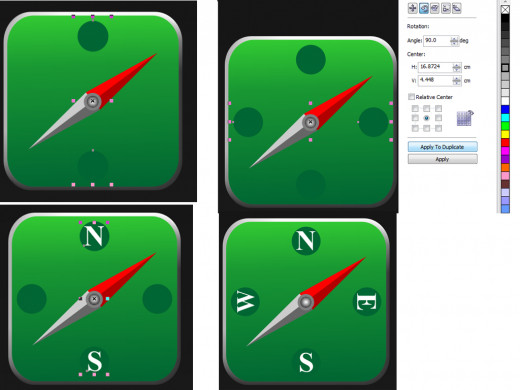
Create a circle right in the middle of of the shape without fill color and with a white outline color with a reasonable outline thickness. After that use the polyline tool and use the treansformations option to create the rest of the icon as shown in the figure.

Hope you benefit from this tutorial. Good luck...


