Drawing a Dragon's Head

You Can Learn to Draw a Dragon's Head
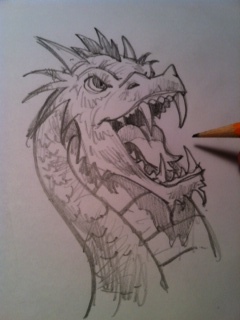
If you're reading this article, you must have some interest in dragons, drawing or both. I want you to know that people with absolutely no drawing ability can learn to draw a dragon like this one.
If this is your first foray into drawing, let me make a few suggestions:
1) Know that drawing is hard. I have been doing this as a profession for almost 50 years and I still face drawing challenges occasionally.
2) Give yourself a chance. Nobody gets it right the first time. Or the second, third, fourth, etc. Drawing is about the experience of learning. Each drawing - no matter how good or bad -is a teacher for the next drawing.
3) Be persistent. I don't know about you, but I'm one of those folks who doesn't ike to be defeated by anything - especially a challenging drawing. Keep at it, practice until you can't practice anymore, get up the next day and practice some more. That's how I was able to develop my talent.
4) Believe in yourself. Drawing is hard but it can be one of the best and most fulfilling things you ever do - especially if you get really good at it. Whenever life gets hard - as it will at times - I know I can find refuge in my ability to create something from nothing.
That's what you're doing when you draw - you are creating something from nothing. To me, that's pretty amazing. When you finally create a drawing that is "good," you'll feel like you're on top of the world - and that is a great feeling!
So, if you have your No.2 pencil sharpened and a few sheets of paper. let's get started on slaying this dragon...
.
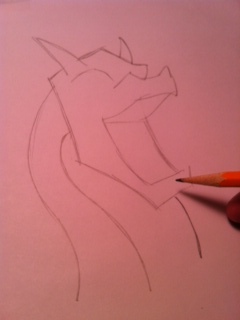
Step 1: Draw Basic Shapes
Start by drawing the basic shapes shown in the image at the right.
This basic drawing is the frame onto which the remainder of the drawing will be supported.
(Pardon the reddish color, I'm not sure what happened with that.)
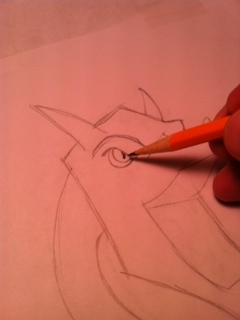
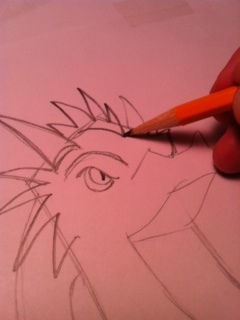
Step 2: Draw the Eyes
So, let's begin to add some detail...
Start with the eyes. Actually you really only see one eye in this drawing because of the position of the dragon'e head.
Draw a circular shape to form the protruding eyebrow.
Next, add a semi-circular shape for the eye.
Finish it with a vertical slit in the center of the eye.
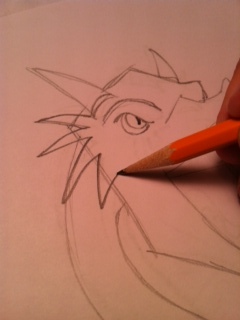
Step 3: Spikes and Other Details
Dragons are typically quite frightening and terrifying. Sharp angles add to that image when drawing a dragon.
These are basically just zigzag lines, sort of like drawing a "W" shape over and over.
Start at the top next to the horn and gradually move down while drawing these lines.
Make them appear to curve downward. This will make them look more real.
Step 4: Draw the Head Spikes
These spikes run along the center of the dragon's head and all the way down his back to the tip of his tail - even though you can only see this one section.
Draw the "W" shape again when creating this line.
Make sure they bend a little toward the back. This will help them to appear more realistic.
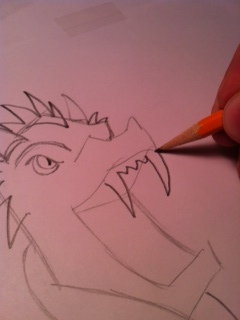
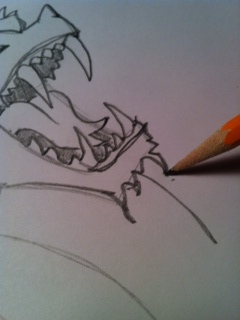
Step 5: Draw the Fangs and Teeth
Dragons typically have large fangs and lots of sharp teeth.
These are still the basic zigzag lines that make up the teeth.
The great thing about drawing dragons is that you can make them look any way you want. Big fangs, small teeth, friendly, fire-breathing or extremely dangerous - it's all up to you when you draw a dragon.
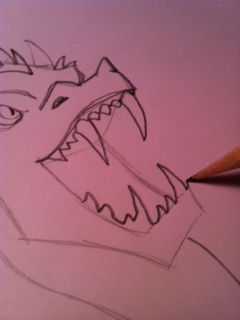
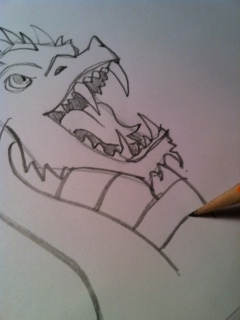
Step 6: More Teeth
Now were going to finish off the teeth.
Add more teeth along the bottom jaw line.
Also, draw a small nostril in the area of his nose as shown.

Step 7: Draw the Tongue
OK, you have drawn all of his sharp, menacing teeth.
Let's finish off the mouth by adding his tongue.
Draw a few curving lines as indicated in my sketch to the right.
Don't forget the bifurcated tongue - two tips on the end. That's very dragon-esque!
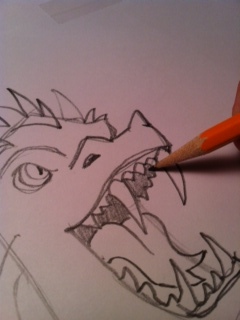
Step 8: Add Shading in the Mouth
This step will really give your drawing a real, 3-dimensional look.
Shade in the area behind his teeth in the top and bottom area of his mouth.

Step 9: Add Some More Spikes
OK, let's add some more of those menacing spikes.
Remember, sharp and pointed edges have a negative impact on the drawing.
Draw a few more "W" type lines downward under the spikes you drew in earlier.
Step 10: What ARE Those Things?
OK, I don't know what these are called, but I always see them on artists renderings of dragons.
These are going to be really easy to draw becaue they don't really have to look like anything.
When drawing these, just let your lines run wild. The wilder, the better.
I think these wild lines give the dragon a real authentic look.
Step 11: Add the Final Details
You're almost done - how does your dragon look?
Let's add the final lines that give this dragon a real 3-dimensional look.
Notice that these lines are curved and show that the surface of the dragon's neck is also curved.

Final Step: Add Shadow and Other Details
This is the last step and the most important.
Adding shadows in just the right place give you drawing a realistic look and feel.
You may need to practice a bit with shadows, they can be a bit tricky.
That's it -Step back and take a look. How does your drawing look?
Remember, drawing is simply making a bunch of shapes that fit together in a certain way. Drawings like this do look complex at first but are basically simple.
Its perfectly normal to get frustrated and draw something many times until you get it right. The fun of drawing is in the journey as well as the end result!
Guess what? - the more you practice, the easier drawing becomes.
I wish you the best with your drawing!
_______________________________________________________________
Look What a 16-year-old Did...


")
")


