Easy UV Unwrapping Techniques For Game Assets In Maya

UV's don't need to be stressful...
This article covers one method among many for unwrapping UV's in Autodesk Maya. There are numerous ways to achieve the same end result, and my goal for this method is to get you started unwrapping UV's in a way that uses basic tools, tested methods, and easy to follow instructions.
Unwrapping UV's was intimidating for me at first, and ultimately frustrating until I was able to find a method that made sense. I hope that you find this guide useful, and that it helps skip both of these stages in learning how to complete higher quality fully textured assets.
Step 1: Verify Topology
Before we get to the actual unwrapping of your models UV's, we need to ensure your topology is set up for use for this particular method.
- No 5+ sided polygons: Although this will not cause your computer to divide by zero and end reality, it could cause potential issues during the unfolding process in addition to the fact that some game engines do not handle 5+ sided polygons very well. Trigons are a better alternative, so try splitting 5+ sided polygons if possible.
- Be sure you are done optimizing your model before the UV process begins. Once you unwrap your model's UVs, changing the topology can cause distortions and will need to be unwrapped all over again.
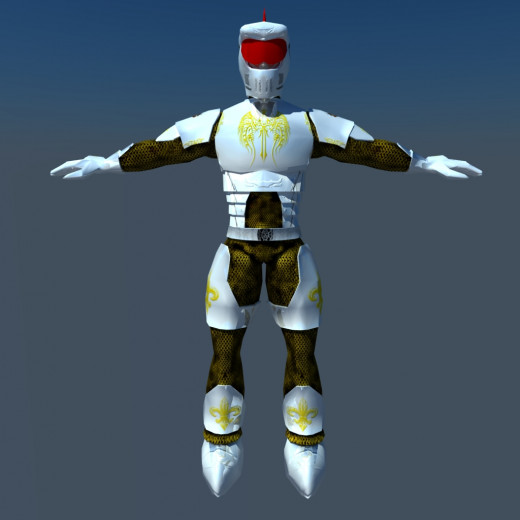
Sample Topology

The next step is to section the mesh. The purpose is to choose which parts of the mesh will overlap on the texture page, and which ones need their own spot (identical textures vs. unique textures).
Step 2a: Sectioning Non-Identical Parts
Depending on your mesh, you may need to separate sections from your mesh so that unwrapping can be done more effectively. In addition, areas on your model that will have the same texture space on both sides can be cut in half, 1 side deleted, to save time.
The following videos provide additional steps to this process as well as examples.
Sections of your mesh that you intend to add variations to that will not be identical on both sides of the mesh, such as grunge, decals, tones, etc. will need to remain whole and unwrapped as is.
Note: You can split a portion of your mesh in half on any axis (x, y, or z), meaning that, for example, if you were making armor and wanted a giant slash down the center of the chest, you can still split the mesh in half from left to right instead of down the middle of the front.
Before watching the videos below, please keep in mind where you want your seams. Try to cut your UV edges in areas that will be seen/noticed the least. Or in areas you can get away with a seam, for example where two pieces of armor or plating connect, or where natural seams would occur.
Separating and Unwrapping Non-Identical Sections, Part 1
Separating and Unwrapping Non-Identical Sections, Part 2
Step 2b: Sectioning Identical Parts
For sections that will be the same on both sides of the model, separate them from the rest of the mesh, then delete 1 half.
If your entire model will be exactly the same on both sides, simply delete all the faces on half of the model. After the UV unwrapping processed is finished, these areas will be mirrored, then recombined with the rest of the mesh. But more on that later.
I moved all the different parts out as an example only, don't do this on your own mesh.
Mesh Sectioning Example
The only parts left whole are the parts that will not be mirrored on both sides. A giant gash across the front of the chestplate, and human skin keeps me from slicing those in half. Everything else will be duplicated after the UV's are unwrapped, and will use the same places on the texture page.
Section Map

3. Seam Placement and UV Unwrapping Techniques
Now that your mesh has been divided up, it is time to start unwrapping. This phase is easier for me to describe via video, but notes are provided below.
If you watched the first 2 videos then you already know a few ways to unwrap the UV's. The method I am going to show you is similar in some ways, but for me personally, is easier to use. It is up to you to find the method you like the best.
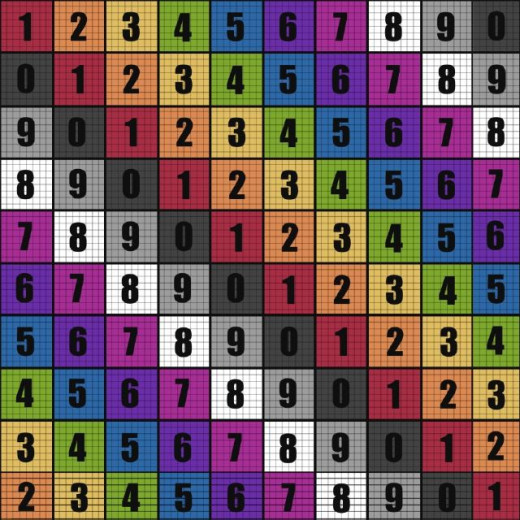
Note: If you don't have one, download the checker map provided below. It is essential to use one when working with UV's to ensure there are no distortions as well as appropriate scale throughout the UV shells.
The Technique Explained, Along With Other Helpful Information.
The Only Two Tools You Really Need
Manual UV Unwrapping Pointers
I do not recommend using any form of automated UV unwrapping unless it is from a 3rd party plugin. Although Maya has made some impressive progress on automatic UV unwrapping in Maya 2015, the only way to ensure your UV's are satisfactory is to do it yourself.
- Find an edge to place a seam where it is least likely to be seen, or where it can be used as part of the texture.
- Line up the joining UV edges of the seam as best as possible.
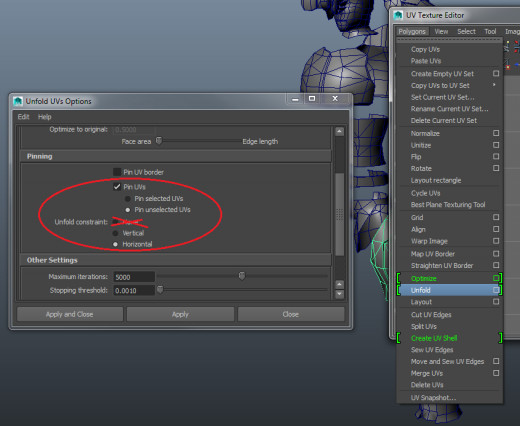
- Make use of the "Pin Unselected" and "Pin Selected" options.
- Only use "None" under "Unfold Constraint" as a final measure to even out the UV's in certain situations, with border UV's pinned. Otherwise, leave it alone.
4. Organizing the UV Texture Space
Before re-combining the mesh, we need to organize the UV Texture Space. The goal is to use up as much space as possible to maximize the resolution of each part of the mesh while helping adjust it so that areas with more detail get the space they need.
- Since the mesh is still in segments, selecting the UV's is easier to do by selecting the mesh, then going into component mode for selecting UV's, then dragging the marquee over it without worry of catching unwanted nodes.
- Use the "Select UV Shell" to easily select all UV components that belong to a mesh as an alternative.
- Scale, Rotate, and Translate each UV as you wish. Make sure that areas that require more detail are larger in the UV texture space if it is possible. (Common areas to do this are faces, spots that contain writing, and so on).
- You can Shift + Select multiple segments and see where their UV's are in relation to each other.
- You do not need to get the entire UV texture space spot on during this stage. Once the entire mesh has been combined, you can still go into the UV Editor and shift the UV shells around as if they were still segmented.
Example: Paladin's UV Texture Layout With Completed Texture

5. Putting The Mesh Back Together and Finishing Up
Once all of your UV's have been unwrapped, it is time to put everything back together into 1 piece.
First, go through and select every part of the mesh you sliced in half then go to "Mesh" and use the "Combine" command. After that, make sure there are no overlapping vertices remaining by going to "Edit Mesh" and using the "Merge" command. If you have vertices that are fairly close together, ensure you those didn't get combined with vertices they shouldn't have. If this happens, reduce the threshold by going into the "Merge" options box.
Next, duplicate the halved mesh along whichever axis will achieve making your mesh whole. To do this, go into "Edit" and select the options box for "Duplicate Special." Use the "Scale" parameter, most likely as -1 on the appropriate axis.
Finally, the entire mesh and all of it's parts and "Combine" them, followed by a final "Merge."
Congratulations, your mesh has been put back together, UV's are unwrapped, organized, and ready for export to act as guidelines for texturing in Photoshop or other such programs. Be sure to do one final inspection of your UV's and UV Texture page. Once you start texturing, there is no real turning back, not without a real headache.
To export your UV Texture Space, inside of the UV Editor, go into the "Polygons" menu, and at the bottom of the list, click "UV Snapshot..." This will open an options menu where you can define the location of the snapshot, the resolution, format, and more.
Now go forth and texture!
If you have any questions, please ask. Any information I may have missed, or anything that I can better explain I will give my reply then incorporate it into this article so others may benefit.
I really hope this article has benefited you in some way. If you or anyone else you know wish to see more guides like this one, make a request in the comments. Until then, good luck and I wish you success and pleasure in your craft!


