Fire for Photography


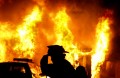
Fire makes great photos
If you are like me, I love fire. I love how the flames dance and swirl. I have tried to catch fire in photography in the past, but I was never satisfied with the results. I needed a more controlled environment so that I could make the flames do exactly what I wanted them to do in order to get the correct images.
So how to you control one of the most powerful forces of nature? Well, you don't. But you can trick it into "performing" for you. I had a clear vision of what I wanted to do and so the search was on for the materials.


What you Need
- 90% or greater Isopropyl Alcohol- perhaps the hardest item to find on the list and unfortunately the most important. I finally asked a pharmacy for help since the typical rubbing alcohol is either 50% or 70% and that contains too much water. Another option is a 151 drinking alcohol, but since I was keeping the budget low on this shoot $15+ versus $2 was a big difference. But for the rum drinkers out there- good news! you may already have the ingredients you need
- Non flammable container- I used a wine glass, a small glass plate covered in aluminum foil, I also used a very tiny teabag rest for one shot.
- Long handled lighter- if you like the hair on the back of your hand, I suggest using one
- Fire Extinguisher- self explanatory. Not necessary, however highly recommended
To make it easier I used a tripod and a wireless remote for my shots, that way I had more freedom to use my hands. But any camera set up should work and you can always enlist the help of a friend when you need an extra hand.


Set up
My ultimate photo was to be used as a Valentine's day shoot. So I wanted to incorporate love and hearts into the shot. I have an app on my iPad called Photo soft Box Symbols which I love to use to create controlled reflections as well as easy lit up backgrounds. For those iPhone/iPad users out there, I highly suggest this as a neat app for macro studio photography.
With a big red heart on the iPad (and occasionally the word "Love") I set out to create a one of a kind photo.
Keep in mind that different shapes of wine glasses and bowls will allow the flames to do different and fantastic "dances" so try a few to find the look you want. **IMPORTANT** when using glass allow the glass to cool COMPLETELY before you place it in the sink to wash... otherwise it will likely shatter.
Start out with a small amount of alcohol. That way you can see how long it burns and get a feel for how your shot will look in the end. DO NOT fill the glass... Alcohol burns for a surprisingly long time and this is one time that the saying "a little goes a long way" truly does apply.
Once you have your glass, your fuel, and your lighter you are ready to start shooting.
Ipad app
- Photo Soft Box Symbols HD for iPhone, iPod touch, and iPad on the iTunes App Store
Read reviews, get customer ratings, see screenshots, and learn more about Photo Soft Box Symbols HD on the App Store. Download Photo Soft Box Symbols HD and enjoy it on your iPhone, iPad, and iPod touch.
A few samples and Ideas
I shot quite a few different styles while I was set up. A few of my favorites were included in this tutorial. The photos of my hand holding the flames are perhaps some of my favorites, and exactly what I was wanting. Now, granted, I could have shot a series of photographs and layered them in post processing, but those who know me realize that this is just not my style. I am a huge fan of the least work after the fact as possible. Besides, how cool is it to take a photo of yourself holding fire?
A few tips to help
- a darkened room, not a completely dark room seemed to work the best for getting the fire to show up
- I used a piece of black velvet for my backdrop as well as my iPad. Make sure that your flames are at least 10 inches away from the background and by all means DO NOT blow the flames out! You risk splattering flaming alcohol everywhere. Instead let it burn out. Hence the reason to only use a little fuel at a time.
- TEST YOUR DISH especially if you want to hand hold it. Some dishes insulate from heat better then others. My first test dish was a small stainless steel condiment holder. I do not suggest using this type unless you wish to have a blister in the palm of your hand. I found porcelain works well, just be sure to run some tests BEFORE you actually light it in your hand to make sure that it will not crack and break once you have lit it. This will again make for a very nice blister in your hand.
- Always start with a small amount of fuel
- Fire extinguisher should be close by. Although lighting your set on fire could make for a very memorable photo shoot, I highly recommend when working with flames to keep it as dull as possible and still get that great shot.
Until next time
As always, I hope you enjoyed the tutorial. Until we meet again "May you always have a seashell in your pocket and sand between your toes"