Fixing Minor Image Flaws With GIMP
I use many image editing tools in my web design projects. Sometimes I get requests by my clients to use certain photos on their websites. However, many of those photos are on the verge of decaying and fading off. With the help of GIMP clone and heal tools, I have often succeeded in making those deteriorating or uneven areas blend with the remaining photo. In this hub, I am going to share what I've discovered through trial and error with GIMP. I hope what I have learned may help someone else breathe life into their old, rotting images.
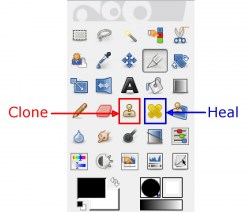
What Clone Does
The GIMP clone tool copies the pixels from one area of the image and puts it in another area that you select. GIMP makes it fairly easy to do so. Just press and hold the Ctrl key and click on the source area with your mouse. This copies the pixels to the clipboard. Once you have copied, just click on the damaged area and the pixels you copied will get transferred to that area.
What Heal Does?
There are often times when you don't want to copy the pixels exactly as they are. May be you just want to copy their hue or saturation. This is where Heal is very handy. The beauty of heal is that the source from where you copy doesn't have to be exactly the same. As long as you get what you want to a good extent, you'll probably get the issue solved.
Clone or Heal?
Whether you decide to use the clone or the heal tool is based on your objective. For a photo with a bunch of small spots, you may want to go with heal, while clone may be more suitable for larger patches.
There are more settings and variations in these tools than I'll ever know or need, but I'll cover some in more detail below. However, I'll admit that I have played around only with those that have helped me reach the effect I desire for my small business marketing clients. If you know a better way to do something, please feel free to share!
Which Tool You Use Most Often?
More Information
© 2015 Hitesh Sahni


