Fixing Old Black & White Photos


Fixing the Old
Have you ever wanted to make your old photographs new again? How many times have you opened an old honored album only to find prized photos fading and damaged, seemingly beyond repair? Did you think for one moment that you could save them yourself with your Photoshop program? New technology is sometimes intimidating. But there are some things that are well worth the effort. Adobe Photoshop is one of those. The learning curve is not as difficult as you may think. Like many things (music, art, dance), the more you practice, the better you get at it.
One of the things that I did to practice was to assign myself weekly tasks, mostly with text effects, but also with photographs and photo-manipulation. Years ago people like you and I were stuck with a textbook and hours of head-scratching. Today there are thousands of YouTube Photoshop video tutorials by pioneers who have already done the head-scratching for you.
Adobe Photoshop
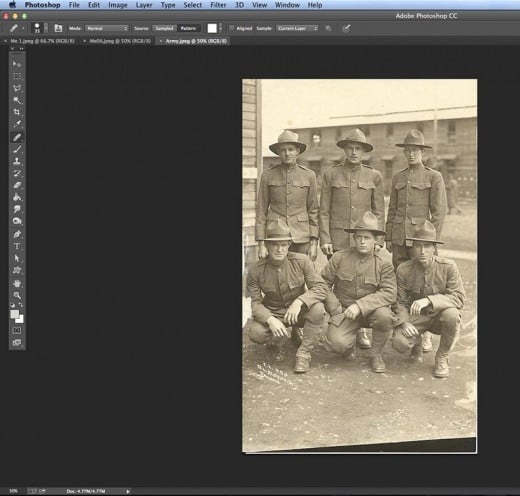
I have Adobe Photoshop CS5, the program on the disc. It is getting older now but still works fine for my purposes. There have been quite a few new advancements between the CS5 and the Creative Cloud. Most of the tools are the same however and are used basically the same way with the same shortcuts.
To begin, you have to learn about some of the basics, such as where to find certain tools and how to work them. For instance, the first time I opened Photoshop, I saw there was a Paint Brush tool. As an artist, I figured that I didn’t need any help working a paintbrush so I clicked onto it and nothing happened. Very disappointing. In this introduction, I will try to cover the many tools and filters used for photography and how each one can apply to your older photographs.


Healing BrushTool
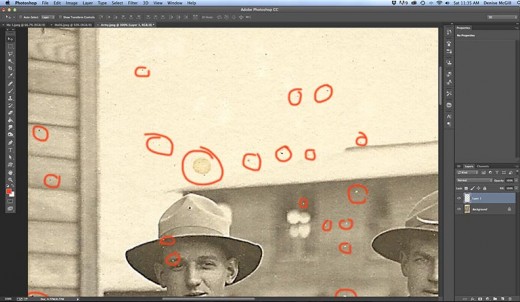
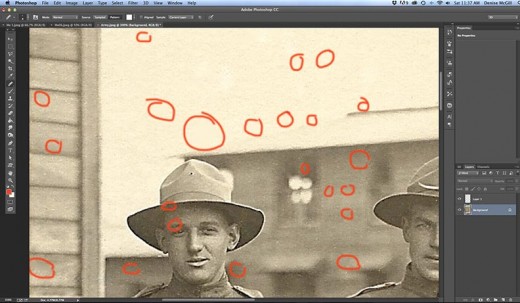
I started by using the Healing Brush Tool to get rid of specks and dots. I created a new Layer to do this so I didn’t damage my original photo.


Clone Tool
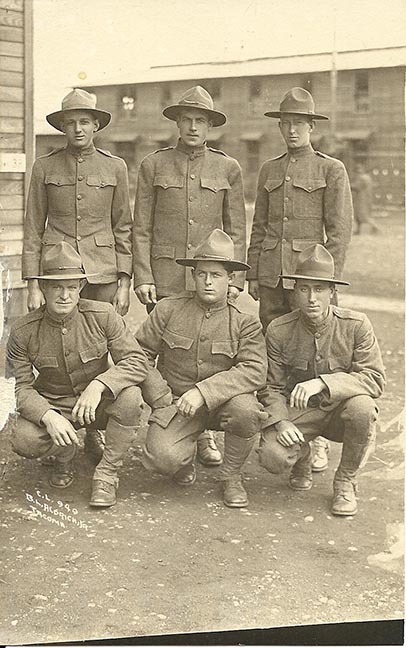
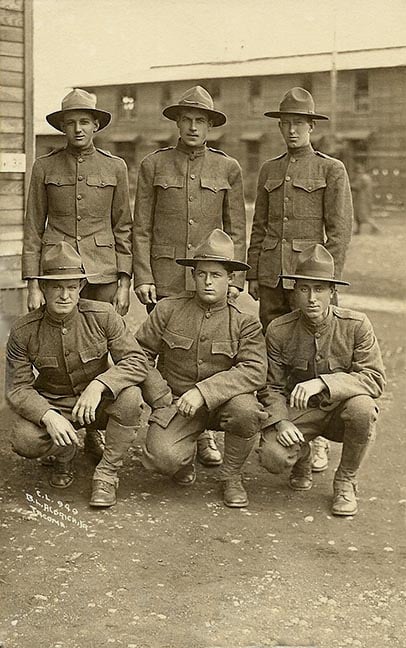
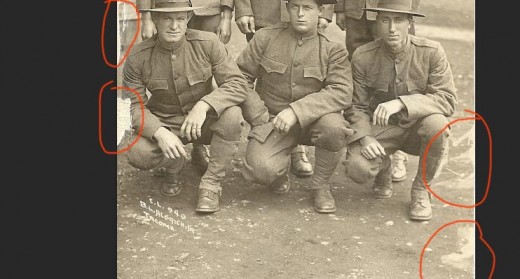
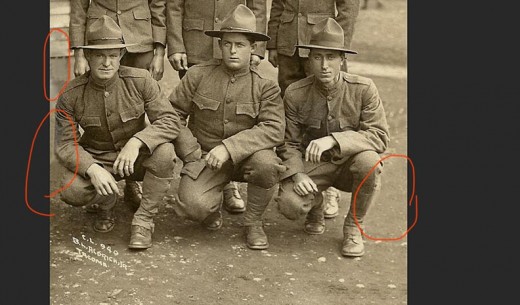
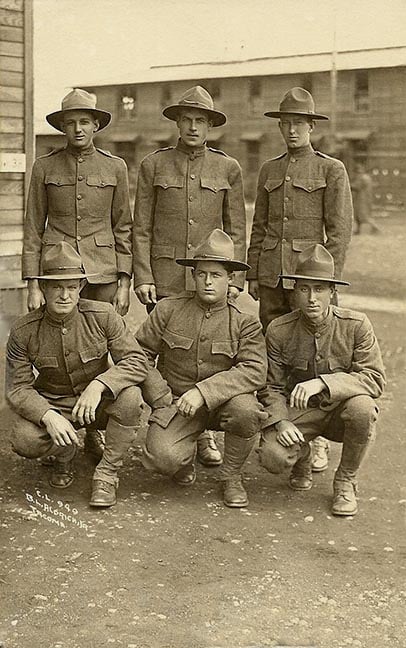
After going inch by inch and healing all the dots and scratches, then it is time to fix the larger problems. On the Army picture, something appears to have been dripped or dropped onto the photo. This is too big for a healing brush. For this, I had to use the Clone Tool. To make the Clone Tool work, you first have to press and hold Alt (on a PC) or Option (on a Mac) and drag the cursor to a spot that is in good shape. This is what you will be “painting” or “cloning” over the damaged area. When you release, the Clone brush comes back. You can resize this using the slider bar on the top toolbar or by pressing the "[" (left bracket) to make smaller or the "]" (right bracket) to make it bigger. As you over the brush over the damaged area you should be able to see a “sample” or “ghost” of the place you chose to clone. This is very helpful so you can see what you are going to be placing in the new area before you click and commit yourself.
Old Photo Restoration
Do you have prized photos that could use retouching?
Build Up Cloned Areas
Note also that it is best to press Alt/Option often on the Clone Tool and keep choosing good spots to cover damaged spots. If you don’t it will be noticeable that you have copied one part of the photo over another part.
Some things are very hard to clone. If you notice there is a spill or tear over the soldier’s elbow on the left. There are no other elbows that will work to clone, so I very carefully cloned the background around the elbow and tried my best to build up the elbow from the other parts of the soldier’s uniform. It isn’t perfect but it looks much better than it did.
Levels Filter
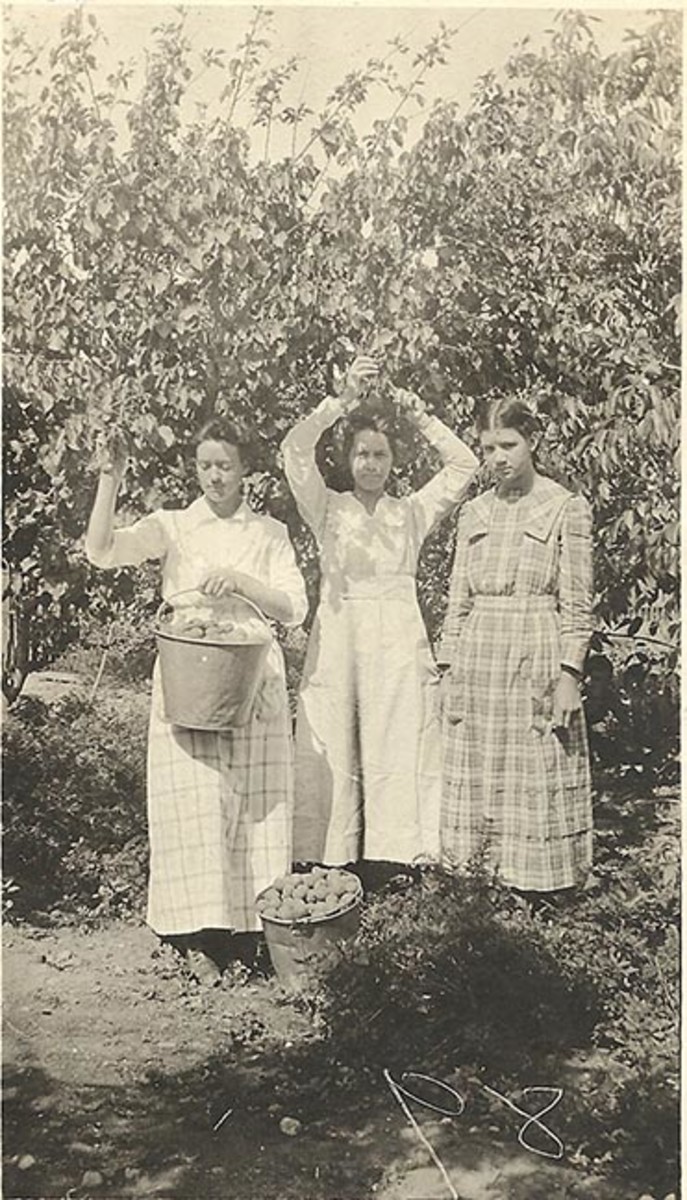
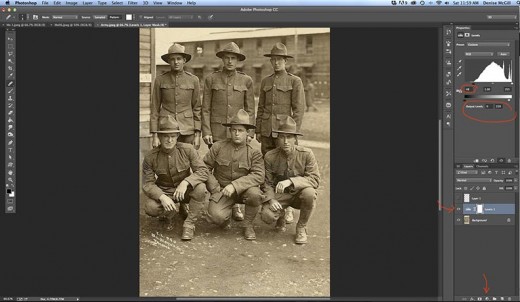
After adjusting the Army photo’s Levels I noticed that the photo had a distinct sepia tone and I decided to leave it. After adjusting the Apricot Pickers photo’s Levels I noticed that the photo was very yellowed so I made one more adjustment. You will notice in the Levels Window there are three little eyedroppers. I only use these on black and white photos. I clicked on the white eyedropper and took it to a place on the photo that I felt should be the whitest white. I clicked on the whitest part of her dress and the whole photo lightened up. Then I chose the black eyedropper and moved it to a place on the photo with the blackest black, in this case, the shadow behind the right girl, and clicked. The darks and lights became more balanced and the yellowing went away. If you don’t like what this did, you can always Undo or press cancel.
With the Army photo, I could have done this same thing to blow out the sepia and get a pure black and white photo. Then if I wanted I could add a sepia filter on top of that. It is always an option.
Resize
The last thing I did was to resize these photos for Internet use. I always save the original so that I can re-edit it later if need be. I give it a name and save it in a folder where I’m sure to be able to find it again. Then I go to Image>Image Size and when the window comes up I make the longest size no more than 11 inches. If it is already below 11 inches but the Resolution is high (200 dpi or better) then I resize small photos (like 2 or 3 inches on the longest side) to about 8 or 9 inches and change the Resolution to 72 dpi. This is the best resolution for the Internet so that the image is still crisp and clear but not so large that it takes forever to load. For Facebook, I usually make the photo smaller (same resolution but smaller in inches) so that the resolution won’t be good enough for people to want to steal it. I especially do this with my photos of my artwork.
Final Thoughts
I heard an artist telling about how she posted her art on Facebook and six months later found quite by accident a large billboard advertisement using her artwork in another country she was visiting. Pilfering has become a pass-time.
I hope you like what I did to fix these photos and that it helps you in the future for your photos. Have fun and remember to enjoy the process. Nothing is permanent so don’t stress.

