Photographing the Frozen

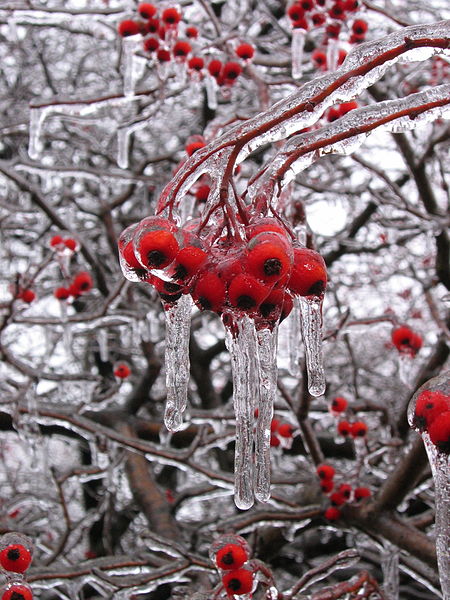
This is a simple project which involves taking small subjects, immersing them in a container full of water and upon freezing them you proceed to photographing them. Simple yet the project depends largely upon the subjects that you choose.
The best subjects are those that have distinct shapes and can be recognized by them as well as their features. Color does play an important part too as the richer the color the better it shows through the ice.
There are alternatives or variations as you can use food stuff such as fruits and vegetables and frozen fish or other shelf fish, flowers, leaves and nuts as well as others make good subjects too.
To get started you first need to choose your subjects, then you should use a clear container in whatever shape you like. The container should be clear in order for you to visually inspect the process and be able to add more water to cover any imperfections that may develop as the freezing process advances.
Once the freezing has taken form, then carefully take out the frozen block and place it in front of your set up which should preferably be a flat surface in a darkened room and with a black background.
The room should be dark in order to highlight the frozen subject and little else, At least one light source should be aimed at the the subject and placed at a forty five degree angle in relation to the main subject.
You can also shine a light at the back of the subject but make sure that this light is more subtle than the one in front. If you want to add more "pzazz" to the scene, use food coloring on the water before you begin the freezing.
Keep in mind that the project is not just freezing things. The project is based on freezing things in water and then photographing the solid block of water where your chosen subject is inside of it.
Being creative with this project can be difficult since the frozen water will opaque most colors and details within a subject. Finding ways to make these stand out is the key.
A good technique is to go in close much like a macro shot and to position you subjects near the top of the water before it freezes You can also take the shots at the point when water begins to freeze but has not become a solid yet.
")
Once you are finished with your project then perhaps you may consider submitting your images to any of the many photographic stock house as these images can have some commercial applications.
Your photographs can also be used in the making of a book preferably an eBook due to the ease of doing so today. You can also submit your images to several photography related publications featuring new techniques and ways of practicing the art.
Above all take this opportunity to practice yet another technique and theme to make your photographic experience that much better and enjoyable.
Some housekeeping tips to take into account. Remember that ice is water and it will melt especially fast when subjected to the lights normally used in photography, therefore it is good to have some towels nearby to wipe of the runoff of the water as the ice melts.
Good to do is to have everything set up ahead of time, including pre-focusing the camera and taking some trial shots using anything that is of a similar size as the frozen subject that you will be photographing. You thus minimize the time that you have your frozen subject in front of the sometimes hot lights.
![Adobe Photoshop Elements 2018 [Old Version]](https://m.media-amazon.com/images/I/51AQ4wl7eOL._SL160_.jpg)
- Ice Photography Tips
Photographing Patterns In Ice - Ice Photography Tips. Gear: Tripod Macro lens – gets you closer to the patterns Telephoto lens – use when it's not safe to use a macro lens Polariser – can help cut down glare Warm clothing Technique: When temperatures
Interesting?
- Frozen in Ice
Here’s something fun to do if you’re looking for an indoor photography project, although it can be done outdoors too. You will need a freezer, a flexible plastic container or a baking tray and some interesting objects. Make sure your container will f
© 2012 Luis E Gonzalez


")
