Fun Holiday Snacks to Make With Your Kids

Christmastime is such a fun time for kids and families. The snow, the cooler weather, mittens and hats, hot chocolate and cookies . . . what's not to love!
This is the time of year where all of the Christmas decorations come out. Christmas stories, Christmas movies, and even Christmas music are prolific.
And the excitement rises as Christmas cards are written and sent, gifts and cards start arriving in the mail, and friends and family members arrange to come over for the holidays.
It's hard not to get into the Christmas spirit.
However, all of this excitement also means kids with more energy that we can almost bear as they feel the tension in the house rising.
Why not use all of this excitement and energy and put it to good use, while making tons of fantastic memories at the same time?
Take advantage of this time for some Fun Activities for Families During the Holidays.
And when its time to settle in, cook, clean, and visit with family, give your little ones some Fun Christmas Crafts For Kids to keep their little hands busy and give them something to show off in your home when they're done.
And the fun doesn't have to stop there!
So they have beautiful creations to display on your bookshelves, hang on your tree, and place in the middle of your dinner table for all of your guests to see . . .
Give them something to enjoy right away. With all of these wonderfully tasty treats, not only can your kids enjoy the Christmas spirit making reindeer, trees, snowmen and penguins, but they can eat them right away.
Wonderfully tasty treats are one of the best parts of Christmas for kids. I wanted to give you a fun variety of easy but creative treats that you and your kids can both enjoy together!
I hope you enjoy not only the experience but the way they taste when they're done.
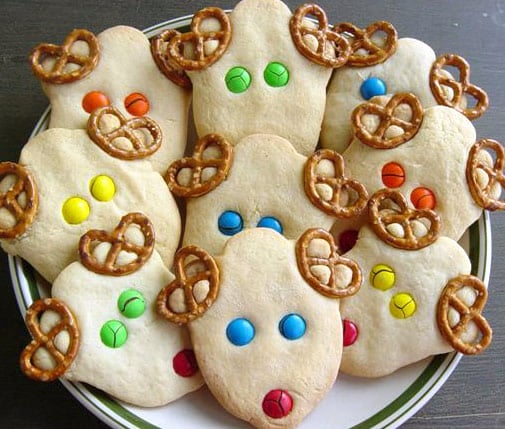
Reindeer Sugar Cookies
These delightful cookies will be just as delicious as they are cute. The hardest part will be deciding what color the eyes and nose should be!
Materials
- Refrigerated sugar cookie dough
- 1 bag of small pretzels
- 1 bag of M&Ms
Instructions
- Preheat your oven to the specifications on the sugar cookie package.
- Prepare a couple of cookie sheets by lining them with aluminum foil and spraying them generously with cooking spray.
- Lay out your sugar cookies evenly across your cookie sheets.
- Press them down gently with the bottom of a drinking glass into the shape you prefer.
- Press two pretzels into each cookie for the reindeer antlers, two M&Ms for eyes and one for the nose.
- Bake according to the directions on your sugar cookie package. (You can also use my Best Ever Sugar Cookie recipe for your cookies and follow the directions therein.)
- Enjoy!
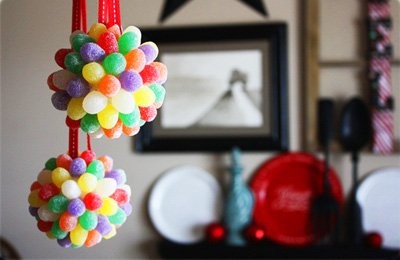
Edible Gumdrop Ornaments
These ornaments will be beautiful, but I'm not sure how long they'll last on your tree or in your home before it gets eaten. This is kind of like those edible necklaces; beautiful but only for a short time.
Materials
- 1 package of sugared gumdrops
- Several small styrofoam balls
- Ribbon
- Sewing Pins
- 1 container of vanilla icing
Instructions
- Starting with one styrofoam ball, cut a length of ribbon, enough to fold in half and still be long enough to hang.
- Press a sewing pin through the middle of your piece of ribbon and deep into your styrofoam ball. (If it would make you feel better, hot glue this ribbon in place before starting with your gumdrops.)
- With a knife or small spatula, smear vanilla icing across your ball and press the bottom side of each gumdrop into the icing.
- You'll want to press your gumdrops together tightly as you add them to your ball.
- Continue smearing icing and pressing on gumdrops until the ball is completely covered.
- You'll want to leave your ball to dry for at least a couple of hours before hanging up. If you would rather eat it, go for it anytime!
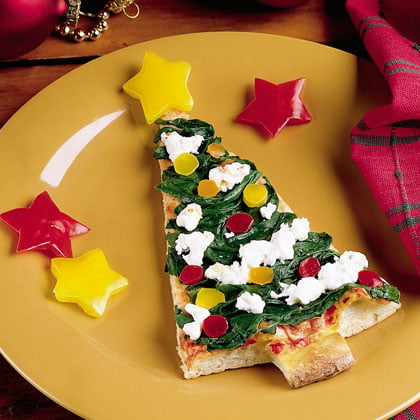
Christmas Tree Pizza Slice
Who says Christmas snacks have to be sugary! Let your child have fun and know that their teeth will be safe at the same time. lol
Materials
- Pizza
- Red and yellow bell peppers
- Frozen or cooked spinach
- Feta cheese
- Scissors
Instructions
- I would start by cutting out a slice of pizza and laying it on the table crust towards you.
- Cut out the right side and left side of the crust with your scissors, leaving a small one inch thick piece in the middle for the trunk of your tree.
- Color your tree with cooked spinach to make it all green.
- Use your feta cheese as the ribbon or streamers on your tree.
- Cut out little circles from your red and yellow peppers to use as ornaments for your tree.
- Finally, cut out a star from one of your yellow peppers as a big, beautiful star for the top of your tree.
- Enjoy your Christmas Tree pizza!
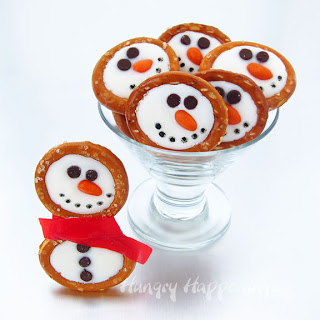
Pretzel Snowmen
So cute you'll want to eat them!
Materials
- 1 bag of pretzel circles
- 1 bag of white chocolate chips
- 1 tablespoon of olive oil
- 1 bag of miniature milk chocolate chips
- 1 bag of orange candy coated sunflower seeds
- 1 box of fruit roll-ups
- 1 edible black food marker
- 1 container of vanilla icing
Instructions
- Lay wax paper down on your tabletop.
- Cut your fruit roll-up into 1/4 inch by 3 inch long strips.
- Lay your strips, one at a time, out onto your table on top of your wax paper and smear a little bit of icing onto the middle of each one.
- Place 2 pretzel circles, one above each strip and one below each strip, meeting in the middle on top of the fruit roll-up strip and icing.
- Press each pretzel down firmly to seal it down onto your wax paper.
- On the side, melt your white chocolate chips on low heat over the stove with your olive oil, stirring constantly.
- When melted and smooth, spoon your melted chocolate into each of your pretzel circles.
- Drop miniature milk chocolate chips into your top circle for eyes and into your bottom circle as buttons.
- Drop one orange candy coated sunflower seed into the middle of your top circle, as a nose.
- Wrap each side of your fruit roll-up strip over your snowman figure, cutting the ends to look like the ends of a scarf.
- And finally, with your edible black food marker, make a mouth on each of your snowmen.
- And voila!
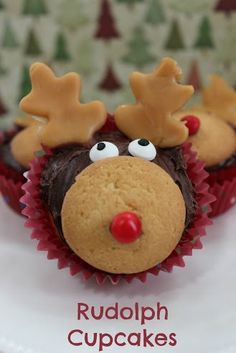
Rudolph Cupcakes
These will be so cute, you may not want to eat them. But I promise the feeling won't last long.
Materials
- Chocolate cupcake mix
- Refrigerated sugar cookie dough
- 1 bag of caramels
- 1 bag of edible eyes
- 1 bag of cinnamon candies
- 1 container of chocolate icing
- A rolling pin
Instructions
- Bake your cupcakes according to the package directions.
- Ice them with your chocolate icing when they cool.
- Bake your sugar cookies according to the package directions.
- While baking and cooling, we'll make your reindeer antlers.
- Unwrap two of your caramels and lay them flat on your table.
- With your rolling pin, flatten each of your caramels to about 1/8 inch thick.
- With your fingers, or another round object, shape your reindeer antlers to look however you'd like and set them aside.
- Once your cookies and cupcakes are ready, it's time to assemble your reindeer cupcakes.
- Give each of your iced cupcakes a big sugar cookie nose.
- Place both of your edible eyes on each of your cupcakes.
- Give each of your cupcakes two caramel antlers.
- And finally, dip each of your cinnamon candies in a little bit of icing and stick them on top of your sugar cookies so your reindeer can have a special red nose, just like Rudolph.
- Enjoy!
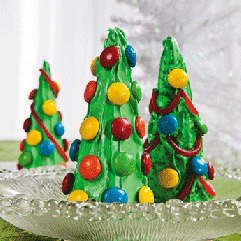
Ice Cream Cone Christmas Trees
So good you won't know whether to decorate with them or eat them. Maybe you can do both!
Materials
- Ice cream cones
- 1 container of vanilla icing
- 1 tube of green food coloring
- 1 bag of M&Ms
- (optional) edible glitter, candy for ribbon and streamers, and a candy star for the top
Instructions
- Open up your ice cream cones and turn them upside down on your table with the points facing upwards.
- Open up your vanilla icing and drop green food coloring in. Start with just a few drops and mix to see what color you get. If you'd like it to be darker green, add in a few more drops of food coloring and mix again.
- Spread your green icing onto each of your ice cream cones, and then decorate with your candy.
- Depending on the types of candy you choose, each of these trees can look completely different. Be creative and find candy that would best represent tree decorations.
- Either eat them right away or use them as a dinner decoration. Maybe everyone can get their own tree to eat for dessert.
- Enjoy!
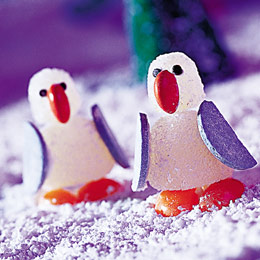
These precious little guys make for amazing Christmas decorations. Add a blue or purple hand towel and some powdered sugar and you have a Christmas scene to envy!
Materials
- A handful of small white gumdrops
- A handful of large white gumdrops
- A handful of orange jelly beans
- 1 container of vanilla icing
- 1 box of Necco wafers
- 1 bag of M&M's
- Scissors
- 1 bag of miniature milk chocolate chips
Instructions
- With a generous dollop of vanilla icing, connect a small white gumdrop (for the head of your penguin) to a large white gumdrop (for the body of your penguin) by stacking the small one on top of the large one.
- Pull out one orange jellybean and cut it in half with your scissors. Sticky side down, with a little bit of vanilla icing, attach both of your jellybean feet to the bottom of your large white gumdrop penguin body.
- Pull out an orange M&M, and if possible, cut it in half with your scissors. (It may take a couple of tries to get it right.)
- With a little dab of vanilla icing, connect your M&M half, chocolate side in, to the middle of your penguin face as a beak.
- Pull out one of your Necco wafers, in the color of your choice, break it in half, and glue each curve side forward to the sides of your penguin body with vanilla icing.
- Finally, dip the point of 2 miniature milk chocolate chips in your icing and press them in place for your penguins eyes.
- You'll have to let it dry completely before you can decorate with them.
- I made mine so that you can simply pop the entire thing in your mouth and enjoy. If you prefer, use toothpicks to connect your head and body and your body and feet. Just remember to remove them before eating. lol
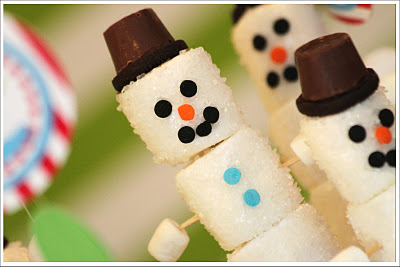
Marshmallow Snowmen
Use these as a fancy centerpiece, a great candy bar display, or just as fun looking and creative snacks.
Materials
- 1 package toothpicks
- 1 package wooden skewers
- 1 bag of large marshmallows
- 1 bag of mini marshmallows
- 1 cup of sugar
- 1 bag of small Reece's Peanut Butter Cups
- 1 container of vanilla icing
- 1 bag of small candies in many colors (to use for face and buttons)
- black licorice vines (optional)
- scissors
- paper towels
Instructions
- We started by skewering three large marshmallows, leaving a 1/4 or so on top for the hat.
- Pour your sugar into a small salad plate.
- Soak a paper towel and lay it flat on your table.
- Roll your skewered marshmallows over your wet paper towel and then in your sugar, coating your marshmallows completely.
- Stick a toothpick in each side of your snowman figure and stick a small marshmallow on the end of each.
- Unwrap your mini Reece's Peanut Butter Cup. Dab some vanilla icing on the top and stick it onto the top of the wooden skewer, icing down.
- Finally, you'll want to dip your little colored candies into your vanilla icing and press them firmly into your snowman face and body to make eyes, a nose, a mouth, and buttons.
- If you can't find black candy for the eyes and mouth, cut your black licorice vines into small pieces, and do the same with them as you would your other candies. Dip them into your vanilla icing and press them firmly into your snowman face.
- Place your snowmen in a glass or into foam for an impressive display. Yum!
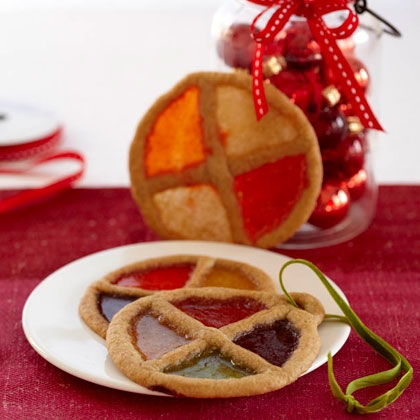
Stained Glass Cookies
These are just as much fun to make as they are to eat. Use them as ornaments, window displays, or creative desserts for your dinner table.
Materials
- Refrigerated sugar cookie dough
- 1 bag of Jolly Ranchers or Life Savers
- Several plastic sandwich bags
- A rolling pin
- Ribbon (optional)
Instructions
- Preheat your oven to the directions on your sugar cookie dough wrapper.
- Prepare two cookie sheets by lining them with aluminum foil and spraying them generously with cooking spray.
- Start by separating out one cookie at a time. Roll the dough for one cookie between your fingers into a long thin snake.
- With this, outline your cookie shape with your dough snake on your cookie sheet, remembering to make your chosen design inside.
- If you would like to use these as ornaments, put a little more dough at the top and poke a hole for the ribbon.
- Now for the stained glass part. In separate sandwich bags for each color for candy, place your candy in your bag, seal it, and smash your candy with your rolling pin.
- Pour a different color of candy into each section of your cookie on the cookie sheet.
- Repeat this process with all of your sugar cookie dough.
- Bake in your preheated oven for the recommended time on your sugar cookie dough package.
- For homemade sugar cookies, check out my Best Ever Sugar Cookie recipe.
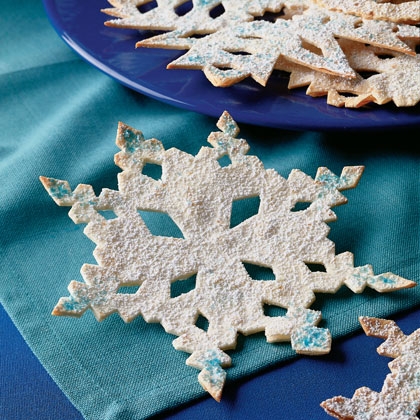
Tortilla Snowflakes
Snowflakes just like you used to make out of paper, but WAY more delicious!
Materials
- 6 flour tortillas
- Cooking spray
- Powdered sugar
- Scissors
- Edible glitter (optional)
Instructions
- Heat the oven to 400 degrees F. Prepare a couple of cookie sheets by lining them with aluminum foil and spraying them generously with cooking spray.
- Warm your tortillas for about 15 seconds in the microwave to soften them, so that when you fold them, they won't break.
- Fold one of your tortillas in half gently, and then fold it in half again. Using your scissors, cut shapes out of your triangle just like you would out of a paper snowflake.
- Unfold your tortilla snowflake and lay it out on your cookie sheet.
- Repeat this process with each of your tortillas and lay them each out on your cookie sheets until finished.
- Lightly spray all of your tortillas with cooking spray.
- Bake them for just a few minutes in the oven until they are all lightly browned and crisp.
- Just as you remove them all from the oven, dust them all with your powdered sugar.
- For an extra sparkly effect, you can sprinkle on a bit of edible glitter.
There's no better way to enjoy the holidays than with these scrumptious Christmas treats!
For great holiday memories, sit down and make these with your kids. They don't take long, but the memories that you create will last a lifetime.
Feel free to find homemade recipes for your cupcakes, cookies, tortillas, etc. if you'd prefer not to use store bought creations.
Either way, enjoy yourself and have fun! That's what Christmas is all about.
Quick Poll
How helpful was this article?
© 2013 Victoria Van Ness

