Gift Wrapping Using Pleats

A Pleated Gift Wrap Job

Add Some Flair to Your Wrapped Packages
Add some pizazz and flair to your wrapped gifts by throwing in a pleat or two or three. It's fun, simple, and shows the person for whom you wrapped the gift that you care enough to take the time to wrap a beautiful gift for them. It also makes the process of opening the gift that much more fun for the gift receiver. And if you attend a party where you play Dirty Santa, your gift is sure to be chosen. If you know how to wrap gifts really well, you can even make money wrapping gifts for hire around the major holidays.
Note that you may double-click on these images to make them larger if necessary.
Supplies

Supplies
You'll need these items to wrap the gift using pleats.
- Gift wrapping paper of your choice.
- Double-sided tape (this is very important so don't try to do this without it)
- A bow and/or curley ribbon
- Scissors
Step 1
Cut a piece of gift wrapping paper as you usually do, except make it about 4 to 5 times as wide as the gift you will be wrapping it around. The excess width of paper will be used to make the pleats.

Step 2
Next, attach one side of the gift paper to the back of your gift as you normally would when wrapping a gift. You may use single or double sided tape to do so. Then flip the gift over the the other side. Next, in step 3, you will make a pleat.

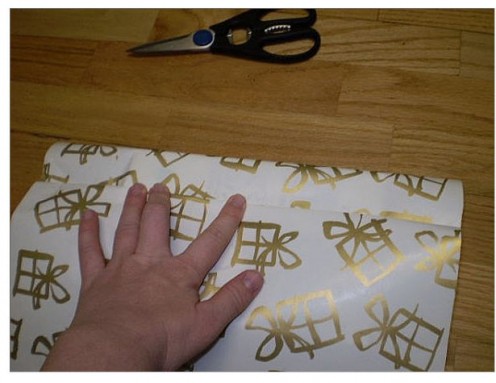
Step 3
The back side of your gift should now be on your flat surface (desk/floor/table) and you are now looking at the top to which you will add folds/pleats. Fold over a small amount of paper onto itself as pictured here. Do this as if you were making a paper fan like we all used to make in grade school. I usually fold over about 1/4 to 1/2 inch of paper to form this first pleat. You can opt to fold a tiny pleat or a large one. I usually fold the pleat larger if the gift is large. Try to make the pleat as straight as possible. You could even drag out a ruler if you want to make it perfect.
Step 4
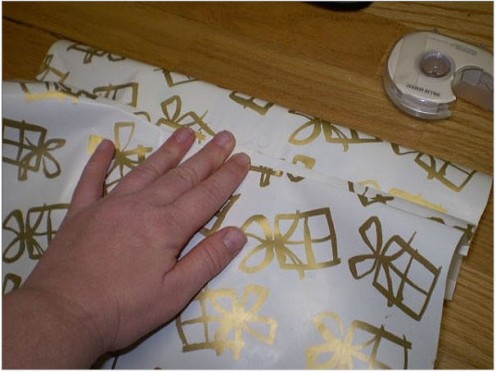
Firmly press the pleat into place with a couple of pieces of double sided tape between the pleat and the paper directly touching the gift. The tape will serve to hold this pleat in place. You should not be able to see the tape. You can add more small peices of tape, if necessary ,when you are done creating the remaining pleats.
Step 5
Make another pleat by following the previous step described above. You can make it larger, smaller, or the same size. Continue making as many pleats as you desire. Use the double sided tape to hold down all of your decorative folds.
That's a Wrap
Step 6
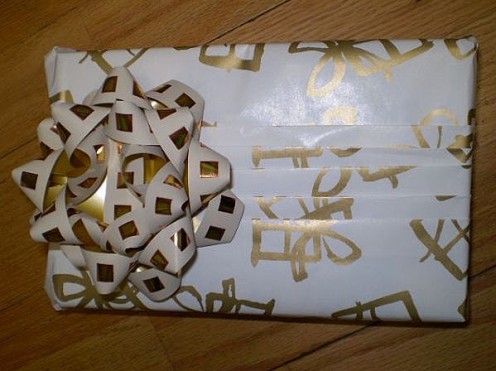
Fold the ends as you would normally do for an ordinarily wrapped gift. Top off your creation with a bow and/or curly ribbon.
As you become more adept at wrapping using this method, you may want to experiment with horizontal pleats, diagonal ones, off-center ones, inserting ribbon between the pleats, etc. etc.
Are you using gift bags, too, this year. Check out my article on making the tissue paper look good.

")


