Homemade toy crafts for children

Toy crafts for babies and children can be both rewarding and very cost efficient. As parents may know very well there are times when you spend a lot of money on a toy which you think your child would like, only to be disappointed to find that your child has no interest in it. Many children would have much more interest in destroying some part of your house, things like tearing, peeling, poking holes and twisting are things which seems to stimulate young children.
Homemade toy crafts can use up your time but this can be used as precious time to spend with your child. Children actually enjoy the making process of new things. Very young children may get in your way not allowing you to complete the project but this can be simply overcome but giving the same materials to him/her, most children will try an copying what you a doing (while making a mess).
A recent survey report shows that if you place an equal amount of handmade toy crafts and purchased toys in one room, 50% of the children will go for the purchased toys and 50% the handmade toys, but looking at the time spent playing with the toys 30% is spent on the purchased toys and 70% on the handmade one. This is mainly to do with the fact that the weaker handmade today are easier to physically manipulate, bend, twist, and ultimately destroy which is what stimulates children. As a child gets older they will learn to appreciate toys more and learn to use them in a less damaging fashion.
How to make a Japanese "Bun Bun Goma"
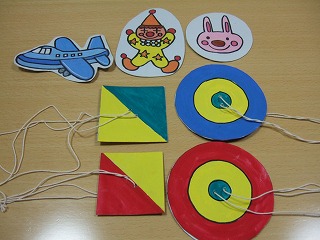
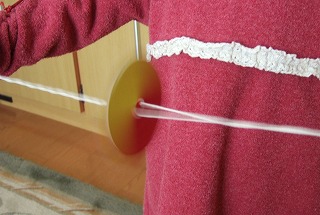
These are very popular toy craft in Japan and very simple to make. Even the elderly enjoy making these for their grandchilren. You will be surprised how much fun a child can get out of such as simple object. It is basically a card which is spun by strings when pulled, the colours blend together and make a humming sound when spinning.
What is needed
- Various pieces of thik paper/card
- Colour pens/pencils or crayons.
- Glue (for paper)
- String (preferably kite string)
How to make it
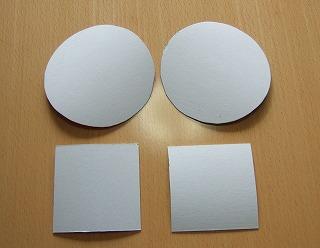
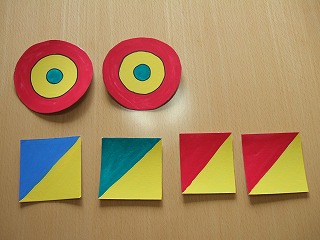
Cut out two copies of an identical shape, the shape can be anything but a square seems to work the best as it creates more of a humming sound when spun. Next add color to one side of each shape. As per the picture, a half/half pattern works well as you will be able to see the color blend once spun. A spiral is also a good pattern to use. You will then need to glue the two pieces of card together so that both colored outsides are showing.

Adding the holes
In order for it to spin effectively the holes need to be relative to the center which is why it's easier to use a square shape because you can measure the center easier. Feed the string through the holes and tie then together so you have a loop. If the holes are not centered enough, it will lose momentum and wobble.
Getting it to spin and hum
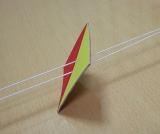
hold both ends of the string loosely and twirl it around like a skipping rope until it becomes tangled. Now grip both ends of the string tightly, pull and watch it spin at high speed. The object is is to keep it spinning back and forth at high speed continuously. One the string untangles and reverses loosen the grip for a moment and then pull again to maintain momentum. I have seen children try for ages to keep to running continuously.
Caution
If using a square shape with hard card, the edges can be painful to touch if spinning at high speed. A good idea would be to slightly round of the edges with scissors.
Check it out !!
- 10 great childrens toys from the 80's
Remember those great childrens toys of the 80's. They don't make them like they used to, here are 10 you will have played with.


