Your Own HandCrafted Books! Made in America!

Once upon a time...
STORYBOOKS HAD GREAT MEANING IN OUR LIVES, WHEN WE FIRST BEGAN TO READ. REMEMBER? STORYBOOKS WOULD TAKE US TO ANOTHER TIME AND PLACE AND ALLOW US TO INTERACT WITH CHARACTERS ONLY WE KNEW INTIMATELY. IT WAS A SECRET WORLD FEW ADULTS COULD ENTER. THAT IS WHAT BOOKS ARE, HANDCRAFTED TALES. IT ONLY STANDS TO REASON THE BOOK THEMSELVES SHOULD BE HANDCRAFTED TALES AS WELL...
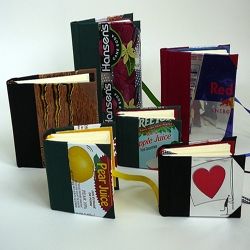
YOU CAN MAKE BOOKS SERIOUS OR SILLY, POETIC OR FABLES. I MAKE PRAYER/POETRY BOOKS. THAT IS WHAT I STARTED MAKING BOOKS FOR, TO HOLD ALL MY PRAYERS WRITTEN IN VARIOUS NOTEBOOKS, SO I COULD KEEP THEM IN ONE PLACE.
Books as ART!
An Expression of Your World
Books are taken for granted. They are rarely regarded as art. The majority of books the general public is familiar with are bound simply and presented with text or photos presenting a story written by someone else. It seems that children's books are the only avenue of departure from conventional binding. Remember pop-up books when you were a child? That is a form of book art. They are interactive and dimensional. The pop-up book ventures into your world.
Most media can only be experienced in a chronological manner. We watch films from beginning to end. We listen to songs from start to finish. The greatest advantage a book offers the reader is the ability to control the sequence of events. The pace of the experience is viewer determined. A reader turns pages at their leisure, reading random pages at will. (You can sneak a pick at the end.)
While a book will offer the same presentation of content each time, a readers experience can vary each viewing depending on where the reader chooses to begin. Books are non-intrusive. They don't demand attention. They are ready when you are.
For a book artist, a book is more than a collection of pages glued together. When considering a new project, several components must be considered; the nature of the binding will facilitate the presentation and the pace of the story. Each element of the book is considered as an aggregate, each contributes to the whole of the book's entity. A specific binding may allow many pages to be viewed simultaneously, or limit the experience to only one page at a time. The type of papers used for the cover, text pages and end sheets will convey a visual and literal texture. The dimension of the book and pages will determine the amount of content per page. The book is the artist's studio, and the pages become canvases. The book as a whole becomes the experience, not simply the content of each page. The book becomes art.
A book is the joining of many parts, each vital, each telling a story. The joy experienced when exploring a handmade book is an adventure; a new world visited over and over. This is a world in which the reader has complete control over the advancement of time. In an age where the demand for the delivery of information has become immediate, a handmade book is the antithesis of such information delivery. Books are meant to be held and read leisurely. Handmade books are designed to open up into your world so you may explore their world.
Books are one of the few products that are still handcrafted in America!
Enjoy your entry to the world of book art.
How to make a Simple Hardcover Book
Make A Book From Scratch!
You will need:
Sheets of paper to make the pages. 8 1/2 x 11 sheets in lots of 4. Sets of 4, 8, 12 or 16, etc
2 Sheets of chipboard cut 1/4 inches larger than your inside paper. (In my case I am using 8.5 x 11 inch paper folded in half - 8.5 x 5.5 inches
for the inside sheets so my chipboard must be at least 9 x 6 inches.) This will give me a book with final mesurements of 9 x 6 inches.
2 Pieces of Cover Material - Brown paper is excellent, and can be painted with india ink or other waterproof pigments. For the book I am going to show you today we are going to use fabric. Fabric stretches a bit and it easier to work with for the first time bookmaker.
2 pieces of hard card stock are needed to make the inner covers. I used 120 pound card stock that is laminated but you can use whatever you can find to be creative. The inside boards need to be cut about 1/8 to 1/4 inch smaller than the outside covers. 8.5 x 5.5 inches
A craft knife, utility knife or exacto knife, cutting board, etc for cutting the paper and boards, and a steel ruler or sturdy piece of wood to cut along.
Glue (I recommend book glue which is specially made for bookmaking. In this case I used modge podge.)
A needle, and a heavy thread (Waxed linen thread is best.) or thick thread you rub through candle wax a bit. You don't have to rub it through candle wax but it makes it much easier to thread.
A sharp object such as an awl or a nail, to punch holes. There is a special tool just for this. (see amazon ad on the side of the page)
Sheets of plastic or wax paper to glue work on. They will not be used in your book. Just a mess saver.
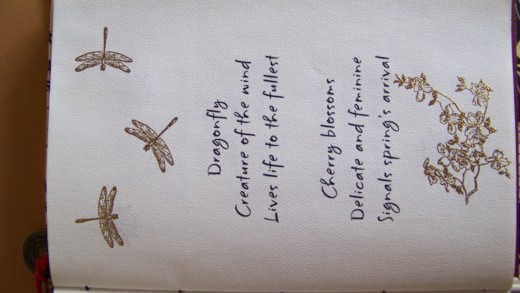
Paper: I am going to use 8 1/2 x 11 sized paper, folded in half. This is where your imagination can run wild. I am using off white textured paper that I can run through my printer. I typed up original haiku poems and figured the exact placement using a software program for writing books. Handwritten books or caligraphy or whatever inside contents you have are only limited to your imagination.
If you are painting the pages, inside pieces or cover or decorating them in some way, do this first. Once everything is dry you are ready to assemble.
I stamped and embossed images related to my book with gold embossing powder for my inside book pages.
Bookmaking Instructional Books


Wrapping the Book Covers - Step One
Back Cover
I glued one side of my chip board from edge to edge and let is dry about two minutes until the glue was tacky. I laid the chip board in the center of my fabric with the correct side of the fabric outside (not on the side of the chip board). I pressed the fabric and pulled it taunt around the board.
Next I cut a straight line from the corner of the fabric to the corner of chip board. This allows the fabric to wrap over the corners without bunching up.
I glued the chip board on the side facing me at the top, bottom and sides about an inch around all four sides then I wrapped the access fabric around my chipboard into the glue. It took a minute or two, for the fabric to adhere to the board good. You may have to hold it tight until it does not pull away.
At this point you should have one side of the outter cover completely wrapped and the inside cover fabric glued down at least an inch on all 4 sides. Do the same thing to the back cover.
Now you can glue cardstock sheets (or other sheets of paper) to the inside covers by gluing the entire cardstock sheets over the inside cover and fabric. Be sure to make these sheets a little smaller than the outside covers.
Photo: I added a ribbon between the 2 pieces to tie the book closed later. The photo shows the inside back cover with ribbon hanging out between the two pieces.
Front Cover - Step Two
Optional Bookmark
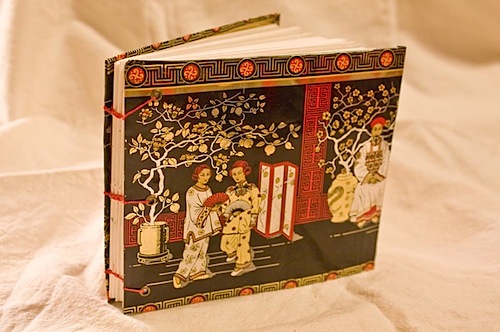
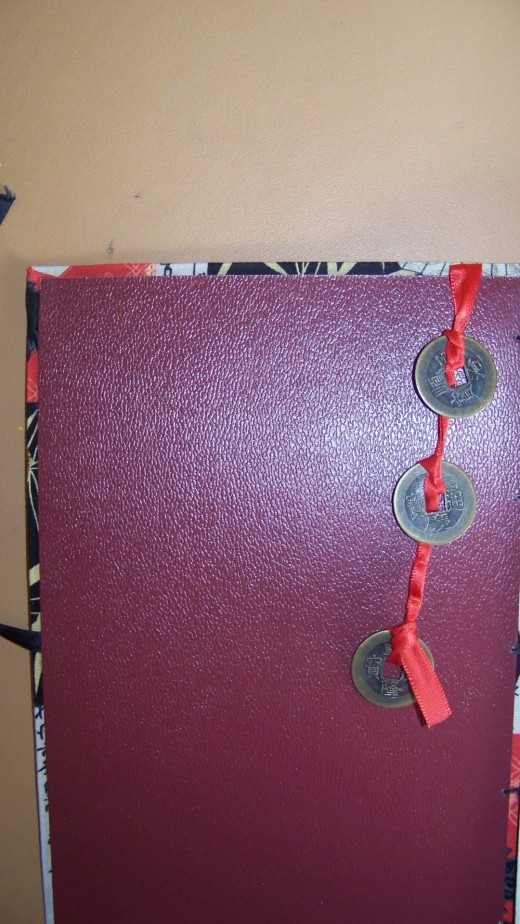
Since my book is Asian themed, I glued a ribbon with chinese coins inside the front cover panel close to the spine for a bookmark. Notice I added a ribbon to the center of the other side as well. This is in the same place as the one one the back cover and I can tie them together into a bow later.
I now have the two covers to my book completely assembled. Set them aside and lets work on the inside pages.
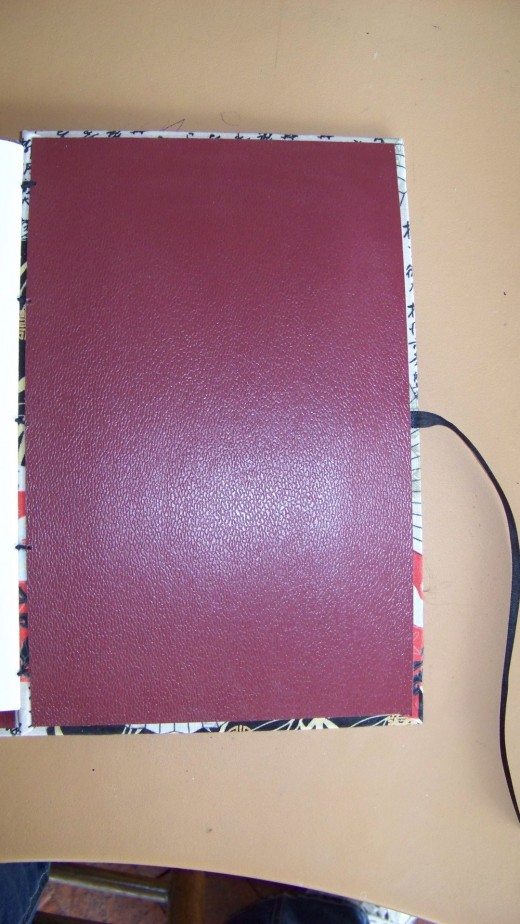
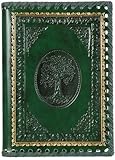
PHOTO: This is the cover of my book. A chipboard covered with fabric on one side, and card stock on the inside.

Book Signatures - Step Three
The book we are making today contains signatures. Books are usually assembled into signatures and that just means sections. Signatures are formed in 4 page intervals. The book I am making is 4 sheets of 8 1/2 x 11 sized sheets folded in half. This will give me an 8 page signature (sig.) I am making 4 signatures.
I fold my pages one by one and place each page inside the previously folded one. Once I have 4 sigs completed it is time to hole punch them.
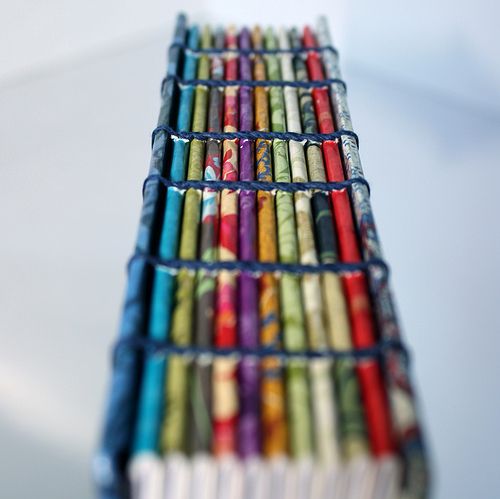
Photo: This photo shows signtures stiched together before a spine is put on the book.
Hole Punching the Signatures - Step Four
There are many ways to bind signatures and sewing patterns in book binding. I am going to show you one way but do investigate other options.
This is a very important part of your book assembly. If your hole punching is off the book will not line up right and will not be professional.
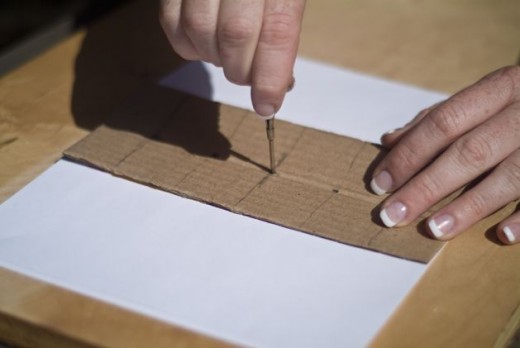
I have a template made of cardboard that shows me how to make the correct space between the hole punches. My book has 5 holes in each signature. I started by figuring out that the center hole would be at 4.25 inches (8 1/2 the long way divided by 2 = 4.25 inches from the top or bottom) Using the template insure all my signatures will be punched in the same location.
Once I have my template ready I use a special tool called an "awl" (all) or Japanese hole punch tool to make the holes in each signature.
Punch holes in the covers 1/8 of an inch from the edge using the signature template.
Photo: Template shows where to punch holes. I open my signatures and punch 4 pages at once with my awl.
Assembling Signatures and Covers
There are lots and lots of ways to assemble books. You can make lots of different covers as well. For the project I am showing you today we are going to use an ancient Japanese method called coptic stich bookbinding.
Because it is complicated to explain I have provided 2 videos below that you can watch as you assembly your book. It is much easier to see the assemble than for me to write it out and confuse you.
PHOTO: Once again this is an inside look at the spine of a book before the cover is glued on. It is a copic stitch pattern.
Assembling Your Book Using Coptic Stitch - VIDEO #1
Assembing with Coptic Stitch Method Part 2 - VIDEO #2
Make Your Own Books, Or Buy a Handmade Journal from Amazon

Join Squidoo and Make Your Own Lens!
Click this link to join Squidoo. It is free and you could make a little money online.


