How I Started Drawing with Alcohol-Based Markers for $30
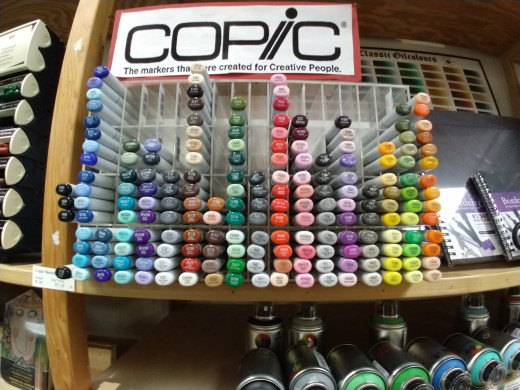
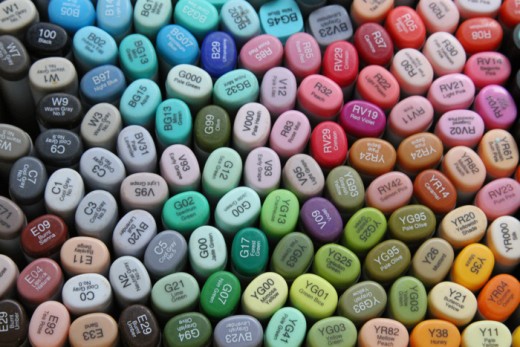
The long-adored Copic Sketch markers are not about to be dethroned anytime soon, but getting started with alcohol markers, or wanting to test them out, without spending over $100 can be tricky. There are dozens of knock-off brands out there for cheap, but how do you know which brands to throw your hard-earned dollars at, and which to avoid like the plague?
I'm not going to be doing a blow-by-blow comparison of different Copic Alternatives, as it's been done before. There are dozens of comparison videos out there which can tell you which markers any particular artist enjoys, and many go over price as well, but often they leave you hanging with the big question: with over 300 colors from Copic, 100 from Ohuhu, and 168 from Spectrum Noir, just what are you supposed to start with?
That is where I come in.
What are Alcohol Markers?
The best way to explain alcohol markers, in my opinion, would be to compare them to your regular Crayola markers.
Crayola markers are what are called "water-based markers." This refers to the ink they use, which uses a mixture of water (and possibly glycerin) and dye. They take longer to dry than alcohol markers, and many sacrifice use as a higher-grade art tool in order to have ink that can be easily cleaned from hands and clothing. Due to the hard tips and thin papers they are typically used with, water-based markers can and will damage thinner papers if too many layers of colors are applying to the same area. This can make blending extremely difficult, if not impossible. Professional-grade water-based markers exist, but they tend to be rare because of the beloved alcohol-based markers.
"Alcohol-based markers," like Copic, use an alcohol solution mixed with dyes, as opposed to water. This combination often means they are considerably more expensive than their water-based counterparts, but they come with a few bonuses.
First: blending becomes considerably easier, and if you manage to score markers with the coveted brush nib, blending can be seemingly effortless. Second: they dry very fast and are generally considered permanent. Lastly: they tend to dry with a beautiful matte finish that, with the right tricks, can make original art pieces almost look like prints. It's a look that I personally find gorgeous, but it's up to personal preference.
If you're not sure how to get started with alcohol markers, check out the video below by Draw with Jazza that really helped reassure me that you don't need all 300 Copic markers-- or even Copics at all-- to create beautiful art.
I highly recommend his videos if you love alcohol markers, want to learn more, or would like to see what the finished product could look like with practice.
What's Your Secret?!
Okay, enough talking about what alcohol markers are, it's time to go shopping! I filled pages and pages of my notebook with different brands and the possible combinations of marker packs, cost per marker, factoring in tax... you get the idea. All in all, I spent probably a combined four hours digging through the bowels of the internet to find the best combination of marker colors with the best brand I could find at a reasonable price.
Naturally, Amazon came out as the most affordable option, especially if you have Prime shipping.
My secret? Honestly, probably an unhealthy obsession with alcohol markers stuffed in between schoolwork and side-jobs that will hopefully pay for a set of Copics in the future.
The Coveted Colors
With such a large color selection available, knowing which ones should be top-priority is important. That's where Jazza in the above video helped me big-time. Per his recommendation, the goal was to get:
- Bright primary colors (red, yellow, and blue, with green thrown in for good measure)
- 4 Skin tones (Paler tones are annoyingly more common.)
- 4 Grays (2 Cool Grays and 2 Neutral Grays)
Buying markers individually would clearly make this color palette easier to acquire, but it likely leads to a higher total price tag. It's a balancing act.
One that I've figured out for you.
The Budget
My budget was around $2.00 to $2.50 per marker, and at that price, I was going to insist on a brush nib being included. Now, this created a few problems that were noticeable within the first hour of searching.
- The budget isn't high enough to buy individual markers with a brush nib at the consumer level.
- The budget is too high for markers without a brush nib to be worth it, as markers without one can be found in 80-packs for $40.
This effectively means that, in order to find the elusive brush nib in this price range, I was going to have to start looking at packs of markers. Why is this a problem? You'd think that a 20-pack of markers would include a nice range of grays, primary colors, and skin tones, right? Nope.
Most larger packs of markers will have extremes of each: too many grays or none at all; no skin tones to be found; or no bright, primary colors. I personally wouldn't be surprised if this is deliberate, but it isn't something that can't be worked around either way.
The Brand
I eventually settled on a brand called Studio 71. Individually, markers sell for $2.99, which is out of the budget, but once you start buying in packs of six or more, the price drops to and below $2.00 per marker.
There are six different six-packs of markers, and there are some duplicates between packs, so it's something to watch out for. However, with a little mixing and matching packs, we can score eighteen alcohol markers for a little over $30.
The Products
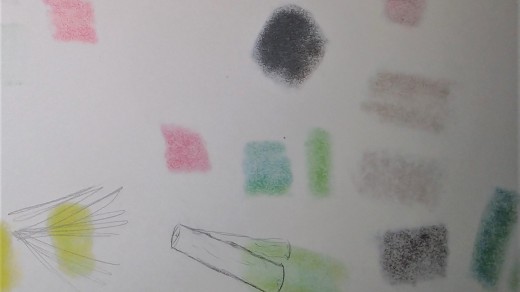
I chose to go with three six-packs from Studio 71: "grays," "skin tones," and "bright primaries."
Now, if you look at your options, you can see a "bold primaries" pack as well-- why not go for that one? If you choose bold primaries, you'll get 16 unique markers out of 18, with "black" and "mocha" being duplicated once. If you go with bright primaries, you'll get 18 unique colors, but you will be lacking a bright, true green, which I personally have found is critical. I personally went with the bright primaries because I had plans to add green markers from other brands later on. You can certainly mix colors to get your secondary colors, but they will seem heavily tinted or "impure" versions of the colors.
Which pack you go for is really up to personal preference, and whether or not you'll be willing to spring for a green marker (and orange and purple) down the line.
You'll notice that, regardless of which set of primaries you go with, you'll be missing cool grays. This can cause some problems blending darker shades of blue, as blue plus neutral gray can create a blue-green color, but there is likely a workaround I haven't discovered yet. If cool grays are an absolute must, then investing in some Copic markers may be better suited to your needs as an artist.
The Final Result
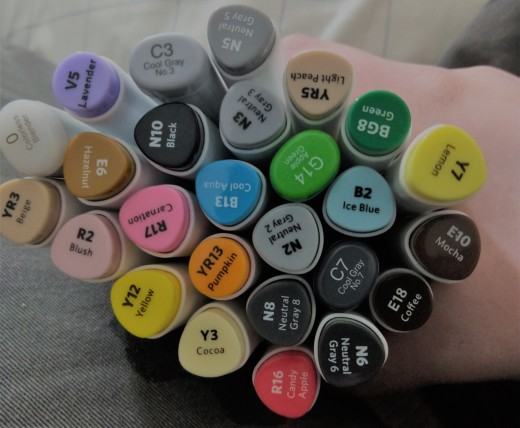
Below is a table detailing the color names and IDs for each marker available in each pack, sorted by color family.
Ultimately, you can get 16-18 unique alcohol-based markers for just $33.19, with each marker coming out to around $1.85-$2.08 each. Well within the desired budget!
If you decide that alcohol markers are for you, then you can see which colors you're missing, and which ones you use the most. The price of expanding your collection and/or shifting towards Copic markers can be spread out over time, and you can ensure not to spend money on an expensive marker you might only use once.
The bottom line when buying any alcohol markers is that sales and coupons are your best friend. Shop around and see what you can find at your local art supply stores, as the same markers will be offered at wildly different prices. The smaller shops might not have as many colors to choose from, but many that I've been to have been willing to special-order colors to fit your needs.
When cheaper alternatives exist, getting into and producing beautiful art with alcohol markers doesn't have to make your wallet hide under your bed in terror. It can be an exciting new venture as you uncap each marker, smell that distinct alcohol-marker stink, and swatch your markers for the very first time.
Color Collection
beige (yr3)
| blush (r2)
| |
|---|---|---|
neutral gray 2 (n2)
| light peach (yr 5)
| candy apple (r16)
|
neutral gray 3 (n3)
| carnation (r17)
| |
neutral gray 5 (n5)
| hazelnut (e6)
| |
neutral gray 6 (n6)
| mocha (e10)
| cocoa (y3)
|
neutral gray 8 (n8)
| lemon (y7)
| |
black (n10)
| ice blue (b2)
| yellow (y12)
|
cool aqua (b13)
|
All prices showcased in this article are in US Dollars and are accurate as of the time of writing.
Links to videos and outside sources are not sponsored and there are no affiliate links. All opinions expressed are my own and I am not being paid to recommend any particular brands or channels.

