ArtsAutosBooksBusinessEducationEntertainmentFamilyFashionFoodGamesGenderHealthHolidaysHomeHubPagesPersonal FinancePetsPoliticsReligionSportsTechnologyTravel

Creating Planets And Starfields In Paintshop And Photoshop

Updated on August 8, 2017
River on another world

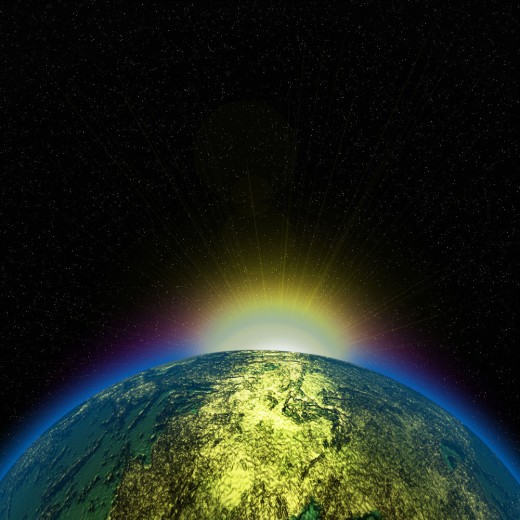
The above image is very easy to create. All you need it a decent landscape photo and a copy of Paint Shop Pro X2. The image can be created using other software however I recommend PSP for this as that is the program I will be using for this tutorial.

Click thumbnail to view full-size
The Original image used to create the first imageThe recolored image before I added the moons
The Original image used to create the first image
The Original image used to create the first image | Source
The recolored image before I added the moons
The recolored image before I added the moons | Source
Source
Source

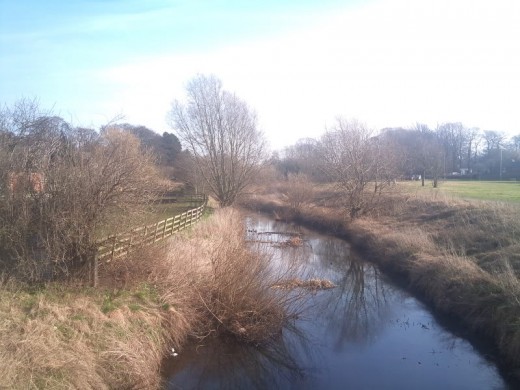
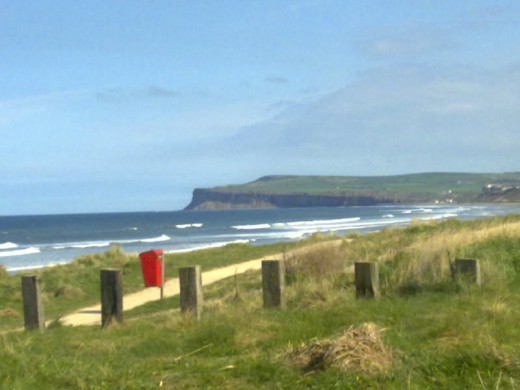
First find a good Landscape Photo

It is always best to choose a photo that is yours as using someone else's could land you into trouble. However if you wish you can use one of my images.

I have placed two slightly different versions of the original image in the photo box above this text. You can also see full size versions of those two images below.

Recoloring the image

How to get from this
How to get from this | Source
To this
To this | Source
Click thumbnail to view full-size
Changing the Photos Color BalanceChanging the Photos RGB Values
Changing the Photos Color Balance
Changing the Photos RGB Values

Load your chosen image into Paint Shop Pro X2 and then go through the adjust menu and find Color Balance. Play around with the settings until you get the desired result.

Next try changing the settings for Hue and Saturation using the Hue Saturation and Lightness settings. Also play about with the Chanel mixer and RGB settings. These can all be found under the adjust menu

It is up to you what the image looks like. it does not have to be the same shades as my finished image.
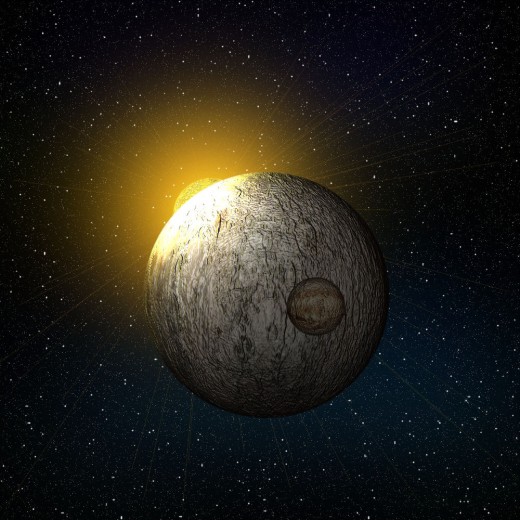
Adding The Moons

First you will need to select the sky using the magic wand and then convert the selection to a layer in the selection menu. Then using the background eraser tool take out the sky from the original part of the image. Promote the background layer to a raster layer then swap the two layers around.

The Moons

Create a new layer and place it between the two existing ones this will be where you place your moons.

Look under the Effects Menu for artistic effects, then click on Balls and Bubbles. Here you will be able to create moons and planets to your hearts content.

Once you have your moons as you want then you will need to place a copy of the sky over them and set its transparency to suit.

Finished result will look something like this
Another Example this time created using the same techniques in Photoshop CS6

How To Create a Starfield

The above video tutorial was made be me a few years ago when I could not find the information I wanted on the subject. It takes you through the steps of creating a star field which can be used to create great space images.

How To Create A Space Scene

Click thumbnail to view full-size
This is one of my all time favorite creations.

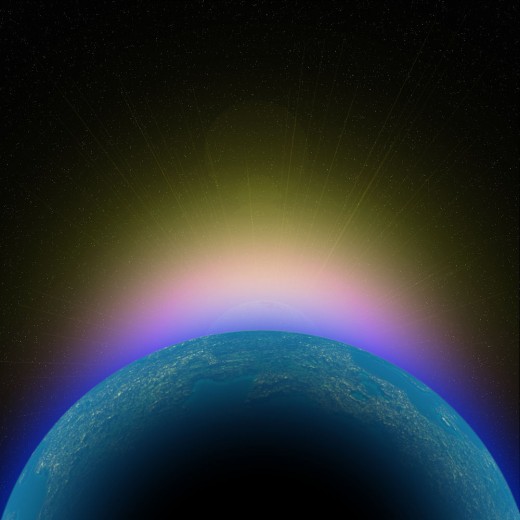
The create the image above start by following the video tutorial which will give you the basic star field to work from.

The Basic Steps from the Video are:

  • Create a raster image with a black background
  • add noise to image (use Gaussian and Monochrome)
  • Change the layers brightness and contrast settings to suit
  • Sharpen layer
  • Follow the steps again for a new layer
  • expand layer using the pick tool
  • resharpen layer
  • set layer properties to screen so you can see both sets of stars

Extra instructions:

  • to add color like dust clouds create a new layer between the first two
  • add patches of color
  • use the distortion tools to distort the colors
  • blur the layer
  • play with the layers transparency
  • set it to screen

Creating the Above Image in Photoshop

To create a star field and planet scene in Photoshop there are a few different steps to take.

A good basic knowledge of the program is recommended as you will need to create a brush for the stars.

Start by opening a document with a black background.

Settings for the Star Brush

Brush Tip Shape:

Size: 3px

Angle: 0

Roundness: 100%

Hardness: 0%

Spacing: On at 260%

Shape Dynamics

On

Size Jitter: 100%

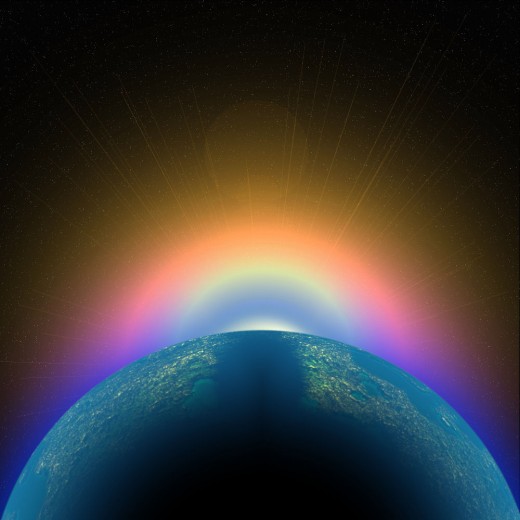
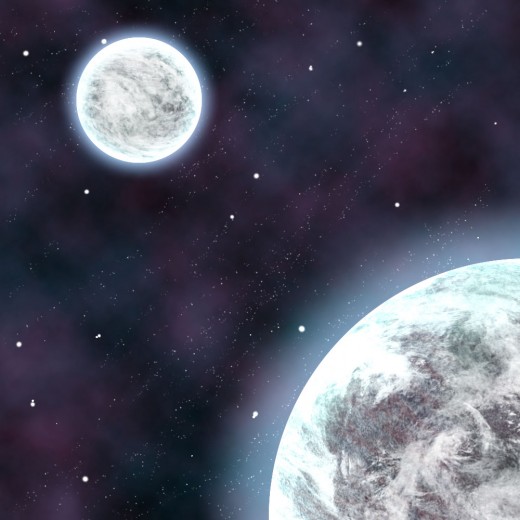
Space Scene Created in Photoshop CS6

Creating Planet Textures in Photoshop

There is quite and easy way to create your own simple planet texture in Photoshop. All you have to do is to use the clouds and difference clouds filters.

Steps

  • Open Photoshop
  • Create a new image
  • Make it large 6000-6000 px or so
  • Give it a white background
  • Chose a background color for you clouds
  • Go to Filters- Render- Clouds
  • Go to Filters- Render- Difference Clouds.
  • You should now have a basic image for your planet texture.

Cloud Color Results

Purple Clouds = Green Texture

Light Blue Clouds = Brown Texture

Yellow Clouds = Blue Texture
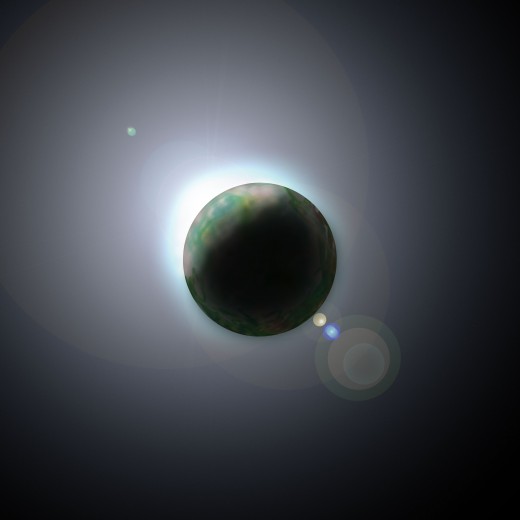
Creating The Planet

  • Open a new document about 400px by 400px. Give it a Black background
  • Create a new layer
  • Select the Elliptical marque tool.
  • Starting in the top left corner of the canvas hold down the shift key and create a circle.
  • Now fill the circle with the clouds that I showed you above.
  • Spherize the circle Filter- Distort- Spherize
  • Keep circle selected and duplicate layer.
  • Hide top layer
  • Select first planet layer
  • Use the Emboss tool. Filter- Stylize- Emboss. Set it to Hight 10, Amount 100%.
  • Make top layer visible and set it to Overlay.
  • You should now have a planet with some definition.
  • Create a new layer
  • Make sure the planet is still selected and create a cloud layer in the new layer.
  • set its opacity so you can see the planets features.
  • Go back to the second planet layer and double click on its thumbnail.
  • Set Inner Shadow, Inner Glow and Outer Glow. Use a color like 66cccc for them.
  • Play around with the settings until you get a look that you like.

My finished planet
My finished planet
working

This website uses cookies

As a user in the EEA, your approval is needed on a few things. To provide a better website experience, hubpages.com uses cookies (and other similar technologies) and may collect, process, and share personal data. Please choose which areas of our service you consent to our doing so.

For more information on managing or withdrawing consents and how we handle data, visit our Privacy Policy at: https://corp.maven.io/privacy-policy

Show Details
Necessary
HubPages Device IDThis is used to identify particular browsers or devices when the access the service, and is used for security reasons.
LoginThis is necessary to sign in to the HubPages Service.
Google RecaptchaThis is used to prevent bots and spam. (Privacy Policy)
AkismetThis is used to detect comment spam. (Privacy Policy)
HubPages Google AnalyticsThis is used to provide data on traffic to our website, all personally identifyable data is anonymized. (Privacy Policy)
HubPages Traffic PixelThis is used to collect data on traffic to articles and other pages on our site. Unless you are signed in to a HubPages account, all personally identifiable information is anonymized.
Amazon Web ServicesThis is a cloud services platform that we used to host our service. (Privacy Policy)
CloudflareThis is a cloud CDN service that we use to efficiently deliver files required for our service to operate such as javascript, cascading style sheets, images, and videos. (Privacy Policy)
Google Hosted LibrariesJavascript software libraries such as jQuery are loaded at endpoints on the googleapis.com or gstatic.com domains, for performance and efficiency reasons. (Privacy Policy)
Features
Google Custom SearchThis is feature allows you to search the site. (Privacy Policy)
Google MapsSome articles have Google Maps embedded in them. (Privacy Policy)
Google ChartsThis is used to display charts and graphs on articles and the author center. (Privacy Policy)
Google AdSense Host APIThis service allows you to sign up for or associate a Google AdSense account with HubPages, so that you can earn money from ads on your articles. No data is shared unless you engage with this feature. (Privacy Policy)
Google YouTubeSome articles have YouTube videos embedded in them. (Privacy Policy)
VimeoSome articles have Vimeo videos embedded in them. (Privacy Policy)
PaypalThis is used for a registered author who enrolls in the HubPages Earnings program and requests to be paid via PayPal. No data is shared with Paypal unless you engage with this feature. (Privacy Policy)
Facebook LoginYou can use this to streamline signing up for, or signing in to your Hubpages account. No data is shared with Facebook unless you engage with this feature. (Privacy Policy)
MavenThis supports the Maven widget and search functionality. (Privacy Policy)
Marketing
Google AdSenseThis is an ad network. (Privacy Policy)
Google DoubleClickGoogle provides ad serving technology and runs an ad network. (Privacy Policy)
Index ExchangeThis is an ad network. (Privacy Policy)
SovrnThis is an ad network. (Privacy Policy)
Facebook AdsThis is an ad network. (Privacy Policy)
Amazon Unified Ad MarketplaceThis is an ad network. (Privacy Policy)
AppNexusThis is an ad network. (Privacy Policy)
OpenxThis is an ad network. (Privacy Policy)
Rubicon ProjectThis is an ad network. (Privacy Policy)
TripleLiftThis is an ad network. (Privacy Policy)
Say MediaWe partner with Say Media to deliver ad campaigns on our sites. (Privacy Policy)
Remarketing PixelsWe may use remarketing pixels from advertising networks such as Google AdWords, Bing Ads, and Facebook in order to advertise the HubPages Service to people that have visited our sites.
Conversion Tracking PixelsWe may use conversion tracking pixels from advertising networks such as Google AdWords, Bing Ads, and Facebook in order to identify when an advertisement has successfully resulted in the desired action, such as signing up for the HubPages Service or publishing an article on the HubPages Service.
Statistics
Author Google AnalyticsThis is used to provide traffic data and reports to the authors of articles on the HubPages Service. (Privacy Policy)
ComscoreComScore is a media measurement and analytics company providing marketing data and analytics to enterprises, media and advertising agencies, and publishers. Non-consent will result in ComScore only processing obfuscated personal data. (Privacy Policy)
Amazon Tracking PixelSome articles display amazon products as part of the Amazon Affiliate program, this pixel provides traffic statistics for those products (Privacy Policy)
ClickscoThis is a data management platform studying reader behavior (Privacy Policy)