How To Customize Your Filofax Or Personal Planner: Add Jewels, Studs And Transfers
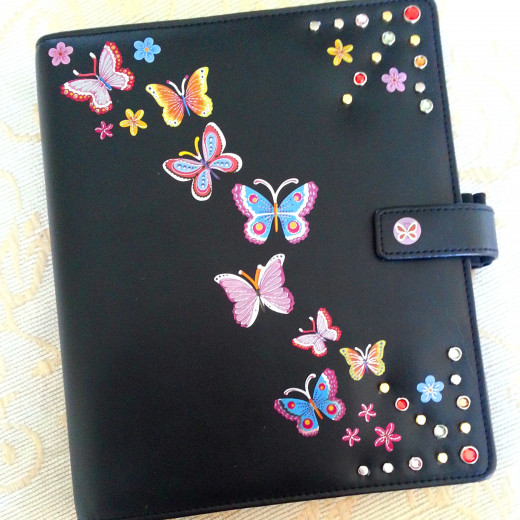
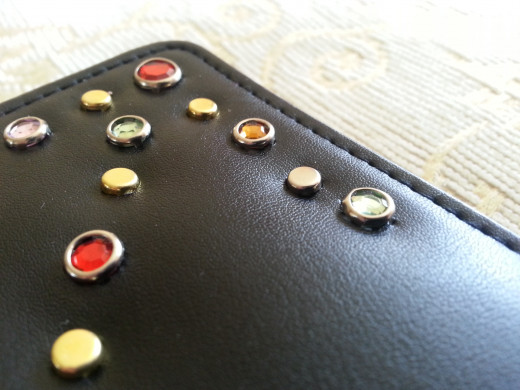
Make Your Filofax Sparkle
If you're like me, and you carry your Filofax around like a cherished pet, or even a fashion accessory - then you might be interested in customizing your Filofax to make it look even more pretty.
This hub illustrates how you can add a sparkle and flair to your Filofax, without breaking the bank and with barely any skill whatsoever. All you need are a few low-cost items (bar the Filofax itself) and a little patience.
I used my A5 Metropol Filofax because that particular variety of Filofax has a soft, leather-effect cover. It feels almost padded, so I knew that this would be soft enough to be able to press studs into using a key piece of equipment that you need to add studs and sparkles to your Filofax: the Grafix Fashion Decorator (ages 6 to 10. Ahem).
You could try the method I have outlined in this article using a different type of Filofax or planner, but I wouldn't recommend it. Filofaxes don't come cheaply - and you don't want to go pressing studs and gemstones into something that is going to rip, tear or warp beyond repair. For the sake of ease, I would stick to using the items I have outlined here.
Note: I have also seen a couple of different fashion decorators on the market - all of which are very similar to one another in that they provide a safe and easy way to add studs and gems to items of clothing. All are priced at roughly £5-6 (or $10), and look as though they do exactly the same job. However, if you are going to purchase one to customize your Filofax with, I would recommend doing a little research to see how they each compare to one another.
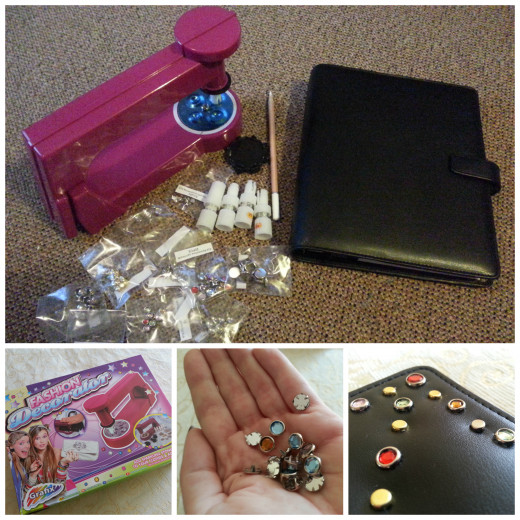
You Will Need
Item
| Where To Get One
|
|---|---|
Filofax Metropol
| Filofax website, Amazon, Ebay
|
Grafix Fashion Decorator
| thetoyshop.com, Amazon, Ebay
|
White Watercolour Pencil
| Any art or craft store
|
Metallic Transfers
| Any art or craft store
|
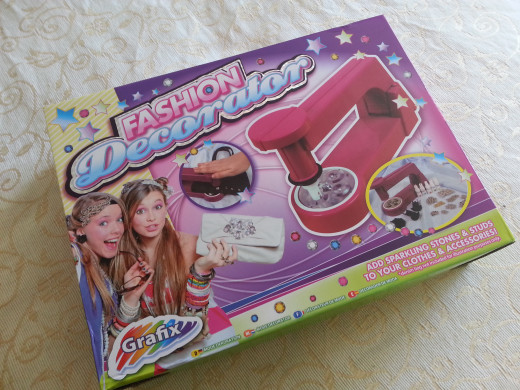
Assemble The Fashion Decorator
OK - the first thing you need to do is assemble the blasted Fashion Decorator. Something which I had particular trouble doing.
Now - what makes me feel particularly ashamed about this is the fact that the Grafix Fashion Decorator is a children's toy. It's true - and yet I puzzled over it for half an hour before I finally gave in and handed it over to my boyfriend to assemble (which he did in 5 minutes, all the while laughing and shaking his head at me).
I'd like to think of myself as a relatively intelligent woman, but when it comes to assembling anything (such as furniture, or indeed toys) I'm useless. But you may not be. The Grafix Fashion Decorator comes with instructions, so don't be put off by my failings - follow the instructions and you'll be fine.
A word of warning though - it is incredibly flimsy. You get what you pay for - and while the Grafix Fashion Decorator is fully functional - it is a very inexpensive toy, so do treat it with care.
Also, make sure you keep hold of the box, and the bags of gems that come with the item - as it is very easy to lose these, and then accidentally step on one of them - which isn't a very pleasant experience.
Plus, the chances are you may only it once - so if you keep the box it means you may be able to sell it on ebay, or give it as a present - either to your own child or someone else you know.
Which do you prefer as a decoration in crafts, upcycling and DIY?

Choose Your Sparkles
Now that you've got the Grafix Fashion Decorator assembled, it's time to choose your studs, gems and diamantés.
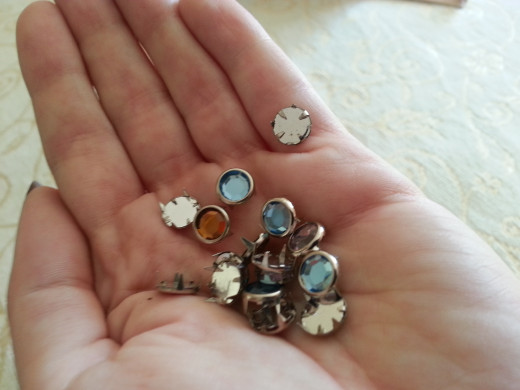
The decorator comes with a selection of different coloured gemstones, plus metal studs (silver and gold coloured) and a selection of clear diamanté style gemstones.
Sift through the studs and gems that come with the decorator and find the ones that you want to use. It might help if you have a play around at this stage, placing the gems and studs onto the Filofax in the pattern you want to apply. The Fashion Decorator comes with more plain studs that coloured gems, so just bare this in mind when you set out designing your pattern
Once you are happy with a pattern, set the gemstones that you want to use to one side (otherwise they could get mixed up - and you might end up spending fifteen minutes looking for a particular coloured stone).
Now it's time to mark out the pattern.
Draw Your Pattern
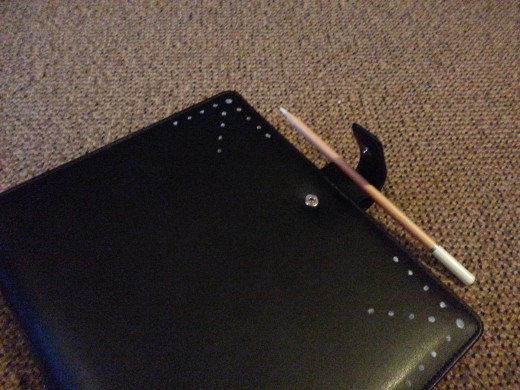
Using a white, water-soluble pencil (a watercolour pencil), mark out the pattern you have decided on.
Dip the tip of the pencil in water to moisten it - and it will act like an ink. But, due to the fact that it's water-soluble, if you make a mistake you can use a cotton bud, or a small section of damp cloth, to rub out your mistake and start again.
If you don't have a watercolour pencil handy, you could use a normal HB pencil - but this will not show up as vividly against the black of the Filofax cover, so you will have to pay extra attention when applying your gemstones.
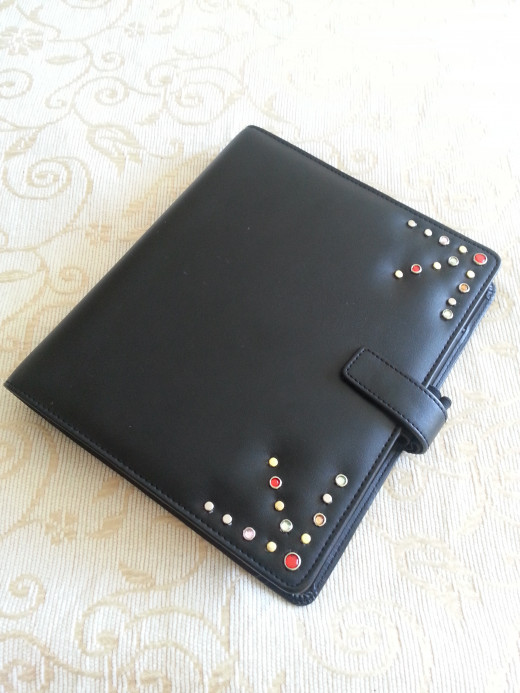
I tried to keep it simple when drawing my pattern - as it is difficult to translate a more detailed pattern with only a limited amount of studs and gems. I stuck with a straight-line design, although if you're more confident (and indeed patient) then you could try a more intricate design.
The fashion decorator comes with a sheet of patterns - so you could follow one of these. I almost went for the butterfly design - but realised how soul-destroying it would be for me to be unable to execute it properly, considering that this toy is intended for girls aged 6 to 10!
Also, make sure that you space the gems at least a centimetre apart in your pattern, to stop the material of the Filofax from stretching and warping.
How To Use The Grafix Fashion Decorator
Apply The Decorations To Your Filofax
Now that you've mapped out your pattern, and have selected the decorations you want to use - it's time to add them to your Filofax.
Follow the instructions included with the Fashion decorator and load the device up with the decoration you want to use. Make sure the corresponding plates are lined up, and slide your (opened) Filofax underneath the arm, so that when the arm is pushed down the gem or stud hovers directly over the spot where you want it.
Press down with a little pressure and carefully lift the arm back up. Don't apply too much pressure when you do this - I got a bit carried away when I was testing it out and heard a loud crunching noise. This thing will definitely break if you don't treat it with some care.
Repeat this process until you have completed your design, then step back and admire your handiwork.
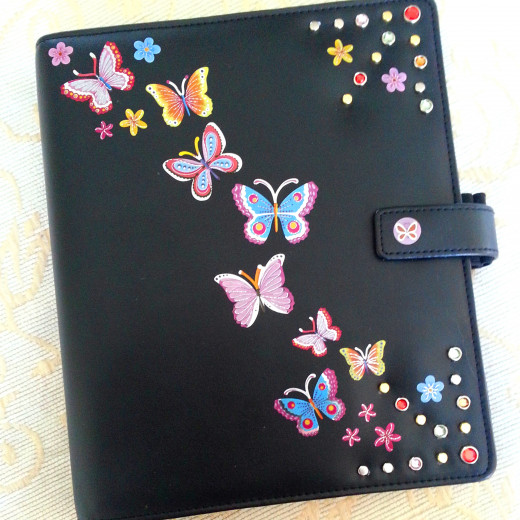
Metallic Butterfly Transfers
Add Transfers To Your Filofax
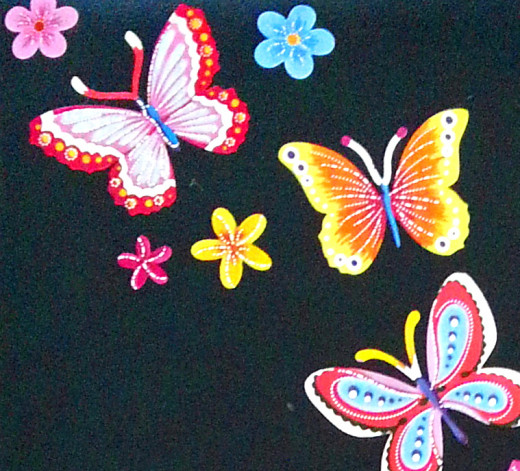
The next step is to add the transfers or stickers to your Filofax. Again it is a good idea to take a look at the transfers you have and sketch out on the Filofax where you would like them to go.
You can either do this, or if you don't mind cutting into your sheet of transfers you could cut them out and then arrange them in a position you are happy with. It's a good idea to take a photograph using your phone or a digital camera once you have the design that you are happy with, and then work off of that when it comes to applying the actual transfers.
Simply peel them off and stick them down - then step back and marvel at your sparkling handiwork!
Try It For Yourself
It really is as simple as that.
A quick, easy and cost-effective way to jazz up your tired-looking planner, and posess something truly unique and original. I wouldn't suggest tampering with such an expensive planner (we all know Filofaxes don't come cheaply - even the Metropol which is one of the more inexpensive varieties) if I didn't have complete confidence that this is a foolproof method.
Just remember:
- Choose a simple pattern that is easy to follow
- Don't place your gems, diamantés or studs too close together
- Be patient - take the time to make sure the decorator is fully lined up with your design
- Have fun!
If you want to see some other cool Filofax hacks and decoration ideas, check out philofaxy.blogspot.com , Pinterest, or you could visit my Blog :)

