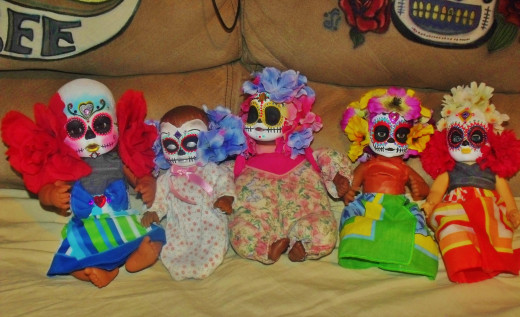
How To Make Sugar Skull Dolls


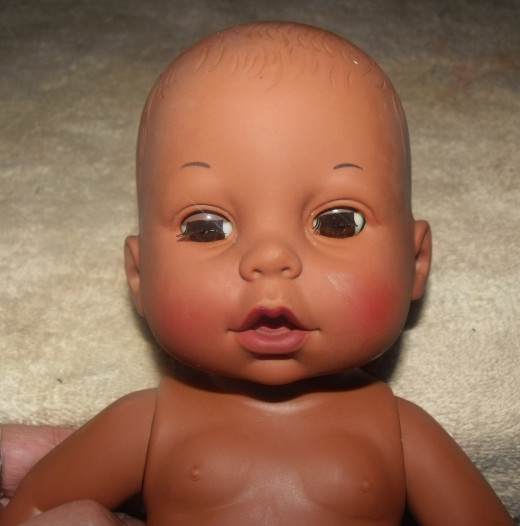
Do you have old baby dolls in your garage? Their hair is probably matted and tangled, their clothes are moldy and you are tempted to throw them away. Stop! Unless you want to send them to me, keep them and let me teach you how to make a Sugar Skull Baby Dolls.
What is a Sugar Skull?
Sugar Skulls started with the Aztecs and were actually made from granulated sugar compressed into skull shapes, decorated with edible icing; the name of the deceased would be inscribed on the forehead of the skull in celebration of their passing. Because it was originally a month long celebration, it eventually merged with Catholic All Saints Day and is now celebrated on November 1st and 2nd.
As time went on, it became a popular design and can be spotted on tattoos, clothes, masks, and of course, my sofa and now baby dolls.
I have always loved sugar skulls because of their color and history. In fact, I wrote another article on HubPages showing you how to paint one on your sofa;
http://rosanamodugno.hubpages.com/hub/How-to-Tattoo-Your-Sofa
Finding a box of vintage dolls the other day was too tempting to leave alone so I thought I'd share a really cool revamping idea sure to save at least some dolls from the same fate of a box in a dusty garage.
Things you will need
1. Doll
2. Acrylic Paint/Fabric Paint (white and black is must for acrylics, colors for the fabric tubes)
3. Silk Flowers
4. Fabric
5. Silver and Gold ink pens
6. Black Marker
7. Embellishments (glitter, faux rhinestones, colored jewels)
8. Flocking Powder
9. Paintbrushes (1 thin and 1 thick)
10. Hot Glue Gun
Steps
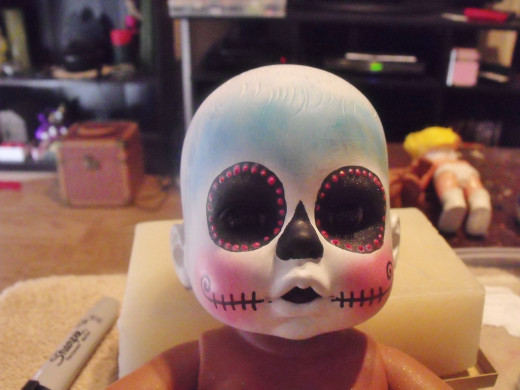
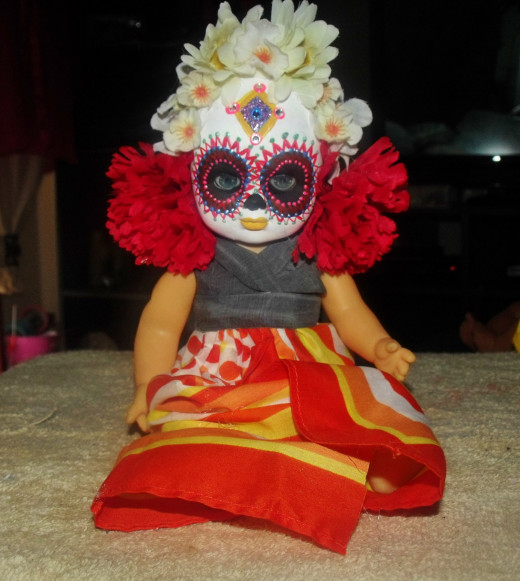
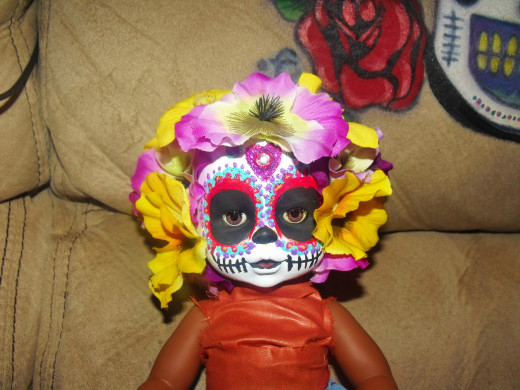
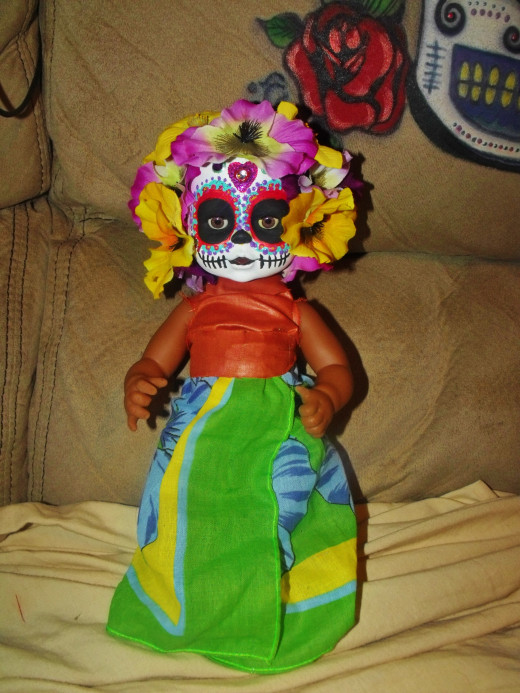
1. Wash your doll, make sure she's clean of dirt and dust. Mine didn't have hair. But if yours does, wash it, and leave it on. If hair is too messy, cut it off, glue flower to top of head.
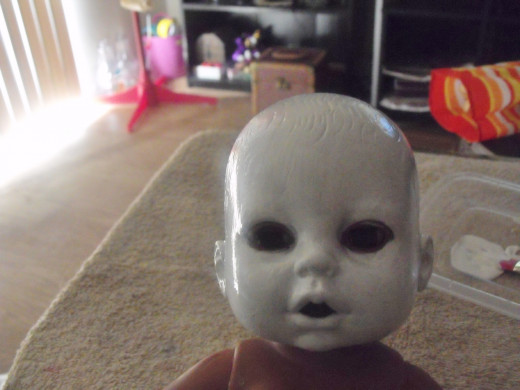
2. Paint white on head, let dry and keep painting until streak marks can't be seen.
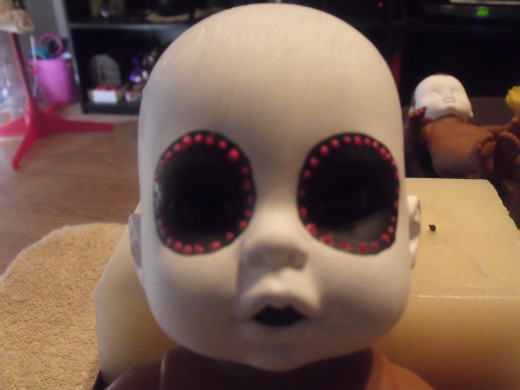
3. When white is dry, blacken eyes using black paint. If eyes open/close, paint eyelids as well.
TIP: If the doll has painted on eyes, paint black and choose another color to paint on. You can also add glitter or gems.
4. Using pink powder, put blush on cheeks. I also used blue on forehead just for dimension.
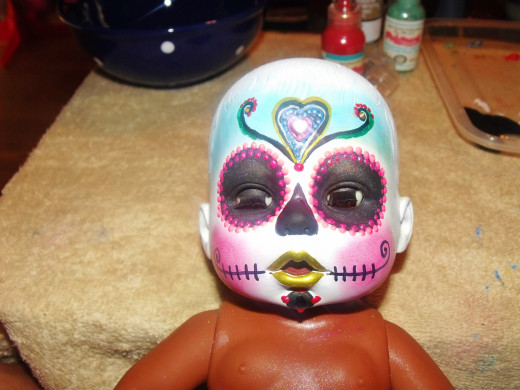
5. Using the black marker, draw a line across each side of mouth outward, then crossing over each line like stitches. These are the skull teeth. You can paint an actual mouth with teeth if you like but keeping it simple is always best. Then designs like hearts, swirls, etc.
6. Using a thin paintbrush, paint over the marker to deepen the color and keep the color from fading.
7. This is where you have fun and paint anything you want, using any color you want. Fabric paints are easy to use, make little dots and they dry pretty quickly.
8. With gold and silver ink, outline the black and color designs.
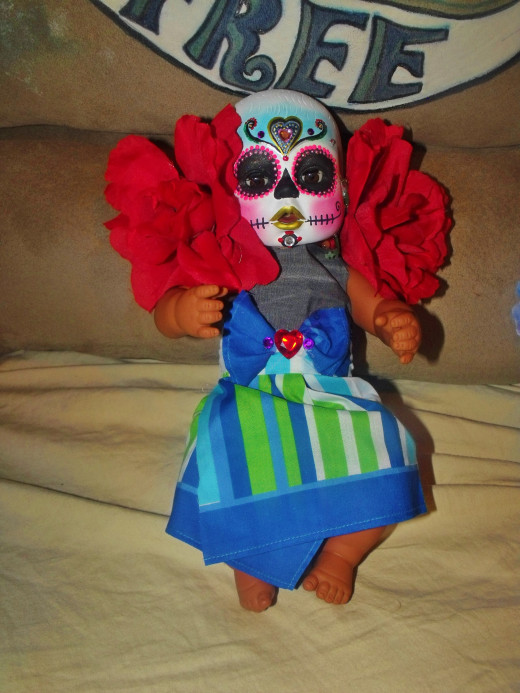
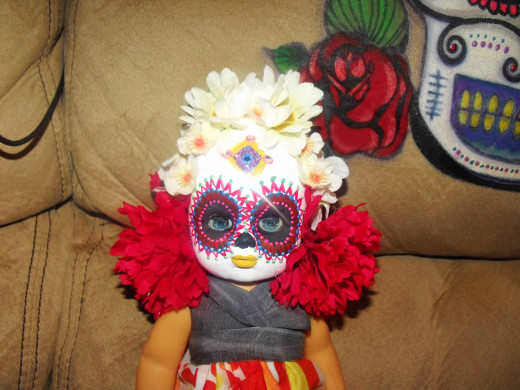
9. Using hot glue gun, take silk flowers and the larger ones on each side of the head, gluing behind the ears. I keep the stems on for easier placement, covering stems with loose petals I took off flowers.
10. Cut fabric to size around body of doll and hot glue them instead of sewing.
You're done!


