How To: Photograph a Water Droplet

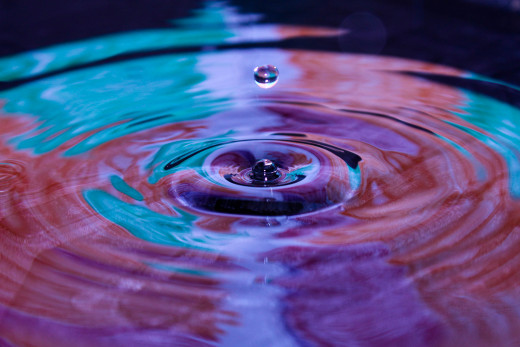
Example 1
So your interested in high speed water photography. Well so was I, so I googled it just as you probably have done just now. this how to read I will explain to you how I managed to take these photos you are looking at on this page. I'm not saying they are great but I like them, isn't that all that matters anyway? What YOU like?
First off you will need:
- Basin (I used a black Jiffy tray. That tray you use for planting seeds. You can also use a paint tray. Be creative.
- Camera (I used my Canon dSLR Rebel 1100d)
- Tripod (mines a mini tripod)
- Lens (I used 18-55mm)
- Coloured paper (I used white sheets are coloured each with a few coloured markers)
- Tape and String
- Pen/Pencil
- Pin
- Ziploc bag with water (just a small amount, doesn't have to be full or anything)
- Remote shutter (I didn't have one at the time but wish I did)
My Absolutely Terrible Paint Drawing..
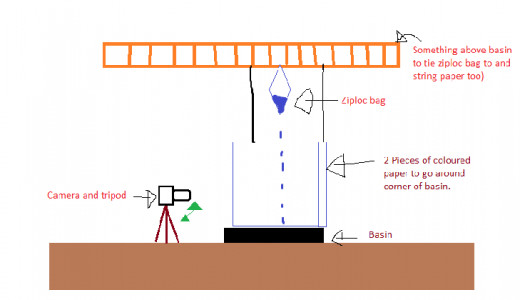
The Set-Up
To begin my explaination of my set up let me start with this. This is my own rigged up set up that worked for me. So it may look pretty "Crazy". But it worked and is better then nothing especially if your determined.
- Fill the basin with water and set it on a hard surface. Try not to spill..like I did.. a couple times. Those jiffy trays are not sturdy.
- Take your coloured paper and string it up so it doesn't fall into the basin but gently rests against it and stands relatively straight up. Setting the basin in a corner and taping the paper to the wall or stringing it to a cupboard does work. I used the pot rack and supporting beam in my kitchen. If your curious as to what the paper is for, its to reflect your flash light off of.
- Put water into a ziploc bag, just enough to fill a corner. Attach it directly above the basin You may be able to also pin it somehow into your cupboard, above the basin. I used the pot rack and hung it on one of the hooks.
- Set up your camera on a tripod, being sure that when the camera is pointed downward there is NO way it can tip into the basin. Mine did which caused me to have a heart attack.
The Post Set-Up
Now that your set up is complete its no time to take some pictures.
- Begin by using a pin to poke a small hole into the corner of the ziploc bag, allowing it to have a steady slow drip into the basin.
- Next grab your pen, point your camera to where you want to take your pictures of the water droplets. With your camera in auto focus mode stick the pen directly where the water is dripping and focus your camera on the pen. By doing this your getting your camera to focus where you want your shots, because it will be hd to get it to focus in that particular spot rather then every where else you don't want the focus to be. That made sense right?
- Next set your camera to manual focus mode. Now that its focused where you want it there is no need for your camera to keep trying to focus.
- Turn your flash on
- Now for the settings. For my photos on here they were set to ISO 800, f7.1, 1/60sec
Your settings is something you will get a feel for. If your camera has AV mode or TV mode you can use one of them, which in turn will give you only 2 options you have to contend with. Rather then going full out manual, which I did.
The 3 settings you should be concerning yourself with is:
Aperture (the f-stop #, {mine being 7.1})
Shutter speed (mine being 1/60)
ISO rating
When your taking your pictures you can definitely time them with the water droplets, but as I wuickly found out it was hard always either missing them or they had hit and I got nothing special. Depending on your shutter speed and how high up the ziploc bag is, try watching when they are about to drip and start from there. You'll get it.
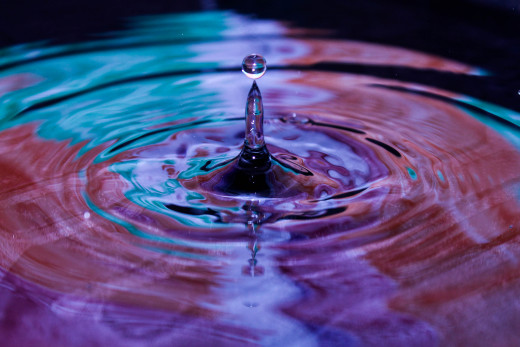
Example 2

What is Aperture?
It is the size of the opening in the lens. Commonly referred to as the f-stop. So for example f/3.5 is much more open then f/22. Odd isn't it. The larger the hole (aperture) the more light comes into your camera, so f/3.5. The smaller the aperture the less light that comes in, f/22.
If you start at f/7.1 and go down one stop, to f/8 you have just lowered the amount of light your camera is receiving. So with that said keep in mind that when you took a photo at f/7.1 and shutter speed at 1/200, it would look the same as if you took a photo one aperture size smaller and one shutter speed faster. So f/and shutter speed 1/250. Even though you quickened your shutter speed, you have also let less light in. So you will get the same looks picture. Aperture and shutter speed kind of work hand in hand.
What is the Shutter?
Shutter is the amount of time the shutter is actually open. It is the amount of time the image sensor in your camera see's what you want to take a photo of.
Shutter speed is measured in seconds or fractions of a second. 1/1250 is a lot faster then 1/60. For any photos your taking beware that anything 1/60 and under you should be using a tripod, unless camera shake and blurring in your photos is what your striving for. As you lengthen the time the shutter is open, your camera will take more and more light in. Which is great for night shots. In particular bulb mode. Bulb mode allows your shutter to be open as long as you can hold the button down. Just be sure not to shake your camera. Even the slightest movement can be noticed. I would recommend a remote shutter release for those situations you want to use bulb mode. Providing your camera has that mode.
If your speed up your shutter one stop, you are letting half as much light in. So you will have to increase your aperture one stop. (As noted above in What is Aperture). Also what you could do is increase your ISO rate Be sure to read about the ISO to help decide what you would prefer to do.
What is ISO?
The lower the ISO rate the less sensitive your image sensor will be to light and the finer the grain will be. Higher ISO ratings are used in darker situations to get faster shutter speeds. Although you have grainier photos. When choosing which ISO rate you want just ask yourself, regarding the situation:
Is there enough light?
Do I want grain or no noise?
Am I using a tripod?
Is my subject moving?
If there's lots of light and you have a tripod, try a lower rating. If its dark and you have no tripod and you don't want a flash you can try a higher rating, but be conscious that you will have a noisier shot.
I'll Let you Go Now
Getting back to my description of my set up, I seemed to of got carried away there.. But I feel confident that I have described to the best I can on how a person can take a nice water droplet shot. It would be nice to hear back from you (yes you) on how it worked out for you and also if my rambling actually helped you see your camera a little bit differently.
Cheers
Example 3