How Using Text Wraps in Adobe InDesign Can Make You A More Efficient Graphic Designer
Adobe InDesign – How To Use Text Wraps
The key to successful editorial layout is to create not only a visually appealing page, but to make a page that is also easy to read and follow. There are several different approaches to editorial layout, such as the traditional newspaper four columns, an equally popular three column magazine layout, or a full page layout in books. Any way that you choose to lay out your editorial, it is important to know how to create a proper text wrap, or in some programs it's called a runaround, for your layout. No more hitting the space bar trying to match your letters up; let the program do this for you in only a few simple steps.
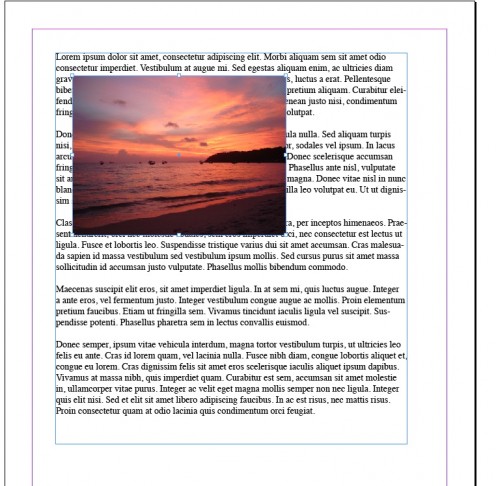
A text wrap, or runaround, is the process of having text wrap an image in your layout as opposed to the image have text run over the image or vice versa of the image covering the text.
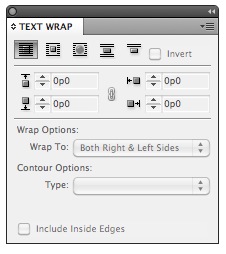
Examples from Adobe InDesign CS4
To create a text wrap is a really easy process, and this tutorial will be showing examples from Adobe InDesign CS4.
-
Insert your editorial by either 'placing' the text or copying and pasting from another document.
-
Create an image box and place the image that you would like to use in your layout.
-
Go to “window” → and choose “text wrap”. You will see an additional tool bar appear on your screen that will feature other options.
- Click the image box to highlight it and choose the icon at the top that shows the text wrapping around a square.
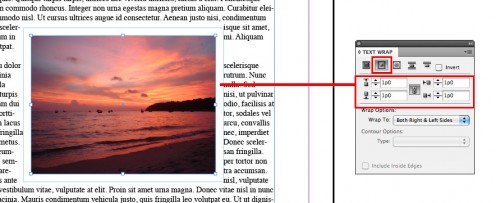
5. From here you can control how far away you want the text from the image. Leaving a little space between them makes the page visually appealing and easier for the reader to follow.
This tool is not just for square image boxes; it can be used for all of the shapes offered in the design software, and even paths that are created manually.
The next option on the text wrap tool bar is the circle text wrap. This allows text to fluently wrap around rounded edges, whether it be a circle or oval or a square with rounded corners. Again you can choose the space between the image and the text.
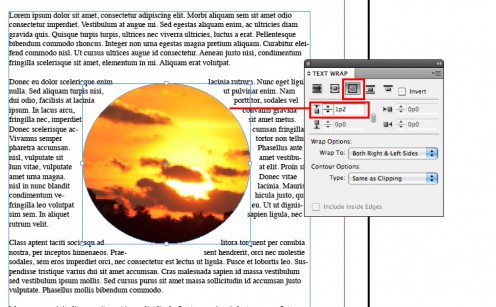
Following in suit, the next option allows the text to only flow at the top of the image box and at the bottom of the image box. It will not allow any text to flow around the right and left sides of the image.
And the final option only allows the text to flow above the images.
Great Reading Material For Designers
Troubleshooting:
If you set your text and the wrap is not showing up make sure that your image is above your text. To do this select the image and go to “window” → “object” and then choose “bring to front”. This will move the image above the text in the software and will “push” the text away from the image.


