How We Make Our Classic Car Steel Wall Art
Red Mini Steel Wall Art
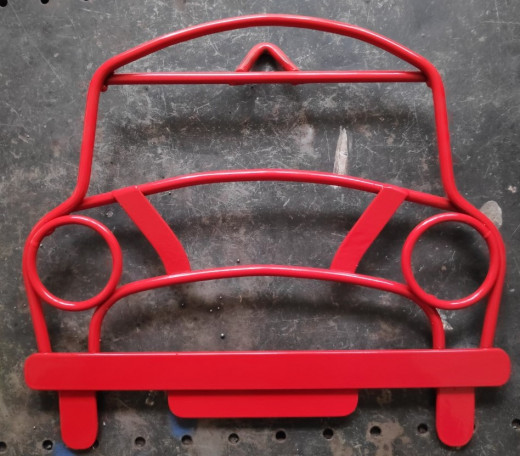
Classic Car Steel Wall Art
One of most popular and eye-catching ranges is our selection of handmade classic cars made from steel and designed to hang on the wall or even be adapted into coat racks, book ends or clocks. Although we have a selection of our most popular models ready for purchase at shows and in our shop, most of our wall art is made to order. As each piece is handmade separately, this allows us to make them to the customer's specification whether they want a small model of a Mini or Camper Van, or a large Morris Minor or Jaguar, or whichever other make of car they desire.
In this article, I'm going to show some of the stages in making one of our wall art cars.
Constructing the Steel Shape
All of our wall art is made from steel which we buy in either cylindrical rods or flat bars and then cut to the correct length using an angle grinder with a cutting disc.
Before starting, we do a scale drawing of the car onto card which will act as the template during construction. We then bend the steel, without the use of heat, by using our bench-mounted metal bender .
Bench Mounted Metal Bender
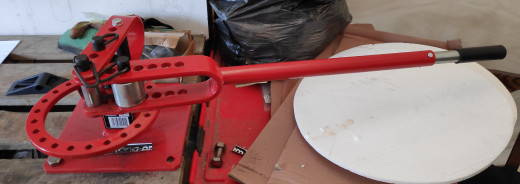
Bending the Metal
The metal bender comes complete with various sized dies around which to bend the metal and a long lever to be able to apply ample force. By carefully bending the steel a bit at a time and constantly referring back to the template, we soon get all the pieces bent into the correct shape.
Making the Wheels
For our smaller models, we generally buy ready-made steel circles for use as wheels or headlights. However, for our larger models, larger circles of steel are required for the wheels and we do these ourselves using the bench-mounted roller.
Rolling the Steel
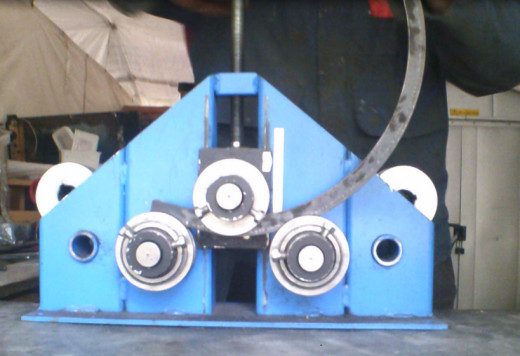
Using the Roller
The roller allows us to create a uniform curve in large pieces of steel; perfect for making circles. The steel is placed between the three wheels and the top wheel in the middle is lowered using a screw to allow for very small adjustments in size. By rotating the handle on the roller, the steel is then rolled between the wheels, with the downwards force of the top wheel causing a uniform bend in the steel. The top wheel is then lowered a slight amount, increasing the pressure on the steel, and the steel is rolled again. We repeat this step until we have a circle of the correct radius for our model. A grinding disc can be used to smooth out the join and generally clean up the piece afterwards.
Welding the Pieces Together
Once all of the steel has been bent/rolled into shape it is time to join the pieces together with the welder. The parts are laid out and chalk is used to mark out where the parts need to join to each other. Each of the joints is then welded in turn ensuring a solid join. An angle grinder is used to tidy up joints and any ends, to make sure there are no sharp points.
Welding the Pieces Together

Finishing the Wall Art
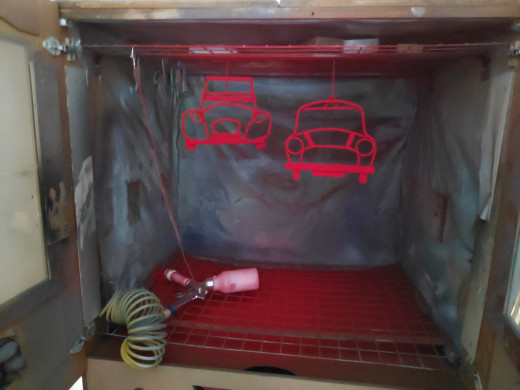
Once the welding and grinding has been done, the car is structurally finished. It can be left like this, however most of our customers request a colour finish. To do this we use powder coating. The wall art is hung in our spray booth and sprayed with the powder coating. One of the great things about powder coating steel is the magnetic effect of the coating ensures the entire model is completely covered, with no bare patches.
The wall art is then baked in our oven to set the power coating. Once it has cooled the item is then finished and ready to hang on our customer's wall.
Powder Coated in the Spray Booth
A Video of the Construction of a Morris Minor Wall Art Piece
© 2020 David
