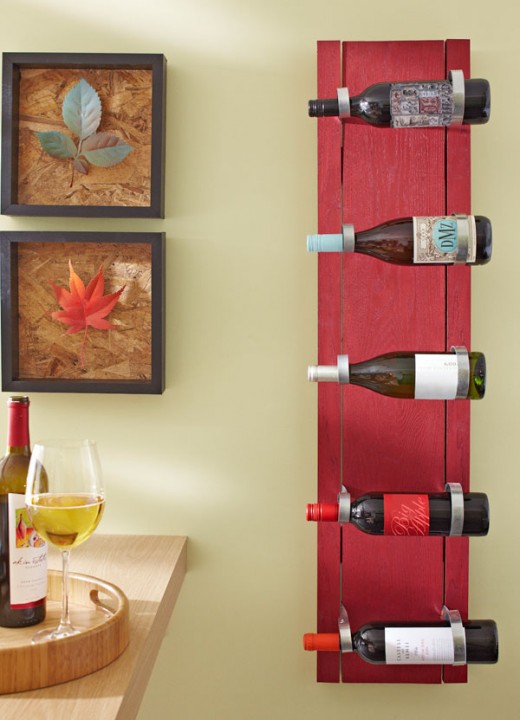
How to Construct your own Wine Rack

A practical yet beautiful item that will add that special something to any home!
If you are looking for a practical, yet lovely item that will decorate any kitchen or family room bar area, you may want to consider getting wine rack. Don't get just any wine rack! Instead, why not be original and truly show your own personality and create one of your own! At parties most of us often receive a bottle of wine from our family and friends and this often means that after the reunion unless you already have a bar or large wine rack we will find ourselves searching for shelf space somewhere in our homes to store all these wine bottles.
A do it yourself wine rack will not only serve as a place to store your own wine, but it is also a great gift idea! You can get supplies at your local hardware store and surprisingly they are not very difficult to construct. I found the instruction for making this lovely wine rack in Lowes Creative Ideas Magazine, along with the wine rack I also found many other great gift ideas as well as other storage solutions for the holidays.
Supplies you will need
1 ft by 8 ft red oak
1 ft by 2 ft red oak
Valspar paint Sangria Red
3 inch galvanized pipe hangers (the number of pipe hangers depends on how many bottles you want to hang)
1½ inch galvanized pipe hangers(the number of pipe hangers depends on how many bottles you want to hang)
Machine Screws with nuts
1 inch wood screws
½ inch wood screws
6 inch hangman picture hanging system
Assembling your Wine Rack
1. For each bottle you will need two galvanized pipe hangers-one 3 inch & one1 ½ inch. Replace the long screw in each hanger with a shorter machine screw and nut.
2. Cut the hanger to the desired length this will determine how far each ring will project from each other on the front of the rack, allow for a few inches for the straight end to wrap around the back panel.
3. Cut the center panel from the 1ft by 8ft board and cut two side panels from a 1ft by 2 ft board and paint with Sangria Red paint. Mark holes for each pair of hangers on the sides of the center panel. Drill pilot holes.
4. Attach the hangers to the sides of the center panel with1 inch screw. Use pliers to bend the ends of the hanger on to the back. Secure ends with ½ inch wood screws.
5.Cut two 1 foot by 2 inch braces to join the backs of the center panel and side panels, one near the top and one near the bottom, using the front of the center panel as a guide, screw the braces to the side panels.
So whether you are making one for your home or for your friends and family, wine racks are a very useful and an elegant gift idea, and making one yourself is a great way to not only save money but to also have some fun on the holidays. A homemade wine rack is a gift that is not only practical, but also make a great conversation piece, so be creative this holiday season.
Note: Do to the fact that the measurements were not listed exactly by foot and inches in the original article, there may be some inaccuracies, therefore I suggest checking with your local Lowes' dealer for exact measurement.


