Crafting for Cat Lovers: Easy and Fun Diy Project for Your Feline Friend
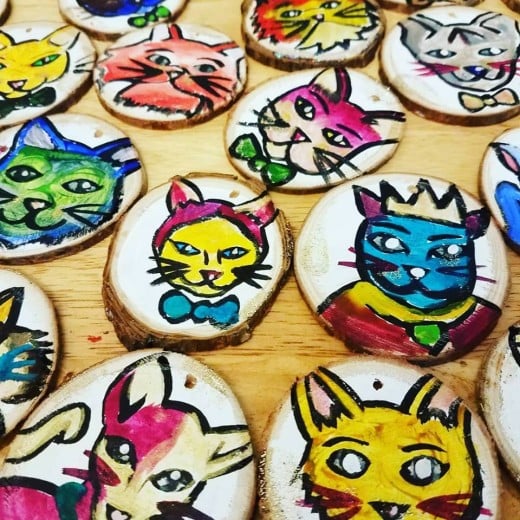
Create Customized Cat Ornaments!
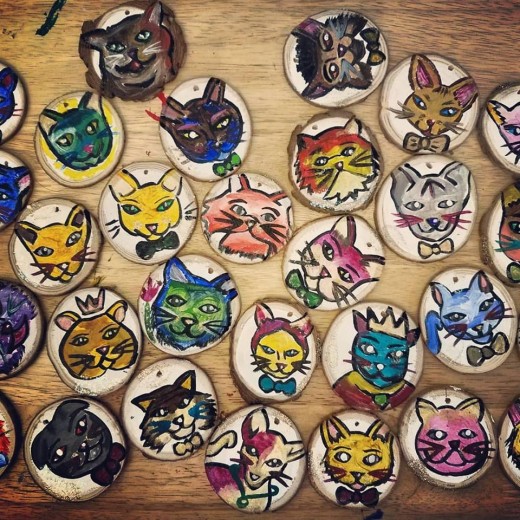
I love cats. You love cats. Sometimes, we want to surround ourselves with all kinds of cats! A great to connect with our love of cats, while showing off some artistic skill, is by creating cat ornaments that are unique, customized, and have a rustic charm. These wooden ornaments blend the country look of wood with the sweet image of a cat to create an ornament that is completely one of a kind! I made thirty of these ornaments to raise funds for the Community Cat Crusaders. I found images of cats on Google and use those pictures as my inspiration! I love wild colors, and you see that reflected in the ornaments I created.
Materials
*Slices of Wood (The ones I used were three to four inches in diameter. Larger ornaments or wooden boards may be easier to work with, as they will give more space to work on)
*Acrylic Paints (You Can try Golden High Flow Paints, or regular thick paints that are mixed with a bit of Floetral to make them a little more flowy. Thicker paints will help create more texture.)
*White Gesso
*Paintbrushes
*Water
*Paper Towels
*Twine or Ribbon
*Embellishments (if desired, such as glitter glue, tiny gems)
*Eyehooks (in case wood slices don't come with a hole to hang twine through)
*Mini Art Resin Kit (optional)
- (If using resin, get gloves, wooden stirring sticks, and disposable cups)
How to Create Cute Cat Ornaments
Step One: Find out what cat image makes you the most happiest when you look at it. The cat can be any kind, whether it's a Maine Coone, an American Domestic Cat or anything else. The image of the cat can look realistic, or cartoon like. Consider if you'd like to have the cat wear a little crown, or necklace. Did you want to add a real gem to a necklace on a royal cat, or did you want to add a bit of glitter on the cheeks of a sweet little kitten? The embellishment possibilities are endless. It's better to make a plan ahead of time, but also know that creativity sometimes takes the lead, and you may find yourself ending up with something completely different than you originally imagined. Just remember to decorate and embellish in accordance to the size of the wooden round canvas. I wanted to add some flowers to the cats on my wooden ornaments, but there was limited space on the side, as my wooden rounds were quite small. They were three to three and a half inches in diameter.
Step Two: If the wood slice does not come with a hole predrilled in it already, then use a pushpin or nail to create a small hole on the edge of the ornament. Use pliers or fingers to then screw in the eye hole securely, but be gentle to not break or damage the wooden board. Pushing too hard can crack the wood slice. Even if this happens, the wood ornament can still be salvageable with the next step.
Step Three: Paint your wooden cat ornament with gesso. Don't layer on the gesso too thick. Leave a bit of the wood grain on the outer edge showing, as in my picture. Allow the gesso to dry.
Step Four: Lightly draw an outline of the cat that you desire to paint on the dried gesso.
Step Five: Start painting the cat according to the lightly drawn outline. You can start with painting the outline with black acrylic paint, and then painting the cat with whatever colors your desire. Don't forget to add the whiskers. The water and paper towels can be used to clean off the brushes and keep the working area clean.
Step Six: Add tiny bits of white paint on the eye portion of the cat, to make the eyes look a bit realistic and 'alive'. Again, use, my photos for an idea of what this look appears like.
Step Seven: Add any cute embellishments when the paint is dried, such as glitter glue, any tiny gems or lace.
Step Eight: You have the choice to add resin over the painting to protect it from the sun, damage, dust or anything else that could disturbed the dried cat paint. Resin dried as a high gloss, and levels on its own as a clear coat over the painting. It usually comes in a two pack that has to be mixed according to its directions. Some extra materials for using resin could include mixing cups, gloves, and wooden sticks for stirring. Some people use a mini torch to help the resin dry faster, but this is not completely necessary. You can find high quality, nontoxic and ultraviolet stabilized resin here: https://tinyurl.com/yb4kzx9p
Step Nine: Thread twine or ribbon through the top hole or eyehook, after the resin has dried.
Step Ten: You're done! Hang up the ornament, or create more and create a collection of cats! These can hang up on a Christmas tree, or you can gift them to friends. These can even be signed or personalized on the back. If this is to be done, I advise putting a bit of gesso on the back, as wood can be quite absorbent and this can cause an issue with colors bleeding through.
© 2018 Charlotte Doyle

