How to Create Any Custom Shape in PowerPoint?
Introduction
This is a tutorial on how you can create any shape in PowerPoint and bring your creative ideas to reality. And, you can do this with your computer mouse itself without having to invest in an expensive Wacom tablet!
I know… it is always nice to have a Graphic Designer work on the visuals of our presentations, but there are times when we can’t afford one or the Graphic Designer is inundated with other requests and is unable to fulfill our requests. Sometimes, we may just feel the creative urge to develop the graphics on our own. It is in those situations that you will find this tutorial helpful. Even if you have a Graphic Designer on the project, suggest him or her to use PowerPoint to create the graphics instead of their favorite image editor tool.
Note: I am using Office 2016 for this tutorial.
Why Create Shapes in PowerPoint and Not in Image Editing Software?
I can give you several reasons for creating shapes in PowerPoint directly:
- PowerPoint is a commonly available software in most of the computers.
- Creating shapes in PowerPoint is an easy process with a short learning curve.
- You can be your own Graphic Designer.
- Image editing software applications are expensive. If you are not a Graphic Designer, you may have to deal with your boss to procure license for image editing software.
- Image editing software applications are usually complex to use.
- They require computers with higher specifications, such as RAM, processor, etc.
- The shapes you create in PowerPoint are vectors. So, you can enlarge them without losing their quality.
- You can also save the shapes as normal JPEG or PNG files and use them outside PowerPoint. But, the saved images will no longer be vectors. They will pixelate if you enlarge them beyond a point.
- You can easily edit and reuse the shapes in future presentations.
- You need not rush to the Graphic Designer for editing the shapes. You can edit them yourself.
- You can keep the file size of your presentation small, which generally increases when you add lot of JPEG or PNG images to the slides.
- You need not manage source files (.PSD) and published files (.JPEG or .PNG) for the shapes.
Heard of Freeform: Shape?
I am sure you must have created lot of shapes, such as oval, rectangle, triangle, etc., in PowerPoint. But, in this tutorial, I am going to create custom shapes using a lesser known, but powerful tool called Freeform: Shape. With this tool, you can draw any shape in PowerPoint. You can find Freeform: Shape in the PowerPoint Home tab.

There are two methods to use this tool.
Method 1
- Click the Freeform: Shape icon. The cursor will change to plus (+) sign when you move it on the slide.
- Now, start drawing by left clicking the mouse and moving the mouse in the desired direction. Remember, just move the mouse, and don’t drag it.
- Repeat these two steps till you have drawn the desired shape.
- You can stop drawing by either pressing the Enter key on your keyboard or moving the cursor to the starting point of your drawing and left clicking the mouse. In the latter case, the shape will close.
Watch the video given below to see an example of Method 1.
Notes
- The frequently used shapes are displayed on the Home tab. If you can’t find the Freeform: Shape icon, scroll down the Drawing panel to find it.
- There are two more similar tools, Freeform: Scribble and Curve, which work like Freeform: Shape. You can use these tools also to draw any shape.

Method 2
This is my preferred method to draw shapes, because it allows me to draw more precisely with greater control.
- In this method, start just as you did in Method 1. Click the Freeform: Shape icon, and draw a short line.
- Then press the Enter key to stop drawing.
- Next, while the shape is still selected, click the Format tab.
- Click Edit Points in the Edit Shape list. You will notice tiny black squares on the extreme ends of the line you drew in step 1. These are called handles.

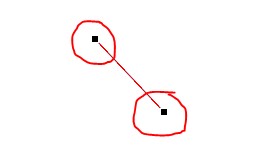
- Now, right-click any of the handles, and click Add Point. This will add another handle adjacent to the existing handle.
- Click and drag the new handle in the desired direction to draw the next line.

- Repeat the above two steps till you have almost drawn the shape.
- Right-click the last handle and then click Close Path to complete the shape.
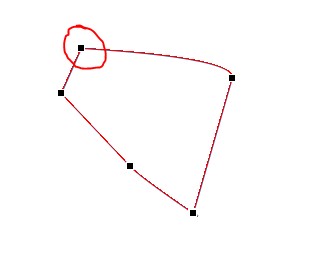
Watch the video given below to see an example of Method 2.
Notes:
- You can right-click the line between two handles and add more edit points to the line.
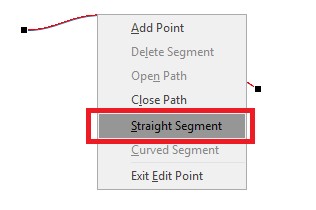
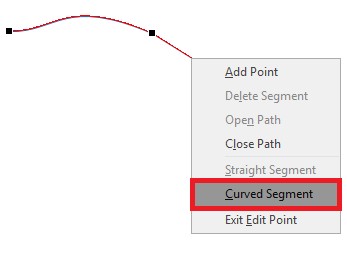
- It is best to add edit points at short intervals. If you increase the distance between two points, the subsequent line will start curving when you drag the point. If this happens, you can just right click the line, and click Straight Segment. Similarly, if you want to convert a straight line into a curve, right-click the line and click Curved Segment.
- On left-clicking an edit point, you will notice two additional white handles. You can click and drag these handles to further fine tune a curve.
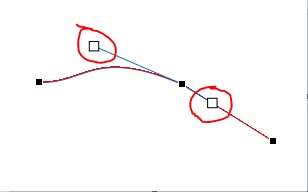
- You can modify the behavior of these handles by right-clicking an edit point and selecting the corner point, straight point, or smooth point option.
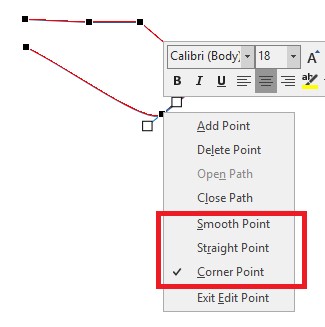
- If you select Corner Point, dragging a handle will have no effect on the opposite handle. It will not move and remain in its position. Watch the video given below to see an example of corner point.
- If you select Straight Point, dragging a handle outwards or inwards will have no effect on the opposite handle. But if you move the handle sideward, it will move the opposite handle also. Watch the video given below to see an example of straight point.
- If you select Smooth Point, dragging a handle in any direction will move the opposite handle also symmetrically. Watch the video given below to see an example of smooth point.
Does it Really Work?
Absolutely, it does! Now, let me show you how you can apply Method 2 to create any shape in PowerPoint. Here are some prerequisite tasks that you need to complete before creating your shape:
- Decide on what shape you want to create.
- Get a reference image of the shape you want to create. You can search for the reference image in Google.
- Copy the image and paste it in your PowerPoint slide. The image is just for reference purpose.
After completing these tasks, apply Method 2 described above and start tracing the image with the Freeform: Shape. It’s that simple!
Once your shape is ready, then apply colors to it. You can make your shape look professional by using gradient colors, shadows, bevel etc. All these options are available in the Format tab.
Note:
- Zoom your slide to 400% before starting the drawing process so that you can trace the shape accurately.
Proof!
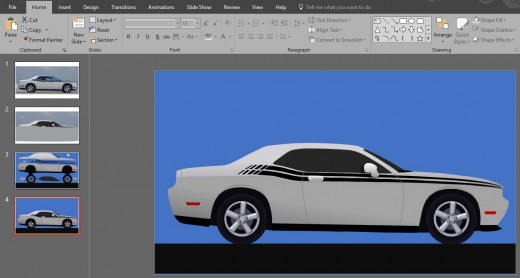
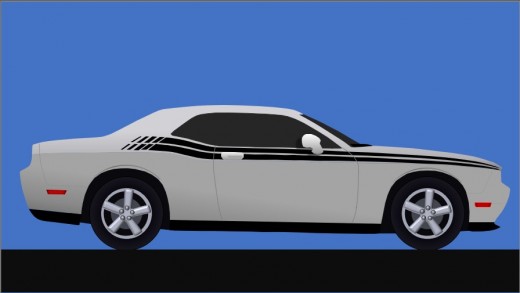
Here is a Dodge Challenger I created with Method 2.
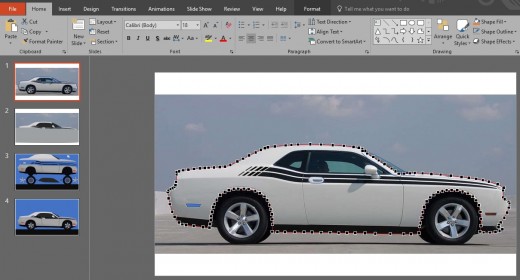
Watch the video given below to see the edit points creation in progress.
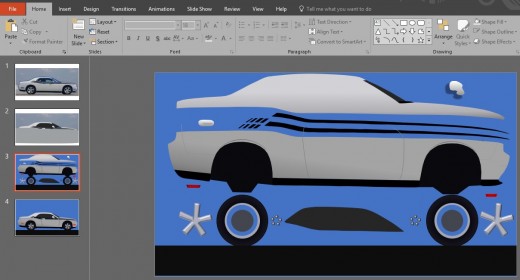
I hope you found this tutorial helpful for your next presentation project.
This content is accurate and true to the best of the author’s knowledge and is not meant to substitute for formal and individualized advice from a qualified professional.
© 2019 thebloggerville


