How to Create Stunning Floral Typography in Adobe Photoshop

In this Photoshop Tutorial for Beginners to Intermediate level users, I am going to show you in detail all the steps I took to create awesome Floral Typography by means of clipping masks, layer styles, transformations and textures.
While working on the Text, we'll be using the type contents as masking agents- they will become the visible areas of the layers above them- the floral images.
To create this cool Text Effect I have used default Blackoak Std Font and eight source images which are my photos and unrestricted stock
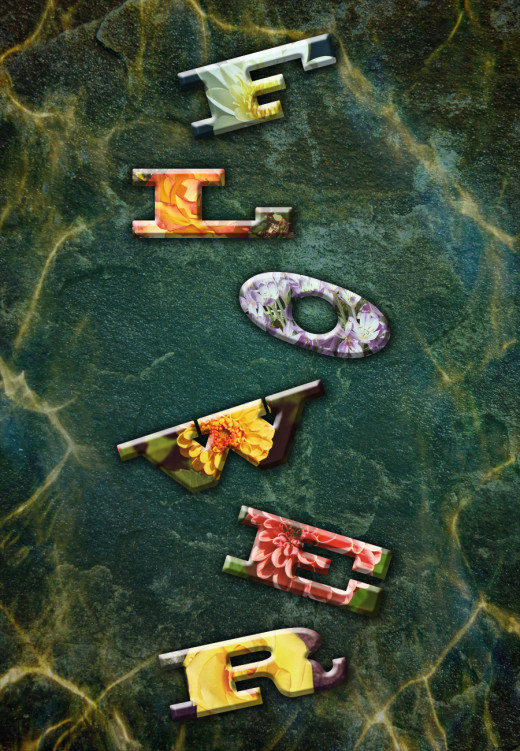
This is what we are going to create:

STEP 1
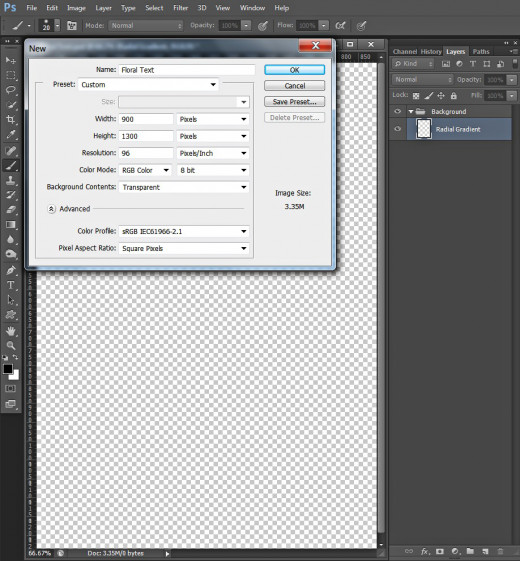
It is good before all to organize your work. Firstly create the Folder where you are going to place the .psd file and the stock images you are going to download. After that open your Adobe Photoshop and from the Menu bar choose File, New. Insert Floral Text for Name, or something else if you don't like my title. Set the Width of the image to 900px and insert 1300px for Height. Change the next three settings as follows- insert 96 Pixels/Inch for Resolution, choose RGB Color for Color Mode and Transparent for Background Contents.
Rename Layer 1 which you'll get in Layers panel to Radial Gradient. We should put our first layer in a Group so go to Layer, Group Layer (hot keys Ctrl+G) and rename the new Group 1 to Background.
Prepare the Background with Radial Gradient and Stone Texture
In Steps 2-5 you have to prepare the Background for the Floral Text Effect. Firstly you have to colorize the canvas with navy blue shaded Radial Gradient. When this first layer in Background group is ready, you should Paste Stone Texture in a New Layer on top of the group. Your next step is to Resize the Texture then change its Blend Mode and Opacity Option.
STEP 2
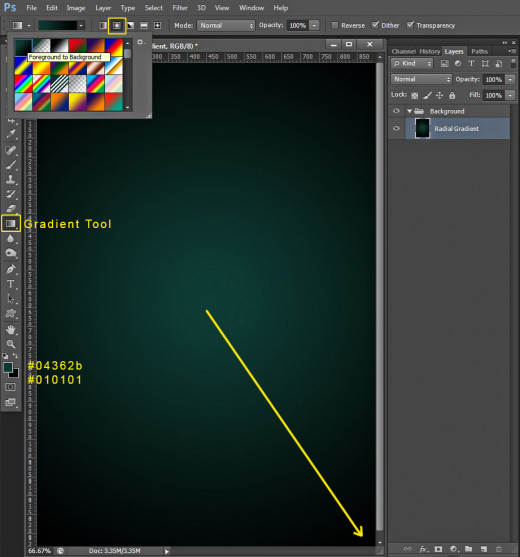
Select Radial Gradient layer then click on Set Foreground Color Swatch in the Tools bar and change the Foreground Color to #04362b. Then Set the Background Color to #010101.
Now select Gradient Tool which is between Eraser and Blur Tool in Layers panel, choose Foreground to Background Gradient from the Gradient Picker in the Options bar and click on Radial Type of Gradient icon. Drag with the tool from the middle to bottom right corner of the canvas for example (see the yellow arrow for a reference) to colorize your Background.
STEP 3
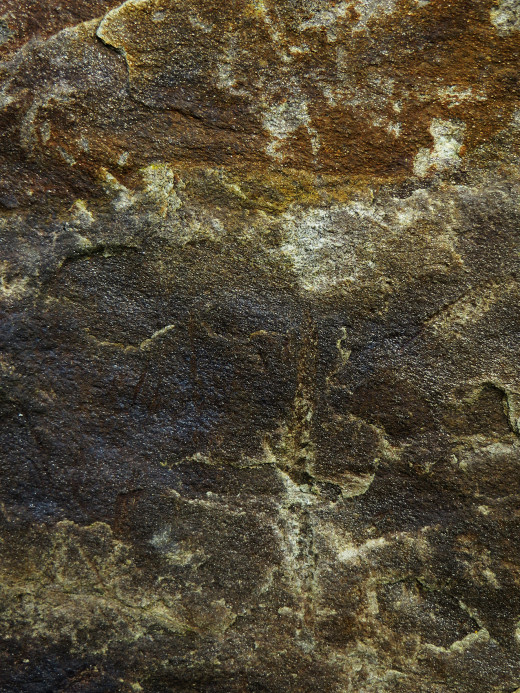
Click on this Stone Texture photo of mine to open it in high res then right click and select Save As to place it in the folder where you keep your Floral Text .psd file.
STEP 4
In this step we are going to move or Copy and Paste the Texture in our Floral Text .psd file. Firstly Create a New Layer (Layer, New, Layer) on top of Background Group and rename it to Stone Texture. Then open the Texture in Photoshop, press Ctrl+A to select it, press also Ctrl+C to copy it, go back to the Floral Text file, select Stone Texture layer and press Ctrl+V to paste the Texture. Use also Edit, Free Transform and move a chosen corner node in inner direction to make the Texture cover your canvas. Press Enter to apply the Transformation.

STEP 5
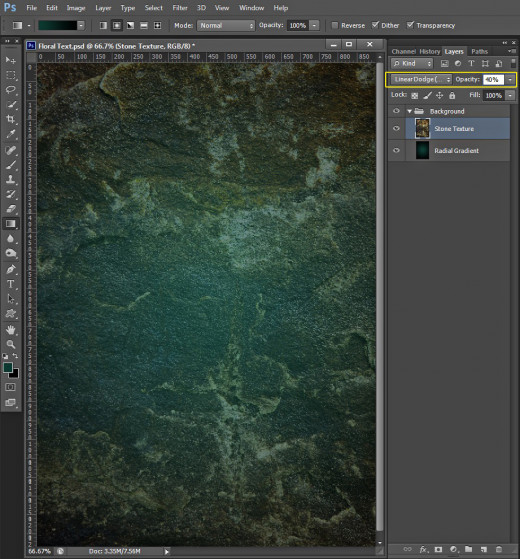
Change Blend Mode of Stone Texture layer to Linear Dodge and lower its Opacity to 40%.
Add Water Texture to Create Golden Highlights
In Steps 5-9 you should download and Paste in a New Layer on top of Background Group the Golden Water Texture. You have to Resize then change the Blend Mode and Opacity of the Texture to add golden highlighs to the Background.
You will complete the work on the Background when you apply Layer Mask on the Golden Water Texture layer and erase the middle portions of it with default Soft Round Brush.
STEP 6
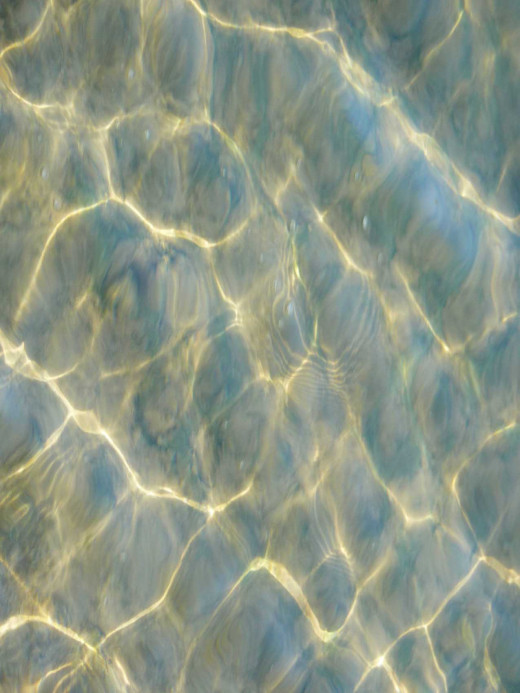
Now download this Golden Water Texture the same way you downloaded the Stone Texture in Step 3.
STEP 7
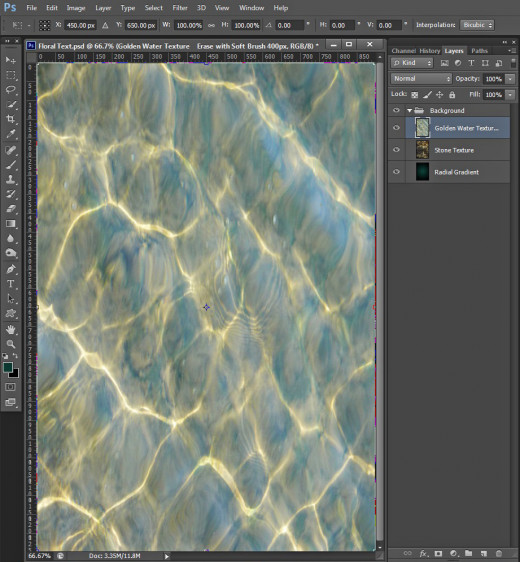
Create a New Layer again on top of Background Group and call it Golden Water Texture. Copy and Paste there the Texture you downloaded in Step 6 and use again Edit, Free Transform to adjust it to the size of the canvas.
STEP 8
Now change Blend Mode of Golden Water Texture to Hard Light and reduce its Opacity to 60%.
Click on Add Layer Mask icon at the bottom of Layers Panel or go to Layer, Layer Mask, Reveal All to mask your Golden Water Texture layer.

STEP 9
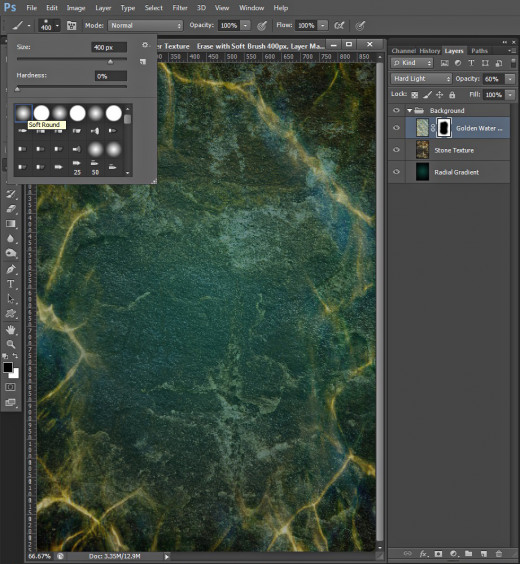
While the previously added Layer Mask (its thumbnail) is highlighted, select Brush Tool, take Soft Round type from the Brush Preset Picker and increase its Size to 400px. Start brushing in the middle of the canvas (the Foreground Color should be black). Leave intact only those parts of the Texture which are around the borders of the image.
Type the Text and Use Transformations to Rotate and Arrange the Letters
In Steps 10-14 your work is to type the Text using the thick Blackoak Std Font which is default for Photoshop. You should type every letter on a separate layer in order to transform them and apply the respective Blending Options. You have to use Rotate Transformation so that you could move randomly any letter and change its position.
STEP 10
In this step we'll start to create the Text.
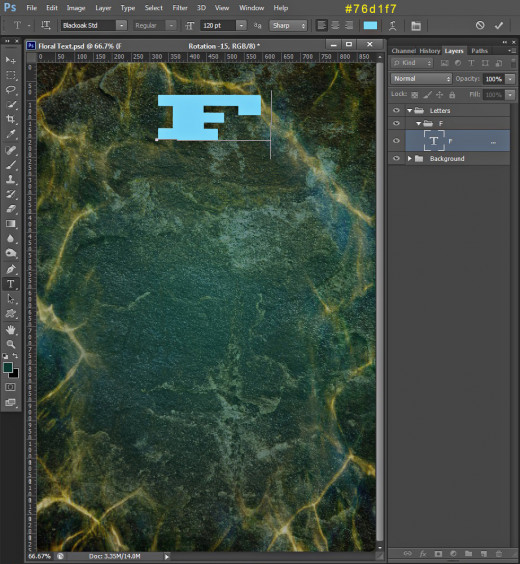
Take Horizontal Type Tool, find Blackoak Std Font in the Font Family drop down menu, set the Font Size to 120 pt and choose a nice blue- #76d1f7 for Font Color. Type letter F using capital letters. Leave the letter at the upper part of your canvas.
Place F text layer on top of Layers panel, then press Ctrl+G to Group it and call the new Group F only, like the Text layer. Select this new F Group and press again Ctrl+G to place it in another Group. Name the last created Group Letters.
Please, see the screenshot below and pay special attention to the Layers panel to see the F layer placed in F Group and F Group placed in Letters Group.
STEP 11
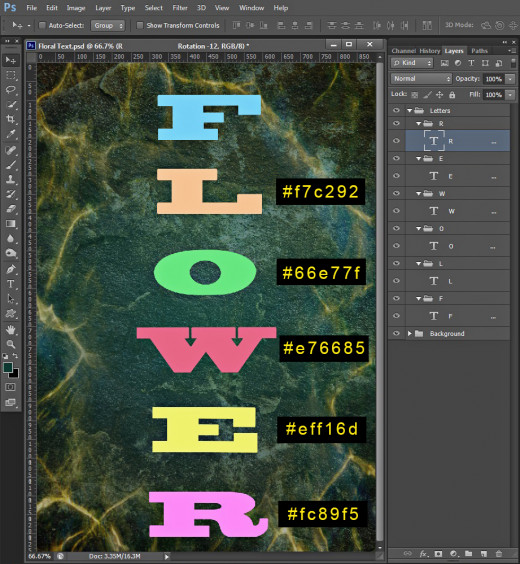
Grab again Horizontal Type Tool and this time type L letter (capital) using the same Blackoak Std Font of 120 pt Size, change only the Font color to #f7c292. Place the letter below the first F letter. It is not necessary to be too precise while arranging the letters. Later we are going to move and rotate them in order to create unique effect.
Place the letter L into L Group, within the Letters Group.
The next capital letter to be typed is O. Use the same Font, change only Font Color to #66e77f. Place O Letter in O Group within the letters Group.
Type also W, E and R letters using these colors: for W- #e76685, for E- #eff16d and for R- #fc89f5. Place them in W, E and R Group within the Letters Group. Compare your result with my screenshot below:
STEP 12
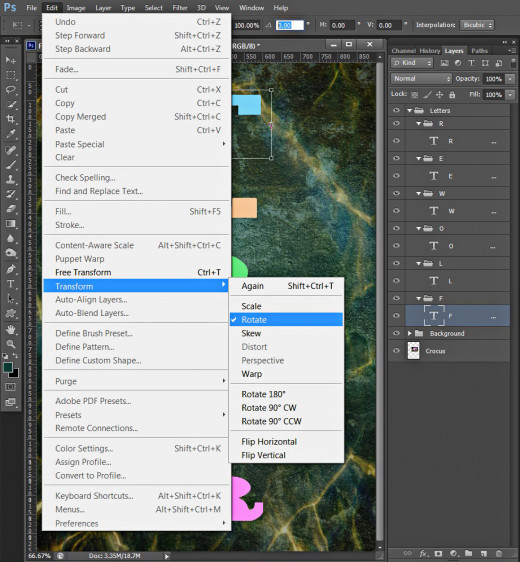
Now comes another interesting part of this tut- randomly arranging the letters in the vertical order.
Select Letter F and navigate to the Menu bar. Select Edit, Transform, Rotate.
STEP 13
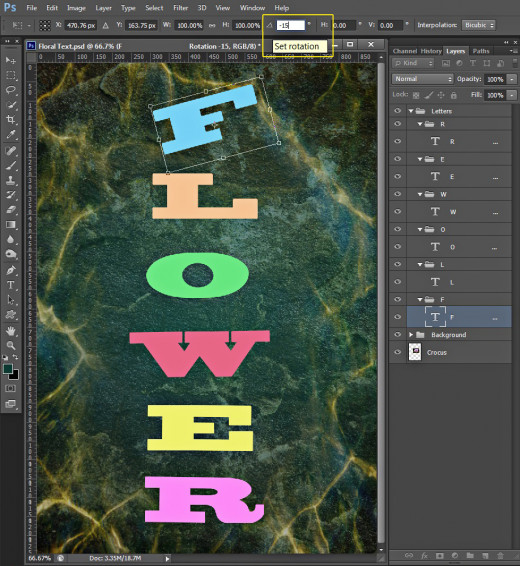
In the Options bar of the Rotate Transformation insert -15 degrees for Angle of Rotation and press Enter key.
STEP 14
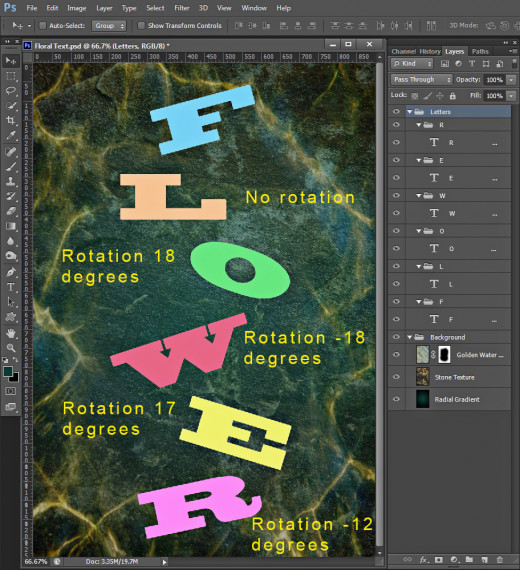
In this step we are going to arrange the rest of the letters.
Don't apply any transformation on Letter L, only move it (with Move tool slightly to the left.
On Letter O apply Edit, Transform, Rotate and insert 18 degrees for Angle of Rotation. Move also the Letter slightly to the right.
On Letter W apply Rotate Transform with -18 degrees Angle of Rotation. Move also the Letter to the left.
Rotate Letter E at 17 degrees and move it to the right.
On Letter R also apply Edit, Transform, Rotate, but this time insert -12 degrees for Angle of Rotation.
See the following screenshot for a reference.
Add Layer Styles to All of the Letters
In Steps 15-19 you have to add Shadow and 3D Effect to the first letter, then you have to Copy these two Blending Options and Paste them on the rest of the letters to give volume to the typography composition.
STEP 15
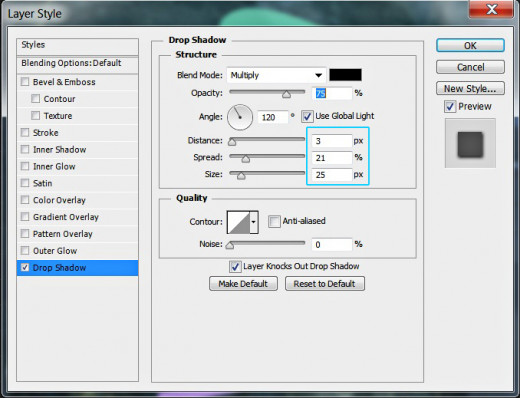
Now select again the first Letter F, right click on it and choose Blending Options or go to Layer, Layer Style, Blending Options. Firstly check Drop Shadow Layer Style. Change only its Distance to 3px, Spread to 21% and Size to 25px. Leave all other settings as given by default and still don't close the Layer Style box as we are going to add 3D effect in the next step.
STEP 16
This time check Bevel and Emboss Layer Style, change its Depth to 320%, Size to 10px and reduce Color of Shadow Opacity to 10px.
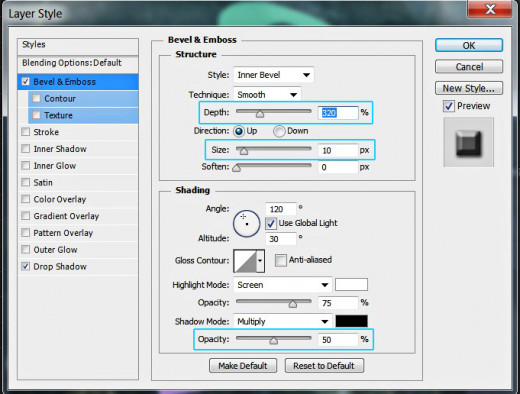
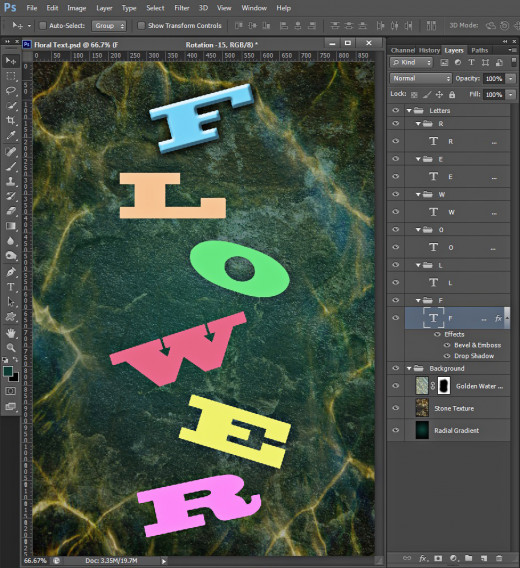
This is how your Letter F should look after adding both Drop Shadow and Bevel and Emboss Blending Options:
STEP 17
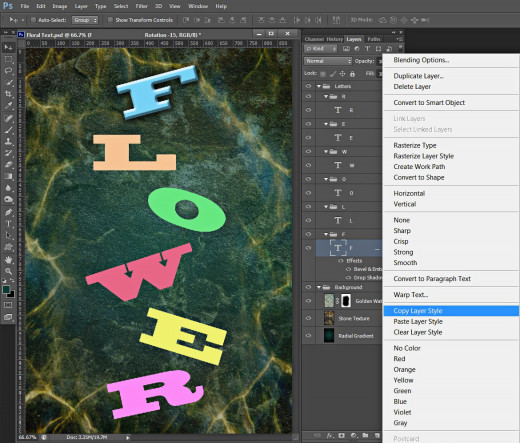
Now right click on F Text layer and select Copy Layer Style from the fly-out menu.
STEP 18
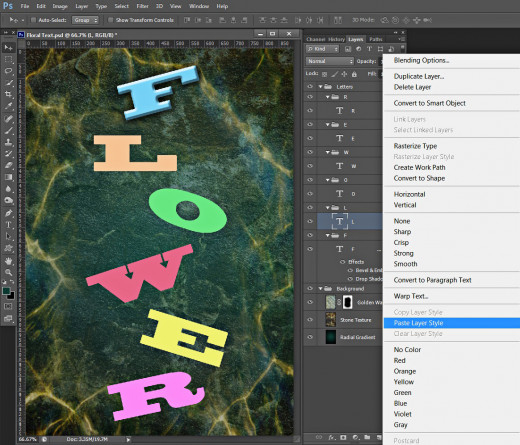
Select the next L Text layer, right click on it and choose Paste Layer Style. Thus you'll apply the same Drop Shadow and Bevel and Emboss.
STEP 19
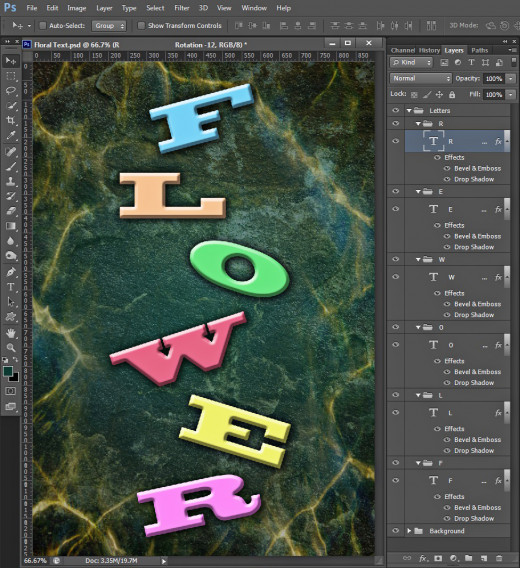
Select the rest of the Text layers one after the other and Paste the Layer Style on them too. You should get this result:
Add Beautiful Flower to Any Letter and Apply Clipping Mask
From the coming step until the end of this tut we have to add different floral image to any letter. In order to make the respective image covering only the letter, we are going to apply Clipping Mask- the letters will play the role of masking agents. For a better effect we are going to reduce the Opacity of all Clipping Mask layers in order to make the floral patterns transparent and to blend them with the original colors of the letters.
STEP 20
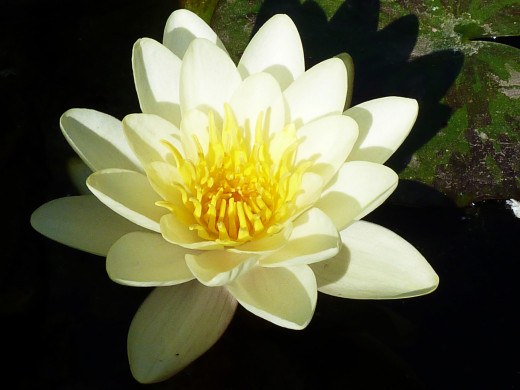
Download my Water Lily stock photo and save it in your folder. We'll need it in the next step.
STEP 21
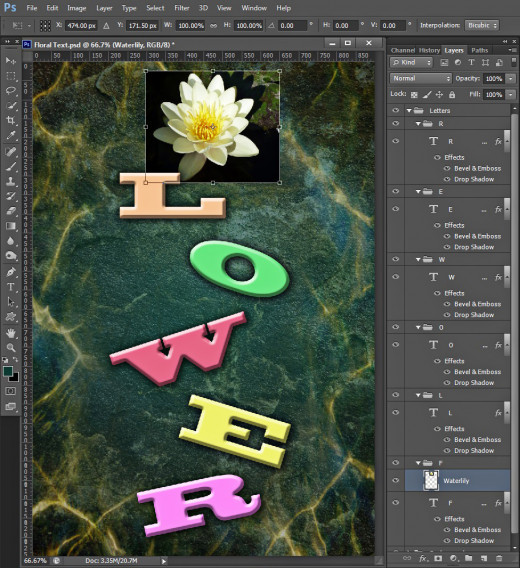
Create a New Layer, name it Water lily and place it above F Text layer, on top of F Group. Copy and Paste there the Waterlily photo and use Edit, Free Transform to make it cover the letter. Have a look at the following screenshot for a reference. Press Enter to apply the Transformation when you are ready.
STEP 22
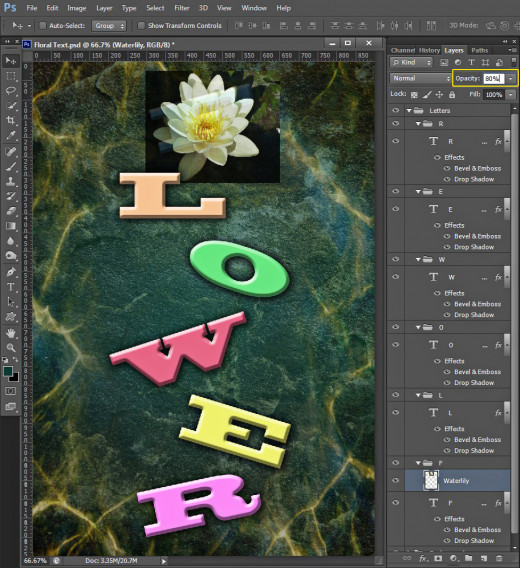
Reduce Opacity of Water lily layer to 80%.
STEP 23
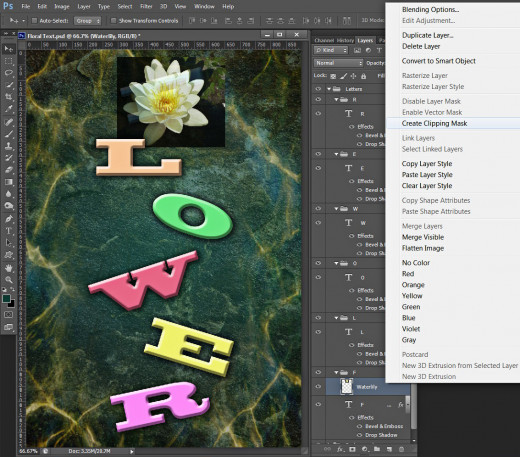
Right click on Water lily layer and select Create Clipping Mask. You can do the same by holding down Alt key and placing the cursor between both F and Water lily layers and when an arrow sign appears just click to create the Clipping Mask.
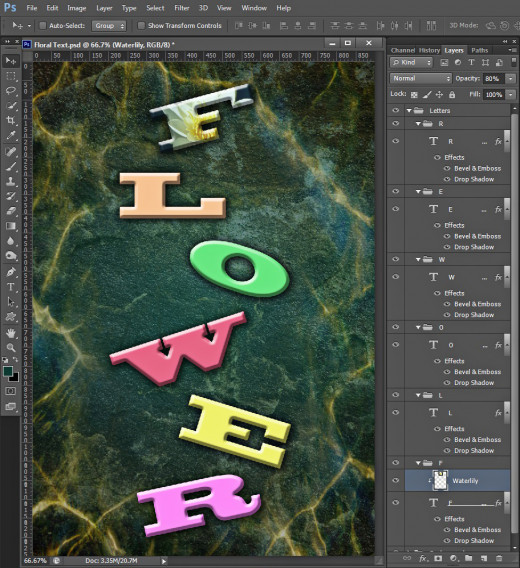
This is how your F letter will look after applying the clipping mask. Only the parts of the Waterlily which take in the letter are visible and the parts which envelop the transparent area of the F Text layer get invisible. This is how the Clipping Mask acts.
STEP 24
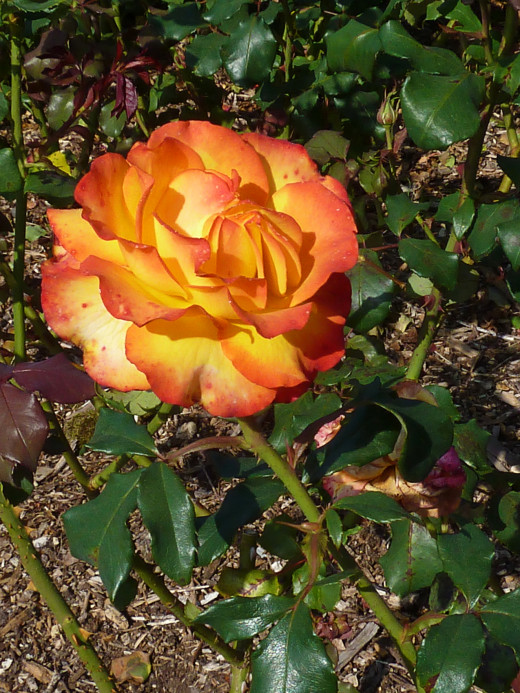
Now download this awesome Rose stock photo and save it together with the other files referring to our work.
STEP 25
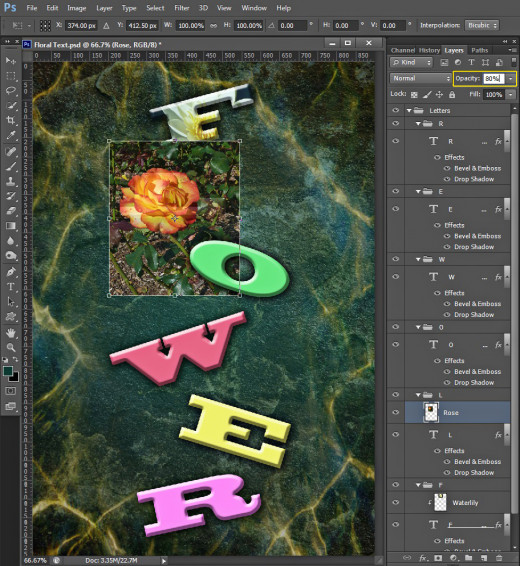
Create a New Layer above L Text layer in L Group and call it Rose. Copy and Paste there the Rose photo you already downloaded and resize it to cover the L letter using Edit, Free Transform. Press Enter, then reduce Opacity of Rose layer to 80%.
STEP 26
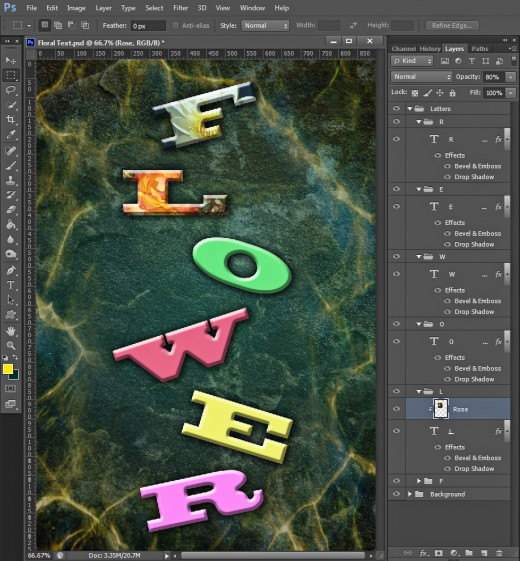
Right click on Rose layer and select Create Clipping Mask. Your letter L will look like this:
STEP 27
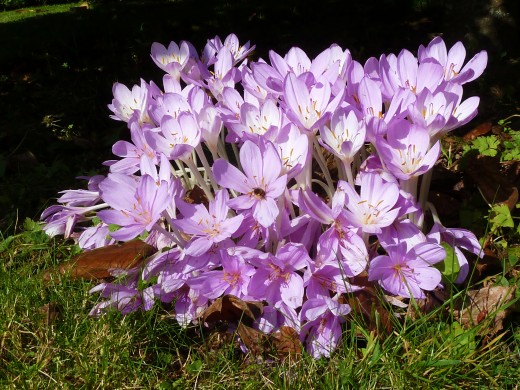
Now save in your folder my Crocuses source image:
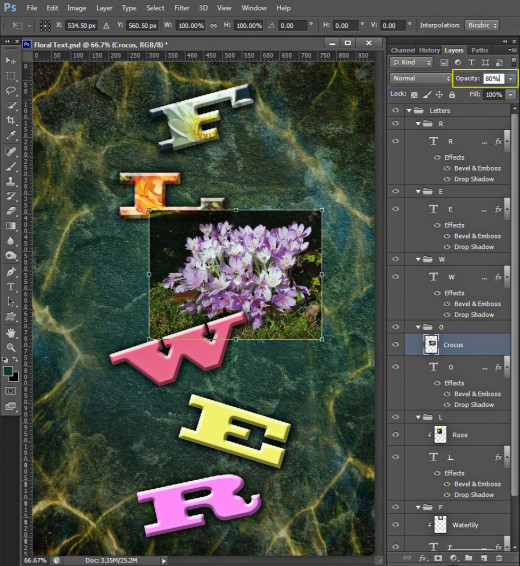
STEP 28
Create a New Layer on top of O Group and name it Crocus. Copy and Paste there the previously downloaded photo and resize it by means of Edit, Free Transform. Reduce Opacity of Crocus layer to 80%.
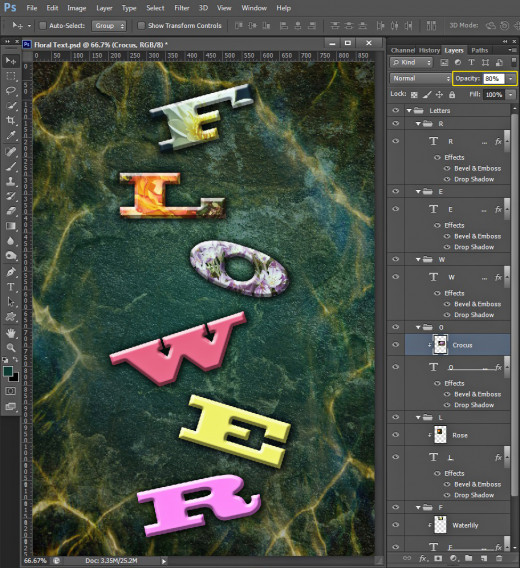
STEP 29
Create Clipping Mask on Crocus layer too and your O letter will look like this:
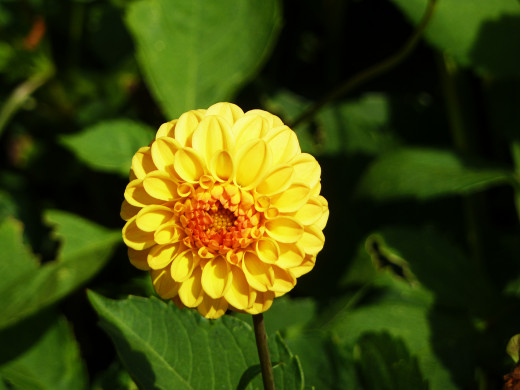
STEP 30
Download my next photo- Yellow Dahlia stock image and save it in your folder.
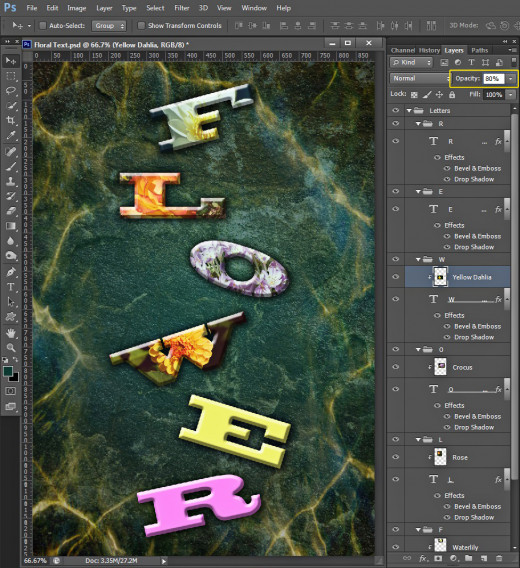
STEP 31
Create a New Layer called Yellow Dahlia above W Text layer in W Group. Copy the stock photo downloaded in Step 30 then resize it with Free Transform to cover W letter. Create Clipping Mask and reduce Opacity of Yellow Dahlia Layer to 80%. This is how your W letter will look:
STEP 32
The next stock photo to be downloaded is this Red Dahlia:
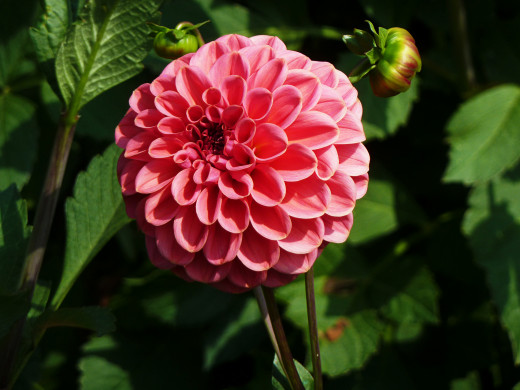
STEP 33
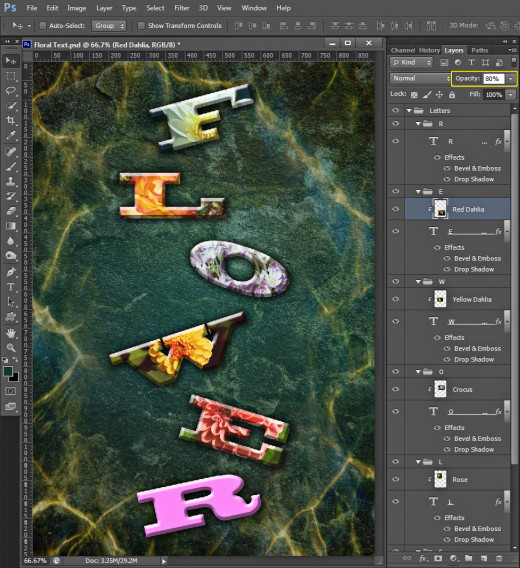
Now Create a New Layer named Red Dahlia above E layer in E Group. Copy and paste Red Dahlia stock photo in this new layer then resize it and apply Clipping Mask. Don't forget to lower Opacity to 80%.
STEP 34
The last stock photo to be downloaded is this Yellow Rose:
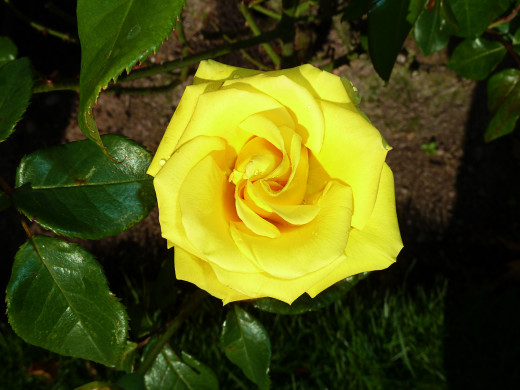
STEP 35
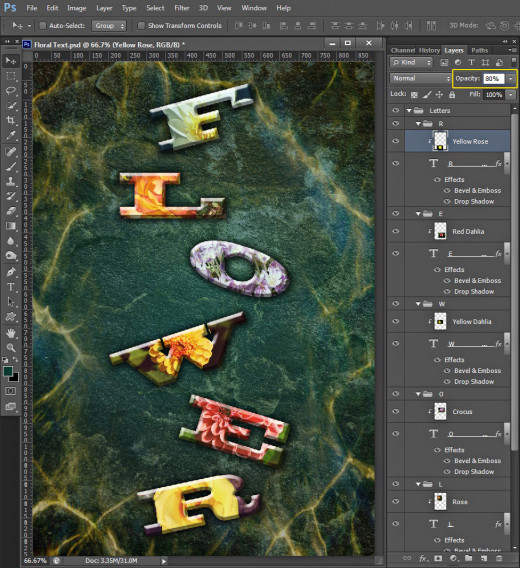
Create a New Layer above R Text layer in R Group and name it Yellow Rose. Copy and Paste there the stock photo then resize it so that it covers the R letter. Create Clipping Mask and reduce Opacity of the layer to 80%. This is how your R letter will look:
STEP 36
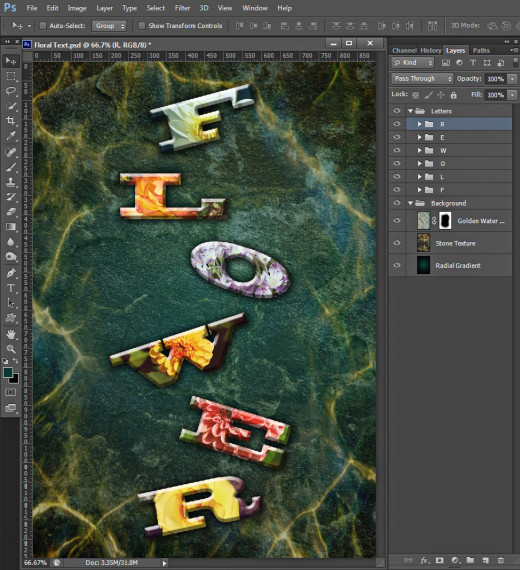
We completed our work on this super cool Floral Typography. Compare your Layers panel with mine. You should have the following groups and layers in it:
-
Background Group which includes these three layers: Radial Gradient, Stone Texture and Golden Water and
-
Letters Group with six subgroups in it: F Group which consists of two layers- F and Water Lily, L Group (L layer and Rose layer), O Group (O and Crocus layer), W Group (W and Yellow Dahlia layer), E Group (E layer and Red Dahlia layer), and R Group (R and Yellow Rose layer).
STEP 37
Your outcome saved in .jpg format should be similar to mine.
Hope you learned new techniques from this tutorial and found it funny and useful.
Thank you very much for reading and God bless! :)