How to Draw a Cartoon Rat

Drawing a Cartoon Rat is Really Quite Simple...
As I like to say in all of my drawing tutorials, drawing is merely a collection of various shapes and lines assembled together to make a recognizable image.
At its most basic level, drawing is really very simple IF you can take it piece by piece and not let yourself get overwhelmed.
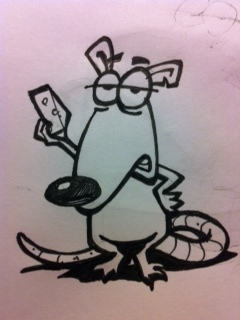
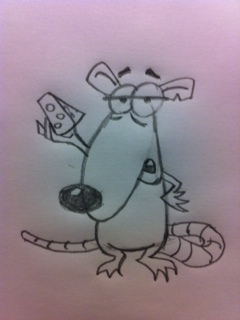
Take our buddy the cartoon rat in the picture to the right. Now he has been inked in from a pencil drawing. The pencil marks have been erased to leave only the black lines. When you look at that drawing, does it seem that it is way too complicated for you to draw?
That is a perfectly natural response and probably felt by a lot of people when they first look at that drawing.
The key to drawing is breaking complex objects into smaller more easily manageable pieces. As you will see in the following tutorial, the cartoon rat is simply a set of simple shapes put together in a certain way.
Why not grab a pencil and some paper. Take a few minutes and give this drawing tutorial a whirl. I would love to know what you think.
Are you ready to begin?
.
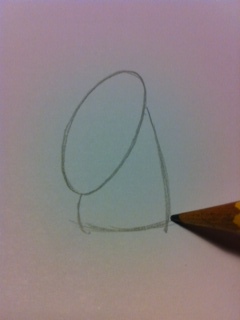
Step 1: Draw the Basic Shapes
As with any drawing, the beginning may be a bit daunting. Don't let that get to you.
Concentrate on drawing the two shapes you see in the picture to your right.
DOn't think about this being a cartoon rat or anything else. It's just two simples shapes - an oval and an irregular rectangle with slightly curved sides just behind it.
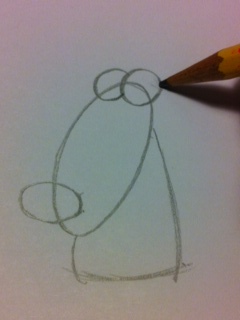
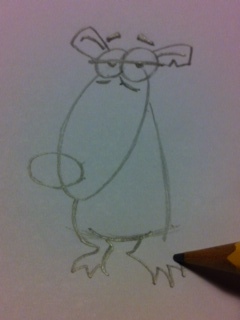
Step 2: Add More Basic Shapes
Again, don't think of this as anything but a collection of drawn shapes.
On the bottom left of the large oval shape, draw a smaller oval as seen in the drawing to the right.
Next, you're going to draw two circles, one slightly larger than the other. Start by drawing the larger circle on the right, then the smaller circle on the left.
Notice that the circle on the left is drawn to appear behind the larger circle on the right. This will make your final drawing more interesting.
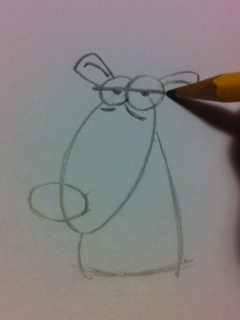
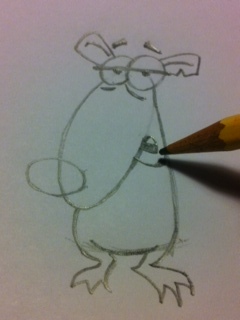
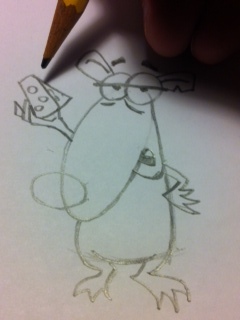
Step 3: Finish the Eyes and Add the Ears
Those two circles you drew in the last step are the rat's eyes.
To complete these, simply draw a straight horizontal line directly across the center of both circles as seen in the drawing to the right.
Next, add the pupils by drawing two dark semi-circles as indicated.
Finally, add the ears. Again, just try and draw the basic shapes. Don't think of them as ears. Add a line inside each ear for interest.
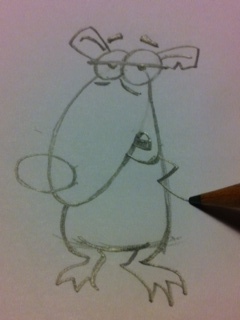
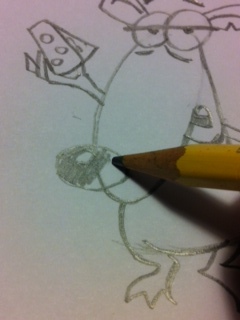
Step 4: Add the Feet
You can't see it in the previous drawing so I wanted to mention it here. I drew a nick in my rat's left ear.
SO, moving on to our rat's feet, these are just zig zag lines in the shape of claws, feet and legs.
Look carefully at the shapes I drew for his feet and try to copy that.
Also, add the eyebrows just above the eyes.
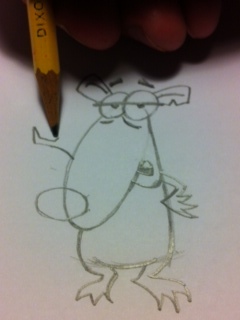
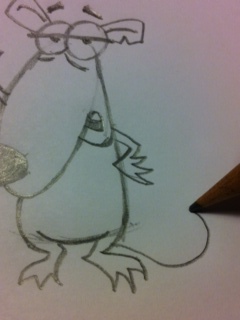
Step 5: The Mouth
OK, how are you doing so far?
Let's draw in the jaw first. Draw a curved line moving from the right side of the big oval to the right edge of the rectangle.
For the mouth, you're going to draw a similar line only smaller and enclosed as shown in the drawing to the right. Fill in the bottom half of the area leaving the top half blank. That blank area is his teeth.
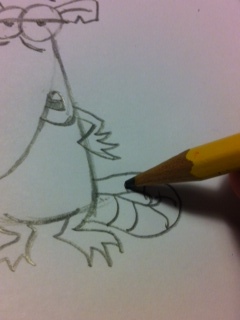
Step 6: The Arm
Let's start with his left arm first.
Begin by drawing a zigzag line similar to the line you see in the picture to the right.
This line will be the outline of his arm.
Step 7: Finish the Arms
OK, you can see how I finished out his left arm. Just draw a line similar to what you see in my drawing.
Nest, let's make his right arm extended. He's going to be holding a piece of cheese.
Again, just draw a curving line outward from his body, making a zigzag line for the fingers.
Step 8: Draw the Cheese
OK, so how are you doing so far?
The hands are actually the toughest part of this drawing. Once you get past this, the rest is going to be easy.
The cheese is simply a triangle and a rectangle joined together.
Add some small circles to give it the identifying marks of cheese.
Step 9: Finish the Nose
I absolutely love the huge nose on this cartoon rat.
It's that oval shape you drew in the beginning of the drawing, remember?
You're just going to draw a smaller oval towards the top of the larger oval (nose).
Next, press down hard and fill in the entire large oval. Leave the tiny oval open. This will be the reflected light off his nose.
Step 10: Begin to Draw the Tail
I want this rat to have a big, fat tail. You can draw yours thin, short, bent - whatever. But mine is just going to be fat and long.
Start by drawing a curving line from the lower left of his body, gradually curving back toward the area just below his left hand.
Final Step: Finish the Tail
Draw another line that follows the same curving contours of the first line.
These two lines make up his tail.
Next, add some curved lines along the length of the tail to give it some dimension.
This is the last step in the drawing.
How does your drawing look?
The Finished Pencil Drawing
Here is our completed cartoon rat in all his rat-glory!
Now you can leave him like this or you can make your next drawing using very light lines and then add some marker lines to give him that real cartoon rat look like the rat drawing in the picture at the top of this page.
One final note about drawing: It is perfectly normal to become frustrated. Use that frustration to drive you to the next drawing and the next and the next. If you keep practicing, you can become a master of the cartoon rat in no time at all.
Good Luck!
.


