- HubPages»
- Arts and Design»
- Drawing»
- Drawing Tutorials
How to Draw a Flower (Easy)

Getting Started
I have drawn this flower about a million times. Once you get the
hang of it, you can do one in about 3 minutes. Many people have
wanted me to show them how to do this, most of them can not draw.
Even if you think you can not draw, I bet you can draw this. Once
you practice over and over, you can impress your friends.
Things that you need: Pen or Pencil, Colored Pencils (optional),
Blender or Q-Tip (if you want to be more artistic), and of course Paper.
At the basic you should have Pen or Pencil, and Paper!
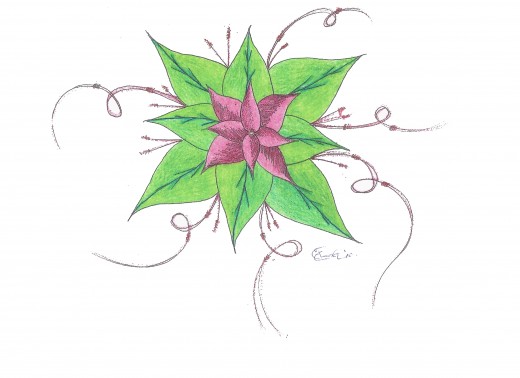
Finished (Color)
Step 1
First, start with drawing a simple small circle in the middle of the paper.
This is our starting point, and the center of our flower.
Center

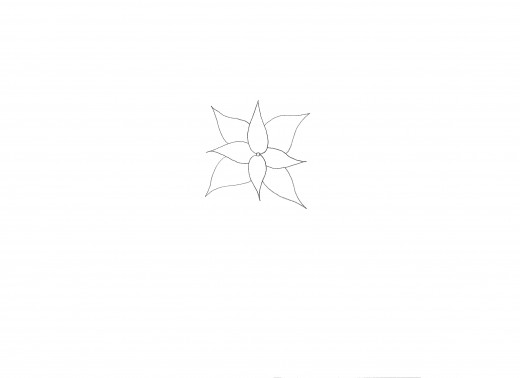
Step 2
Now we need to draw the petals of the flower.
These are easier to do if you start on the circle we started with, go out to a point, come back down to the circle.
The more you practice the easier this will become. Don’t worry if the petals overlap. As you can see I have done this. Every flower will look different than the one before.
Petals

Step 3
Now we are going to add some more petals to the flower. If you want to draw on a
smaller scale you can skip this step. Every flower can add more or less of these.
Make sure that each petal is started and ends between the previous petals.
Few More Petals
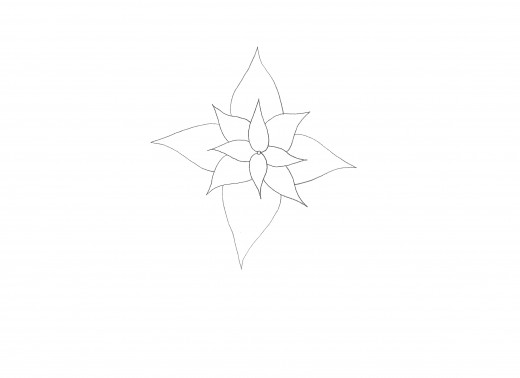
Step 4
Adding the leaves.
Start this just like you would if you were adding the petals, only bigger.
Remember to start and finish at the base. In other words, start next to
a petal, skip over a petal, come back down on the next one.
You can experiment with everything, bigger petals than leaves. For this
tutorial, the leaves are bigger.
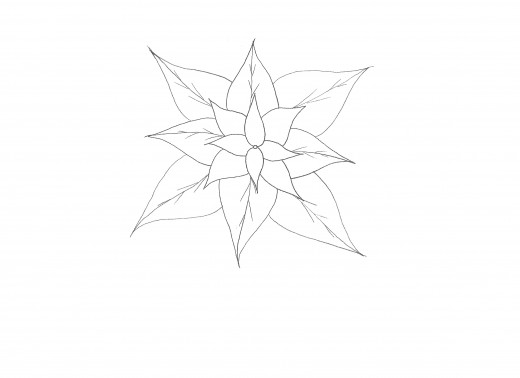
Leaves
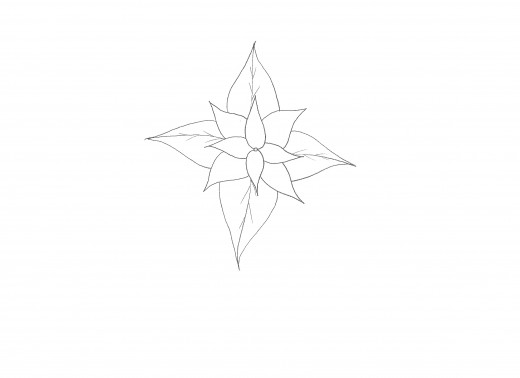
Step 5
Add some Details.
Now we are going to start adding detail to our flower.
We need to add the veins of the leaves.
Just start somewhere near the petals, then draw a line to
the end of the leaf. This will look like you split the leaf in two.
Next, draw lines that come off of this center line, alternating
back and forth. You should have two lines on each side of
the line.
Details (Leaves)
Step 6
Add some more leaves.
Again, just like before, and with the petals,
add some more leaves. Of course, if you skipped
Step 3, you might want to skip this step too.
At this point, add veins again, as in Step 5.
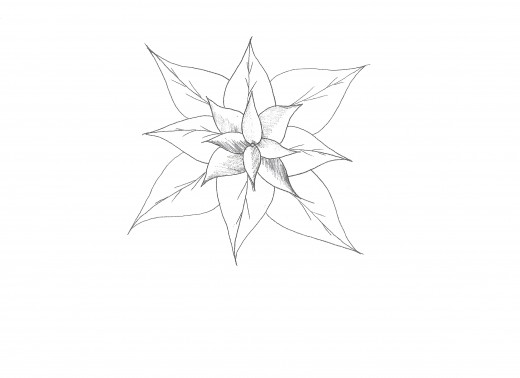
More Leaves
Step 7
Now add some more details.
Start shading in the petals. This can be done with a
colored pencil, shader, or just shade with pen or pencil.
The color of the petals is up to you, it is your flower.
Try different colors, maybe your favorite.
For this tutorial, I will use red. This will be done later.
You do not have to add color until you are done
drawing your flower.
Shading and Details
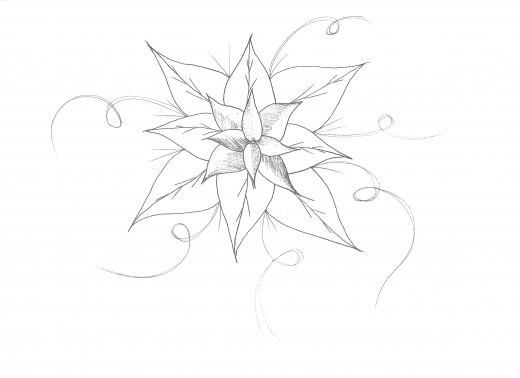
Step 8
Tails and Fox Tails
We want to add a little more detail to
our flower. In order, to add the Tails,
draw a line starting between two leaves,
go out to open space, loop around,
and lift pencil.
Then, do it again, only this time, to get
a good effect try to draw over the same
line, only do it faster this time.
You will not get an exact line over what
you drew before, this is what we want.
We want to lines that look like they
belong to each other.
Continue this around the flower, I did this six times. Yours may be different.
Now for the Fox Tails, simply draw a line out from the flower anywhere you like.
These are short lines, (see Picture) that just flow out.
Vines and Foxtails
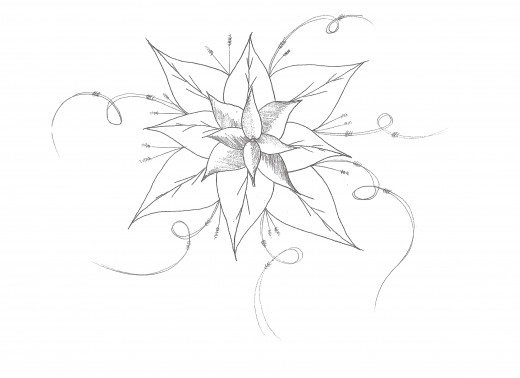
Step 9
Final Details
This is the time when we add the final details to our flower.
Draw small half circles around the Tails. These can placed
wherever you want. For the Fox Tails simply, make some lines
right at the end of the smaller lines. These lines will be sideways.
Final Details
Step 10
Color
At this final stage, we will add color. This is optional.
You may want to keep your flower in black and white.
If you do choose to color your flower, the colors are up to you.
Color

Try it Out!
You can mess around with different things with this flower.
Add more petals, more leaves, whatever.
It is all up to you!
Good Luck!
Happy Drawing!
")


