How to Draw a Human Nose

A Step-by-Step Tutorial for Drawing the Human Nose
The human nose seems to be one of the most difficult appendages of human anatomy for most beginning artists. It doesn't have to be difficult or challenging - after all it's just a collection of lines and shapes that are combined to create the illusion of a human nose on a piece of paper.
I have to say that drawing a human nose was perhaps a bit of a challenge for me when I first started drawing them. But in my line of work, I sometimes have to draw literally hundreds of them a day - and they have to look like good, attractive human noses.
So I did just what anyone would do when faced with a drawing challenge - I hunkered down and started drawing noses by the thousands. Some of my old sketch book pages are filled with nothing but noses from various angles, different types of noses, noses in various light, etc. The point is that I practiced drawing noses until I had them down solid.
SO, when I put these drawing tutorials together, keep in mind that while it looks like I simply drew a few shapes and lines that came together in just the right place - it's really not like that. The reason I can draw noses so easily is because there are literally hours and hours of practice behind them.
Keep that in mind as you go through this tutorial. While your first attempts may not be perfect, just keep trying and you'll soon get the hang of it.
Now, Let's get started - do you have a pencil and something on which to draw?
Let's begin...
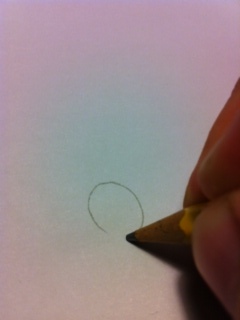
Step 1: Draw a Simple Oval
As with all drawings, they begin with simple shapes and this drawing is no different.
Start by drawing a small oval at a slight angle. Draw it so it looks like it's tipping over to the left a bit, as shown.
It should look sort of like a small egg that's just beginning to tip over.
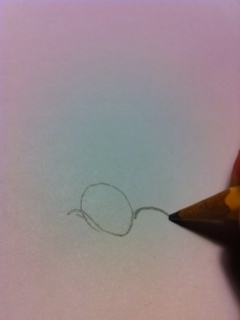
Step 2: Give the Oval Wings
OK - this is a real simple step but very important that you do it just the way you see it drawn there to the right.
You're going to draw two curved lines, one smaller curved line on the lower left side of the oval and a longer curved line on the lower right side of the oval.
When you're finished, your oval should have two lines that looked liked curved wings on either side of the oval.
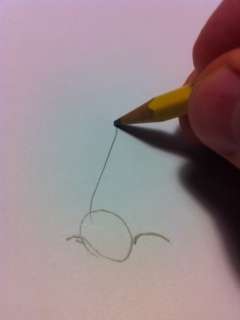
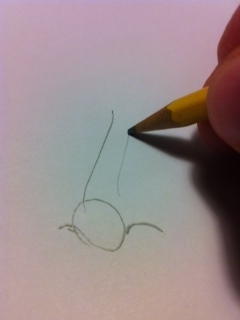
Step 3: Add a Single Line
Next, from the top left side of the oval, you're going to draw a straight line.
This line should be about the twice the length of the oval's diameter.
This line represents the front edge of the nose.
Step 4: Add Another, Lighter Line
Running parallel to the straight line you drew in the previous step, draw another line as shown, running just alongside the first line.
Make sure you draw this line a bit lighter than the first line.
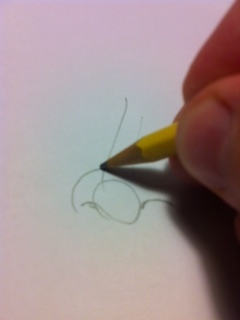
Step 5: Add the Side of the Nostril
This is where your drawing will really start to look like an actual nose.
As shown to the right, carefully draw a semi-circular shape just to the left of the basic oval shape.
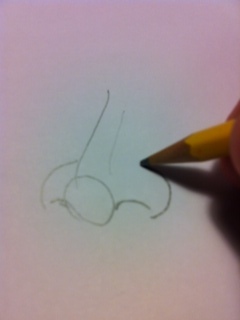
Step 6: Add the Left Nostril
Now really pay attention to where you're drawing lines, especially with this line and the previous line.
As shown to the right, carefully draw another semi-circular line just to the right of the oval shape and a bit above the lower curved line.
At this point, your nose should really look like a human nose.
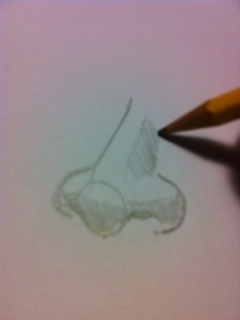
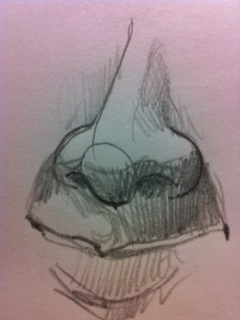
Final Step: Add Some Shading
SO, if you have drawn it correctly, you should have a series of one shape (oval) and six lines (two straight lines, 4 curved lines) that make up the drawing on this human nose. Those few lines and single shape make up the basic drawing of a nose.
If you really want to bring the nose drawing to life, give it some simple shading. Using the edge of your pencil, just lightly shade in some shadows on the lower sections under the nostrils and on the right side of the bridge of the nose.
.


