- HubPages»
- Arts and Design»
- Drawing»
- Drawing Tutorials
How to Draw Pokemon: Charizard (Detailed)
How would you rate my Charizard?
Flames of Glory
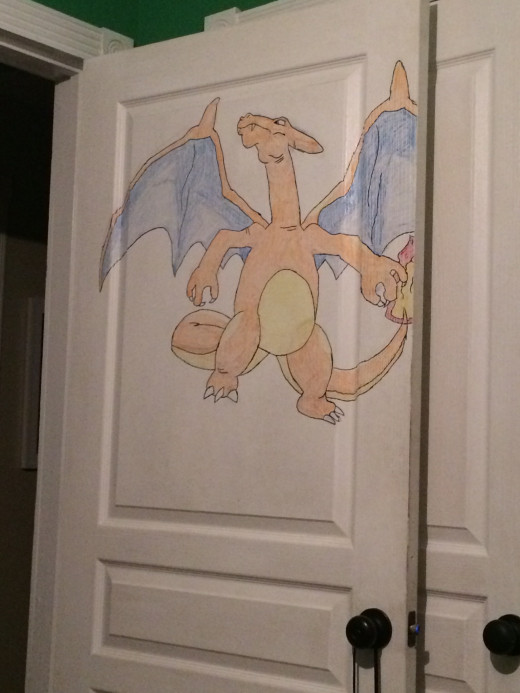
An Awesome Fire Breathing Dragon, my Favorite Pokémon
Hello everyone! Welcome to a brief description on how to draw a Charizard. I will be going about this instructional article by giving you the run down on how to achieve the picture below the text. To simply put it, I will write about Step 1 and then place the picture of what it should look similar to once that step has been completed. I will recommend that you do as I did, and make several attempts at this on paper and not your doors, walls, or anything else that will be a pain to clean up if you so happen to mess up. If you do eventually make it to the door or wall or whatever it is you decide to draw on, please be sure to use a pencil and erase. It will still make a sort of mess, but not as bad as one if you use something more permanent. Remember this is brief! So I will give you the guidance, but you must make the leap yourself. Use the visual guide I have provided through my own work. Step 1 will be the longest for I did not start taking pictures until I had done a lot of things. I was intensely focused because I did not want to screw up my door.
Step 1
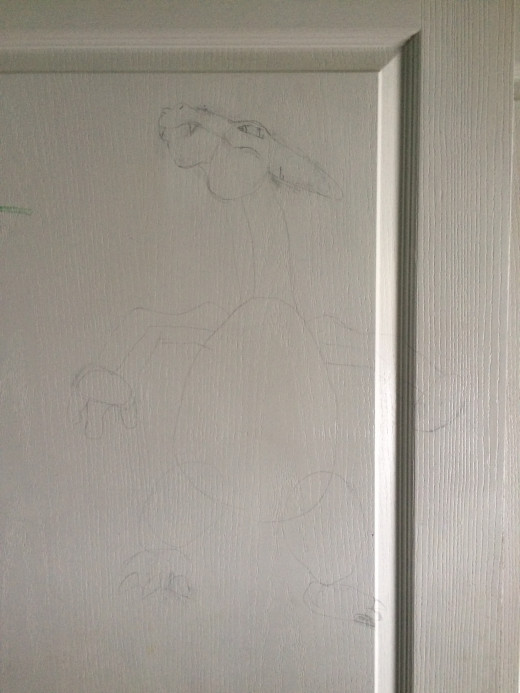
- Alright let us begin, shall we? So you will want to start off by drawing an egg for the head. Then about 5-6 inches down draw an even larger egg shape, about 2-3 times larger than the head, this will be the body.
- Now, draw a line from the bottom-middle of the head to the top-middle of the body. This line is going to be your reference for the neck. Now if you're looking at a unit circle, you'll want move down the head's shape about 3.14 radians (180 degrees) and draw a backwards 3 with lengthened bottom section, but you will need to angle this backwards 3 by 2*3.14/3 radians (120 degrees). This is going to be the nose.
- Now looking at the small oval again, you will need to draw a sideways capital A with the spearhead of the A facing the northwest direction and make sure it is slightly past the middle of the small oval. We move down to the neck again. Time to outline the neck. The left line should be slightly towards the bottom of the small oval, and the right should be towards the right-middle of this oval.
- Next is the body. Draw two sticks for arms at the midway between the side-middle of the large oval and the top. Then draw two small ovals and make the lines you draw as arms center of the ovals at the end.
- Next head to the bottom of the large oval. Get an evenly spaced idea of the bottom in both directions. Then draw two large ovals, barring in mind the even space stays true, for the legs. Now draw two smaller ovals for the feet then leave this section alone for the moment and head up back to the neck.
- Now the right line of the neck, the longer line, You need to draw a sideways U but make it look like it had a baby with a V and have the bottom of the U/V baby pointed southeast. Now head back to that funky backwards 3. Draw an M on the top section of that backwards 3, but have the M cocked a little bit to the left.
- As for the bottom of the backwards three, you will need to draw a sort of backwards J shape to attach the nose to the bottom of the small oval (Head). Now it's time to make the iris of the eye. Make a backwards C towards the spearhead of the A.
- Now on top of the backwards 3 you need to make a funky M for the mouth, refer to the picture to get an idea, also you need to draw the cheek bone, to give it that fine detail.
- After you have placed the mouth, put two slants on the nose to signify the nostrils. Then place two V's at an even distance from one another, to make the fearsome teeth!
- Now let us outline those arms, shall we? So What you need to do is make a sort of hump for the upper part of the arm while following your guideline. Then just mimic the guideline for the lower part of the arms. I would definitely refer to the picture for the part of the process, but your out lines should arrive at the sides of the oval your drew for the hands.
- As for the hands themselves, Make another M shape except make the middle part of the M a little bit longer than its two outer markings. Be sure to make this M a fat rounded M to make the stubby fingers.
- The two ovals for the feet, you need to make uppercase D's and face the hump of the D upwards to make the claws.
The Frame
Step 2
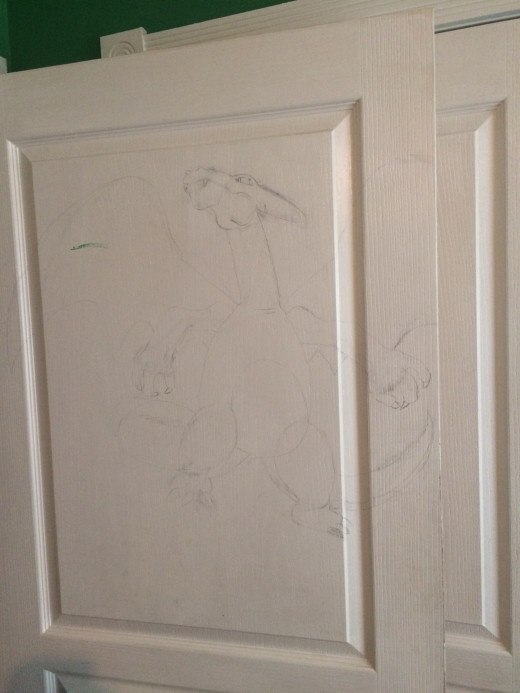
- This section will be focusing on some finer details, the tail, and the wings, don't be discouraged! The wings and tail were the more difficult parts of this drawing. To keep trying and you'll get it down pat.
- So for the top of the two wings, you will need to refer to the picture because their shape is and odd one. It looks like angled question marks, but that is about as close as I can get as far as explaining the shape.
- Now on the left wing, bottom, you will need to make lowercase n's to until you've connected the top and bottom. The same goes for the right side except you need to be making V's until connected to the top section.
- Now you need to add little V's to the hands for the claws. Each claw differs so make a reference to the pictures to get the correct shape for each claw.
- Onward to the tail! Left side of Charizard will be the bulk of the tail. On the left leg make a big lowercase e with the bottom of the e at the bottom of the leg, not the foot, the leg and have the top of the e finish off at the top of the leg.
- Continue the tail to the right side of the left leg by actually making another curved line to mimic the leg's line. Same for the left side of the right leg.
- Next just continue the tail past the right leg and make slim spear, so to speak, as the tip. Be sure to make a small line towards the bottom section of the last piece of the tail, this will be the beige underside of Charizard.
- After this part, head back to the mid-section (the body). Follow along the bottom line of the body to the right and have this circled shape go around and make its way towards the right side of the upper left leg. You should be erasing some of your guidelines by now. This will be Charizard's stomach! Belly button not included.
The Meat
Step 3
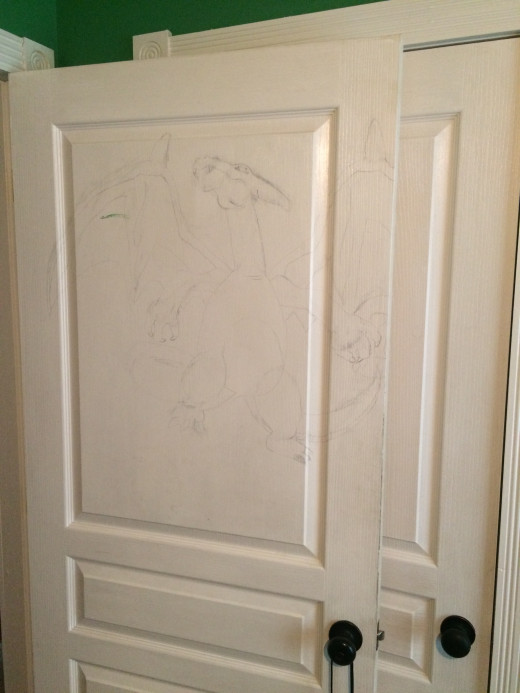
- This step will be finishing up the detailing and working on the flames at the tip of the tail. Then it will be time to outline and color!
- Let us finish up those wings. So at the hump on top of the two wings you will need to make another upside down lowercase n, but elongate it a bit. Make it look like the horn on his head but on the wing instead.
- Also, towards the middle of the wing, you need to make two vertical squiggles. These are the folds of the wing and they give it that nice authentic look.
- Now all that is really left for them is to outline a border for the wings. So that you can have your blue wings with the orange skin outlining it. Only outline the top until you reach the bottom. The bottom section of the wing does not get an outline.
- Time for those flames. Make two ovals over the tip of the tail. The first oval will be horizontal. Then on top of the horizontal oval, draw a vertical one. They should be about the same size as one another.
- These ovals are your guidelines! So now you must begin to draw the waves that we know those dancing flames make. Make them vertical and use your guidelines so that you will not make flames way out in left field. Refer to the pictures!
- Once you are satisfied with the vertical waves. you'll need to make little angled M's to connect the wave. Make sure you make the top parts of the M sharp. This isn't water you know.
- Once that is done you should have a decent looking Charizard.
The Details
Step 4
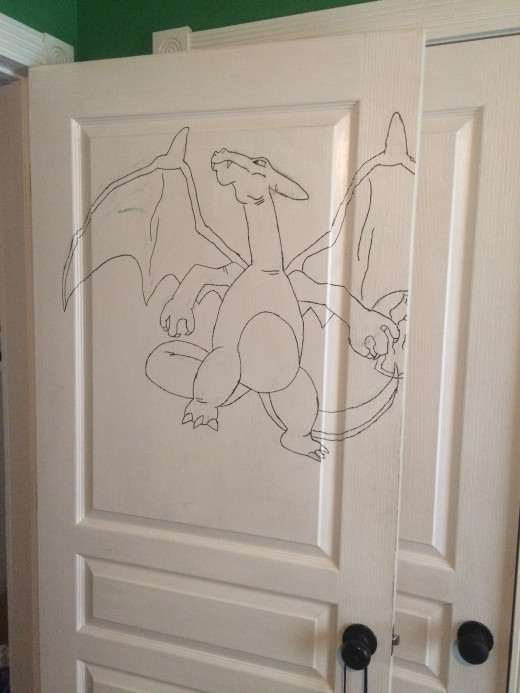
- The steps are getting easier and shorter, hooray!
- It's time to outline with a dark marker, preferably black. I used a permanent marker, so be careful! One silly mistake and you're screwed.
The Emphasis
Step 5
- Onward to the coloring, we're almost done!
- I'd use a red-orange coloring system for the skin only.
The Hue
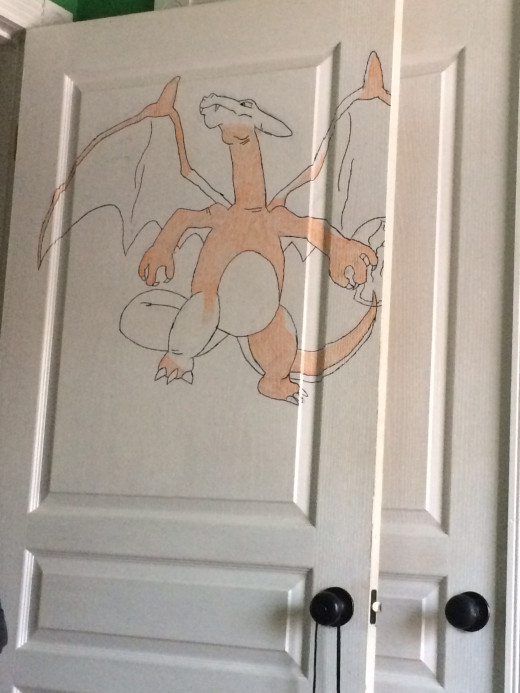
Step 6
- Next we use a beige/golden type color for the under skin. The belly, under the tail, etc.
The Tone
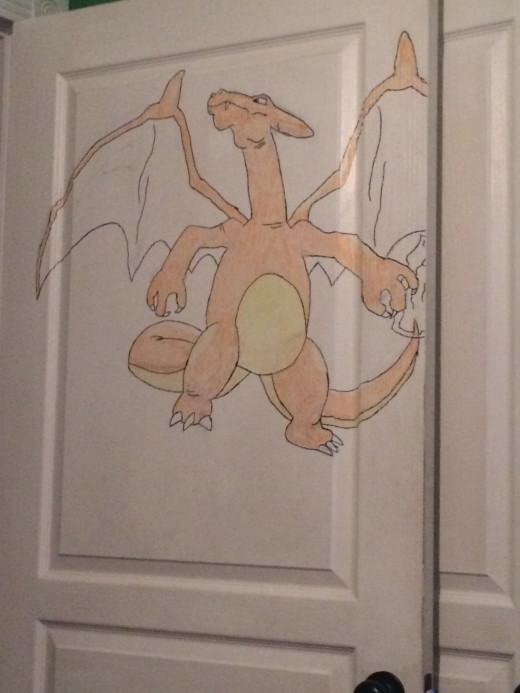
Step 7 (Final)
- Finally we have a nice dark blue for the wings.
- Also I know in this picture the flames are not colored. I used a typical red outline with a yellow for the middle.
The Color
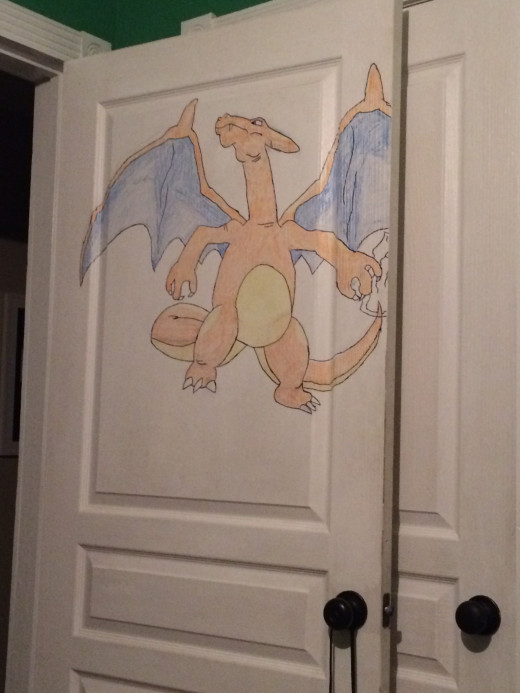
Trail Blazing
Remember everyone. It takes time, practice, and patients to really get this drawing down. Failure is the key to every great thing. Take stride in every mess up you make because that is just one less mess up you'll ever have. I hope you all have done well! Great job!
Critique
How were the instructions?
© 2015 Benjamin J Briley

