- HubPages»
- Arts and Design»
- Crafts & Handiwork»
- Textiles»
- Knitting
How to Knit A Sweater for Toddlers - Free Pattern

It Is Not Hard to Knit a Sweater for Toddlers
There are several ways to go about it, depending on your personality and preference.
- If you prefer to follow patterns, you enjoy seeing something you created that looks like the picture you see, you can just find a pattern you like, and follow it. Make sure you check your gauge, since most knitters have different tension.
- If you like to play with your pattern, making your own, you can find a pattern you like, and adjust it to your preference. Use different yarn than the one suggested, or modify some of the stitches used. If you modify a pattern though, it is even more important to make sure that you check your gauge.
- If you just like to go with the flow, you can improvise, basically coming up with your own pattern.
- If you like planning, following your own ideas, you can design your own sweater.
How to Work Without a Written Pattern
If you have always followed a pattern, you might find it scary to think that you can just come up with their own. In reality it is far easier than it seems. Trust your instincts, and play with that yarn. If it doesn't turn out right, you can always frog it.
There are a few things to understand that really help, if you are trying your hand in designing your knitwear.
- Yarn Requirements:
The first challenge is deciding how much yarn to buy. There are charts out there, that help with this task. I personally just guess, and it usually works out, but if it doesn't, I add a different color and modify the pattern to fit a new scheme. I don't mind improvising, I don't mind changing the pattern as I go along. But if you have something in mind and you want to make it, you should definitely try to get enough yarn, to keep the color uniform. Even the same color from the same store will have a different hue if bought at a different time. Even if you buy it at the same time, check the lot number to make sure it is the same.
When deciding how much yearn to buy, it might be easiest to use the following knitting calculator:
http://www.jimmybeanswool.com/secure-html/onlineec/knittingCalculator.asp
You just type in your data and it gives you an estimate, either using yardage or the metric system. All you need to do is divide the yardage needed for your project by the yardage that is in a skein of the yarn of your choice.
Lion Brand Yarns also has a very helpful chart:
http://www.lionbrand.com//stores/eyarn/upload/faq/yardagechart.pdf
The chart gives you the yardage needed. Your skein gives you how many yards are in it, so you need to divide the yardage you need by the yardage that is in a skein.
I have a chart by Ann Budd that gives me the yardage requirements for many different project and sizes, taking in consideration gauge and yarn weight. It is very similar to the Lion Brand one on the net, but it is a hard copy, colorful and easy to read. I try to keep it in my knitting bag for quick reference. However, most of the time I still just guess and hope for the best. I usually adjust the pattern to the yarn I have, not vice-versa, but that does not necessarily work for everyone.
- Knit a swatch
You need to do this to determine your own gauge. It may be very different from the one that is listed on your yarn, so this step is important. If your gauge is different, you may need to adjust your yarn requirements, so I advise to do it as soon as possible. This way, if you need to buy more yarn, you have a chance to find the same lot number. Again, I personally rarely follow my own advice, and I have paid for it multiple times, with garments too big, too small, or just needed to add different yarn and somehow incorporate it in the pattern. It really is worth your time to knit a swatch.
- Figure out how many stitches to cast on
Once you know your gauge, you figure out how many stitches to cast on for the size you need. For example, you may have 4 sts per 1". You start a toddler size sweater, which has a chest circumference of 24". The 24" is divided by 2 for the front and back, so you have 12" that you need to start out with. The 12" will need 12 x 4 = 48 stitches to cast on.
- Figure out how many rows you will knit
You determined how many stitches to cast on, so you are ready to begin. First you may want to figure out how many rows you will knit. Check how many rows you have in your gauge per 1". For example, you may have 8. That means that you need 8 rows to get 1" length. For a 12" length sweater then you will need to knit 8 x 12 = 96 rows.
You can bypass this step, just measure the length as you go along. I usually don't bother with this, but then I need to try measuring it constantly. It works either way, depends on how you work, if you are a planner, or an improviser.
Now you are on your way, you know how many stitches you are working with and you know roughly how many rows you will work.
- Finally the real fun begins. You can play with stitches!
Depending on what you like or how much you enjoy knitting, you can use the stitches of your choice. If you just want a simple, all stockinette stitch, sweater, you are on your way, no need to do much more, just knit until you reach the neck opening. Even then, you have a choice to keep going straight and just leave it a boat neck.
If you want the sweater (or any knitting project) to stay straight (not roll), you need at least one inch of rib stitch (or any combination of knit and purl stitches work). All stockinette garments tend to roll. It is a preference though, I have made sweaters that roll, just because I liked the look. For rib you have many choices. The simplest is just knit one, purl one stitch, and on the reverse knit the purl and purl the knit stitches. You can combine this with two stitches instead of one, or even three, or two and one, etc. Moss stitch also works just as well, which is just knit and purl, but knit the knit and purl the purl stitches on the reverse.
If you include cables (I love them and tend to include them in just about every project), keep in mind that you will use more yarn, and the finished garment will be tighter. To be on the safe side, knit a separate swatch with all of the stitches you plan to use.
- Shape the neck opening
When your sweater is long enough, you might want to shape the neck opening. You do that by separating the front in the middle, and decreasing continually on both sides, as a mirror image. Same for the back, though you need to go up a bit more and decrease faster. However, if you are a beginner, or just simply want a boat neck sweater, you can skip this step. Your front and back will look like simple rectangles, which is still good, because you can sew the shoulders together leaving a bigger opening in the middle.
- Make the sleeves
The sleeves are made by the same general rule. The main difference is that you need to increase gradually if you want a traditional sleeve. However, for beginners, it is easy enough to just start out with a wider sleeve, especially when it comes to toddler sizes. It will make it easier to put it on anyway, and if you start it with a rib stitch, that also pulls it tighter on the bottom. You generally start at the bottom.
- Sew the pieces together.
For a baby or toddler sweater, it is very helpful if you leave one of the shoulders open, and add buttons to close it. This will make it much easier to put the garment through the baby's head.
- You have just created a sweater, all of your own, without looking at a written pattern! Hope you enjoyed it.
Was this tutorial helpful?
Lovely Ladybugs Toddler Sweater - Written Pattern
I made this sweater originally as a vest for my son when he was about two years old. He wore it a few times. My friend, whose son was the same age as mine, liked it, and asked me to make one for him. Same pattern, same color, same yarn. I found that I had to make notes of the pattern to remind myself how to make it again. Later on, I added to the notes, and my very first written pattern was born.
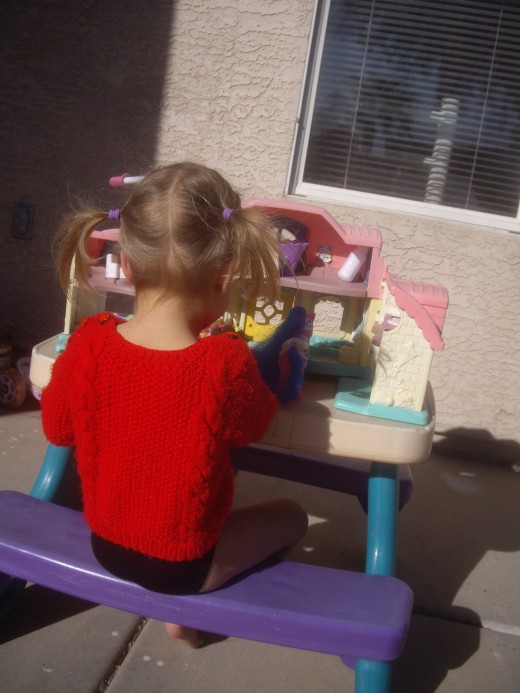
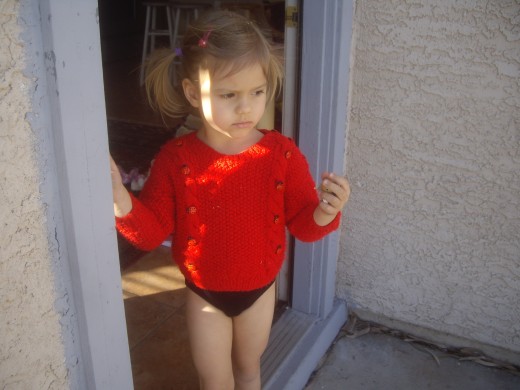
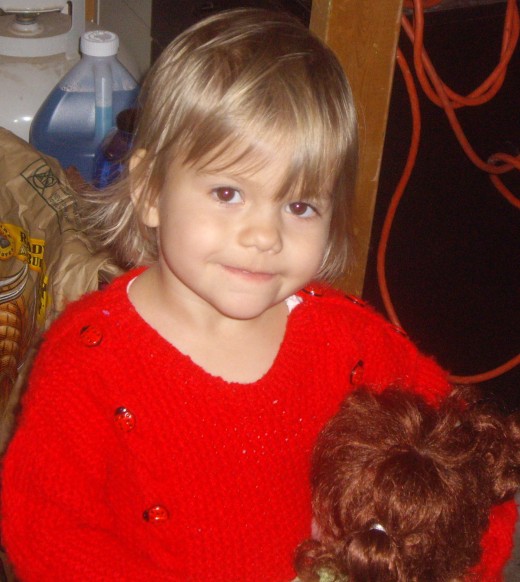
My son only wore it for one season, he grew out of it fast. His sister grew into it, and to make it more girly, I added the ladybug buttons. She wore it a few times, then I put it away.
Seven years later, my youngest daughter was born. By then, I had forgotten about the sweater. When she was about two, she found it and she started wearing it. It became her favorite piece of clothing. She wore since it was very big on her until she totally grew out of it, in town as well as when we were in colder places. All the pictures are taken with her wearing it.
Pattern Notes:
Skill Level: Beginner
Basic Skills Necessary:
- knit, purl, simple increase, basic cable
Size:
- Toddler size 2T - 3T
Materials:
- any worsted weight yarn of your preference
- US size 8 knitting needles, circular or straight
GAUGE:
- 1"x 1" = 4 sts x 8 rows (moss sts)
- 1"x 1" = 6 sts x 6 rows (cable sts)
Stitches Used:
- rib st: K1, P1 in first row - right side; P1, K1 in second row - on wrong side. Make sure that you K the P sts, and P the K sts on the wrong side.
- moss: K1, P1 in each row. Make sure you P in the P st and K in the K st on the wrong side.
- Cable: Knit 4 rows in stockinette st (K on right side, P on wrong side), fifth row is 8 sts cable crossed in front: take 4 sts in the front of work on a holding needle, knit the next 4 sts, then knit the first 4 sts. Repeat these 5 rows.
Abbreviations:
st = stitch
k1 = knit 1 stitch
p1 = purl 1 stitch
m1 = make 1 stitch (increase by knitting 2 sts into one, or any other method preferred)
(WS) = wrong side
(RS) = right side

Pattern
FRONT:
- Cast on 50 sts.
- Row 1 (WS): [k1, p1] to end of row
- Row 2 (RS): [p1, k1] to end of row
- Repeat Rows 1 and 2 two times.
- Row 7: increase 6 sts evenly distributed (1 on each end, and the rest every 8th st)
- Row 8 (RS): [k1, p1] 5 times (10 sts); k8 (for cable); [k1,p1] 10 times (20 sts), k8, [k1, p1] 5 times (10 sts).
- Row 9 (WS); [k1, p1] 5 times, p8, [k1,p1] 10 times, p8, [k1,p1] 5 times
- Rows 10-13: Repeat Rows 8 and 9 twice
- Row 14: [k1;p1] 5 times, slip 4 sts on a cable (holding) needle, k4, k4 from the holding needle, [k1; p1] 10 times, slip 4 sts on a cable (holding) needle, k4, k4 from the holding needle, [k1;p1] 5 times.
- Now the pattern is established: 10 sts moss stitch, 8 sts cable, 20 sts moss st, 8 sts cable, 10 sts moss st.
- Repeat Rows 8 - 14 until sweater measures about 9".
- Repeat rows 9 - 13 once more.
Shape neckline:
- K 24 sts in pattern, K2tog, turn.
- K in pattern to end, turn.
- K 23 sts in pattern, K2tog, turn.
- Repeat until 20 sts remain (10 moss, 8 cable, 2 moss).
- Bind off.
- Shape the other side as the mirror image.
BACK:
- Cast on 50 sts.
- Row 1 (WS): [k1, p1] to end of row
- Row 2 (RS): [p1, k1] to end of row
- Repeat Rows 1 and 2 two times.
- Row 7: increase 6 sts evenly distributed (1 on each end, and the rest every 8th st)
- Row 8 (RS): [k1, p1] 5 times (10 sts); k8 (for cable); [k1,p1] 10 times (20 sts), k8, [k1, p1] 5 times (10 sts).
- Row 9 (WS); [k1, p1] 5 times, p8, [k1,p1] 10 times, p8, [k1,p1] 5 times
- Rows 10-13: Repeat Rows 8 and 9 twice
- Row 14: [k1;p1] 5 times, slip 4 sts on a cable (holding) needle, k4, k4 from the holding needle, [k1; p1] 10 times, slip 4 sts on a cable (holding) needle, k4, k4 from the holding needle, [k1;p1] 5 times.
- Now the pattern is established: 10 sts moss stitch, 8 sts cable, 20 sts moss st, 8 sts cable, 10 sts moss st.
- Repeat Rows 8 - 14 until sweater measures about 10".
Shape neckline:
- K 21 in pattern, BO 8 sts,K 21 in pattern, turn.
- K 20 in pattern, K2tog,
- Shape the other side as the mirror image.
If you would like to keep it as a vest, go to FINISHING.
For a sweater, continue with sleeves.
SLEEVES:
Make two.
- Cast on 26 sts.
- Row 1 (WS): [k1, p1] to end of row
- Row 2 (RS): [p1, k1] to end of row
- Repeat Rows 1 and 2 two times.
- Row 7 (WS): k1, m1, [k1;p1] to end of row, m1 (increased 2 sts = 28 sts)
- Row 8 (RS): [k1, p1] 5 times, k8, [k1, p1] 5 times.
- Row 9 (WS); M1, [k1, p1] 5 times, p8, ]k1, p1] 5 times, m1 (30 sts)
- Repeat Rows 8 - 9 twice (34 sts)
- Row 14 (RS): p1, [k1;p1] 6 times, slip 4 sts on a cable (holding) needle, k4, k4 from the holding needle, [k1; p1] 6 times, k1
- Row 15(WS): M1, p1, [k1, p1] 6 times, p8, [k1, p1] 6 times, k1, m1 (38 sts)
- Row 16(RS): [K1, p1] 7 times, k8, [k1, p1] 7 times
- Row 17 (WS): [k1, p1] 7 times, p8, [k1, p1] 7 times
- Row 18(RS): [k1, p1] 7 times, k8, [k1, p1] 7 times
- Row 19: M1, [k1, p1] 7 times, p8, [k1, p1] 7 times, m1 (40 sts)
- Continue working in pattern, increasing 2 sts (one on each end like established) in every 4th row until you have 48 sts.
- Work till sleeve measures 8"
- BO
FINISHING:
- Sew pieces together, leaving the left shoulder open. •
- Pick up 70 sts at neckline, work in rib sts for 4 rows, BO •
- Pick up 20 sts on the front left shoulder. Knit 3 rows in rib st. BO •
- Pick up 20 sts on the back left shoulder. K 1 row in rib sts, 2nd row: *K1,P1,YO,K2tog*, repeat twice, then K1,P1,K1,P1. BO. (you made three buttonholes) •
- Sew three ladybug (or other decorative) buttons corresponding to the buttonholes on the left shoulder. •
- If desired, sew on more decorative (ladybug) buttons on the cables.
Do you prefer following a pattern or making up your own?
If you knit a sweater, either following my tutorial or my written pattern, please send me a picture, I would love to see what you came up with.
Happy knitting!
")


")

 Pattern With Step-by-Step Videos")