How to Light Paint With Your Camera

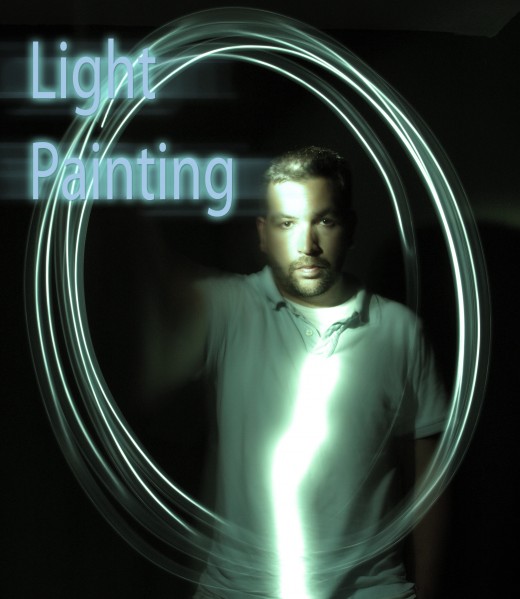
Painting with Light
Painting with light has become a very popular technique in the past few years. It's a fun way to take photos that will impress your friends. Light painting isn't that difficult to do either, you simply need some basic pieces of equipment to get started.
Equipment for Light Painting
- Camera with Manual Mode: The first thing you will need is a camera that has a manual mode, or a camera that at least allows you to control the shutter speed.
- A Tripod: We are going to be taking photos with very long shutter speeds. You are going to need a tripod to avoid blurry photos.
- Light Source: Feel free to get creative with this. You can use anything that emits light to create an interesting effect. The brighter the light source the better. To get started you may want to try using a laser pointer or a flash light. Objects that don't diffuse their light work best, you will want a very direct source of light.
- Dark Environment: Any dark environment will work for light painting. Dark environments outside seem to be more interesting and create better photos. However, if you are looking to practice your skills; a dark room at home will work fine.
- Extra Battery (Optional): You may want to have an extra battery on hand for your camera. I found that the long exposures caused my camera battery to die much faster. You don't necessarily need it, but I found it was helpful.
Setting Up Your Camera
To get started you'll want to put your camera in manual mode. Now their are three settings that you will be playing with to get the look you want for your photo. Each setting will need to be adjusted depending upon how dark the environment is, how bright your light source is and what kind of effect you are going for.
Shutter Speed: This is the obvious setting that you will need to adjust. For light painting you will need to use a very long shutter speed. I wouldn't try to use anything less than 15 seconds.
Aperture Setting: Before you start to mess around with ISO settings, try to adjust the apeture to get the desired effect. If you want more light use a smaller aperture setting (larger opening) or if you want less light use a larger aperture setting (smaller opening). Don't forget that the aperture will not only affect your exposure it will also affect your depth of field.
ISO Setting: This setting determines how the sensor reacts to light. The higher the ISO setting, the more sensitive the sensor becomes to light. As the setting gets higher less light will be needed to take a properly exposed photo. However, as you increase your ISO you will often degrade the quality of the image. You need to play with this setting a find a good setting for your current situation.
You may also need to use the shutter delay settings in your camera if you don't have someone to help you. Light painting is much easier and more fun when you have a few friends with you, but if you plan to do this alone just use the shutter delay. This will cause the shutter to not take the photo right away, which will allow you to hit the shutter and run in front of the camera and get ready.
Perfect Environment for Painting with Light
I find that choosing a location for your light painting is the most difficult part of the entire process. It is best to find a location that isn't 100% dark, you want to find an environment that is nearly dark. Below are a few ideas that I came up with when trying to find a location:
- Try painting with light shortly after dusk. This time of day is dark, but not overly dark.
- Do your light painting on days that have a full moon. The full moon creates a perfect diffused light that isn't overly bright, but bright enough to create a nice photo.
- If you are indoors, try to use a room that has a dimmer switch rather than a room with a regular light switch. Dimmer switches give you the greatest amount of control over your lighting in your environment.
Cool Examples of Light Painting
Click thumbnail to view full-size


Taking your First Light Painting Photo
Once you have your equipment, have your camera set-up and have found the perfect place it is time to get started. You will want to attach your camera to your tripod and frame your shot. Once you are happy with the way the shot looks, set up your shutter delay or have a friend get ready in front of the camera. After the shutter is released the person in front of the camera will need to turn on the light source and begin moving it around. Remember that you only have so much time before the shutter closes so you need to work fairly quickly. Here are a few things to keep in mind when you are moving the light around:
- The faster you move the light the dimmer your line will be in the photo. If you slow down your light the light will become fatter and brighter.
- When spelling, don't forget to turn the light source off between letters. You could also use cursive if you can't easily turn your light off.
- Remember that a certain amount of diffused light will be captured as well; especially if you moved your light slowly.
- If you only want the light to appear and not the person make sure the person is moving quickly and is wearing dark colors. If the person holding the light stands still for too long a ghost like image of them will appear in the photo.
- Lastly, avoid pointing the light directly at the lens.


