- HubPages»
- Arts and Design»
- Crafts & Handiwork»
- Paper Creations
How to Make Beautifully Colored Paper Beads Out of White Paper

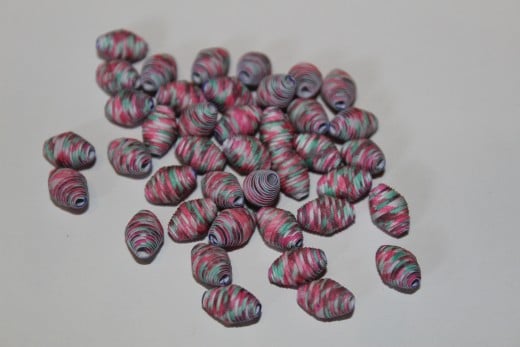
Completed Paper Beads
Introduction
This tutorial is how to quickly color paper to create colorful and completely unique paper beads. We will be using very common materials that you should have laying around the house. This is not a bead making tutorial if you don't know how to roll the paper beads I suggest pinterest or youtube there are many amazing tutorials for basic paper beads or how to make different shaped beads. Just remember to stop back here to learn to make your own beautiful papers.
What you need
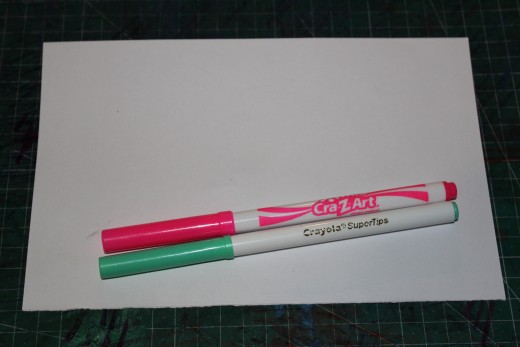
For this tutorial I'm using a Crayola supertips marker with a CrazyArt fine tip marker. You can use any markers you have laying around in your house, crayolas, sharpies, I have some old Spectrum Noir markers I use for this a lot as well. For the paper any plain white paper will work perfectly, I have half a sheet of cardstock that I'm using because I don't like my beads really fat but use any weight of paper you know you like using. You are also going to want something you can get color on, I use my old quilting mat because it has a break in it, but a piece of newspaper underneath will work just as well.

How to Start
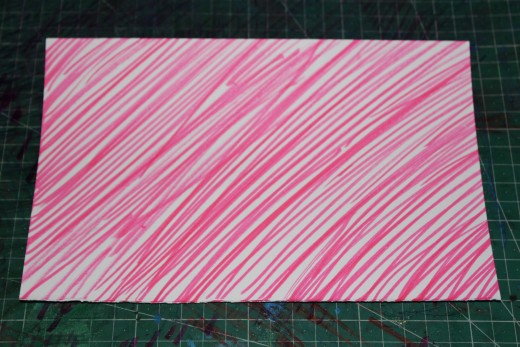
I like to begin with the lighter of the two colors that I choose because the other one then can be layered on top with less discoloration. You can do it the other way around if the colors blend well (like blues and greens) but with colors that don't blend well you will end up with muddy colored beads. You will want to draw lines in a diagonal direction. These lines do not need to be perfect, the messier they are the more colorful the beads end up in the end and the less of the white paper will show through.
Finishing Color One
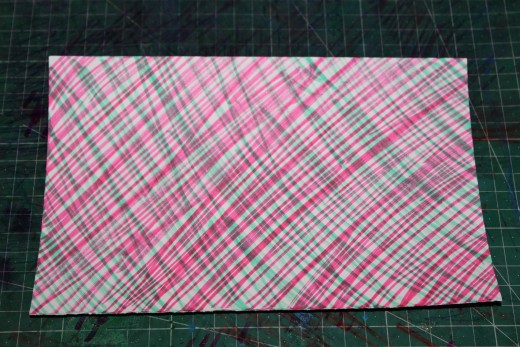
Continue drawing stripes all the way across your paper, make sure the stripes reach the top and bottom otherwise you will end up with a lot of blank spots on your beads. Again I would like to say they end up much more colorful the messier you do the stripes, as you can see mine are mostly scribbles across the paper. Before you move onto the next color you should look over your paper and if there's any big white gaps fill those in a little bit. You do what some white showing through however, otherwise the second color will end up muddy when layering on top.
Beginning Color Two
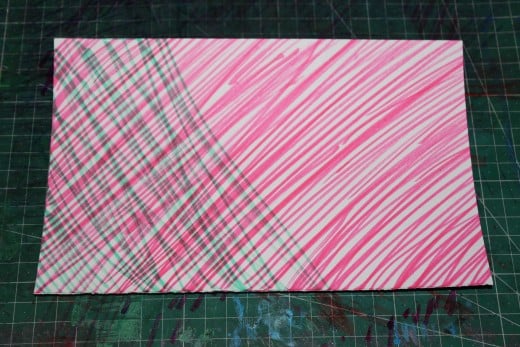
For the second color you want to repeat what you did with the first color but go in the opposite direction. With this color you want to watch and make sure you are keeping a balance in the two colors because the darker color will cover up your lighter color and make for muddy beads. You will want these lines nice and close to each other still to make sure the beads end up as colorful as possible.
Finishing Color Two
Finish up the paper by going completely across with your second color, as you can see my lines are extremely messy it makes for more colorful beads in the end and I like that look. When you finish look over the paper and look for any areas that have a lot of white showing through and add some more color. Also double check that all your edges have a lot of color otherwise the edge strips end up only partially covered, or the tail of your bead may end up with no color.
Making the beads
Now that the paper is done you can flip it over draw out your bead templates and create your beads. The beads in the picture are made from cardstock, if you use copy paper you will end up with skinnier beads, or if you use a thicker paper such as watercolor paper you will end up with much thicker beads. You can also use more than two colors, one idea I enjoy doing is a light blue and dark blue one way then light green and dark green the other it makes very cute beads. Once you cut your strips you can also color the tail the darker color and it will make them look more like a striped bead, which is also cute, and it makes sure no white shows through on your tail.


")
