ArtsAutosBooksBusinessEducationEntertainmentFamilyFashionFoodGamesGenderHealthHolidaysHomeHubPagesPersonal FinancePetsPoliticsReligionSportsTechnologyTravel

How to Make Beautiful Paper Flowers Part II: The Technical Details.
Updated on October 1, 2012
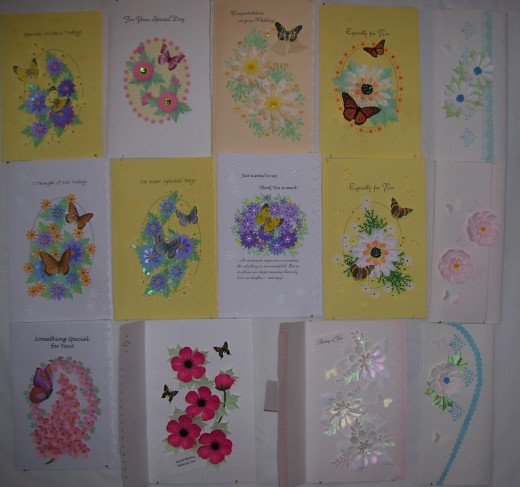
These flowers are demonstrated on card fronts, but usuable in every place you want to put beauty.

From flat cardstock, you can accomplish these lovely flowers to your heart's desire!

This is a further explanation of the techiques used to form paper flowers in a fantastic multitude of color, type and size. All these florals may be used for greeting cards and scrapbooking, even for bouquets on a wrapped gift. Some have been framed as pictures or used to decorate a wedding album cover, even on a birthday cake.

It's your choice to create whatever type you wish, and the wide variety of colors in cardstock and heavy papers is wonderfully tempting. The supplies information is in the first hub on making uniquely beautiful flowers, as is some basic instruction for contouring the flowers.

Here are more detailed technique tips and photos to assist you in your creative process. Once you have practiced how to contour your leaf and floral shapes, you may construct easily and discover your own shortcuts and methods.


Close up samples of papercrafted flowers.
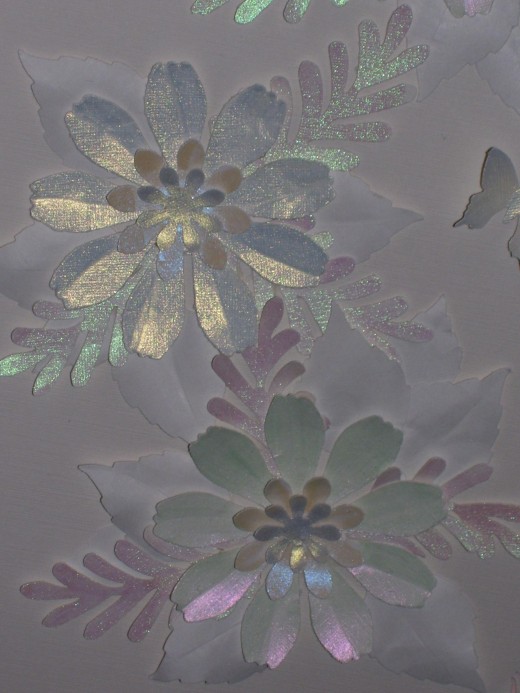
A shimmering play of rainbow light for misty romatic display. This is a retired paint by RoseArt.  PearlEx interference colors will appear similar.
A shimmering play of rainbow light for misty romatic display. This is a retired paint by RoseArt. PearlEx interference colors will appear similar.
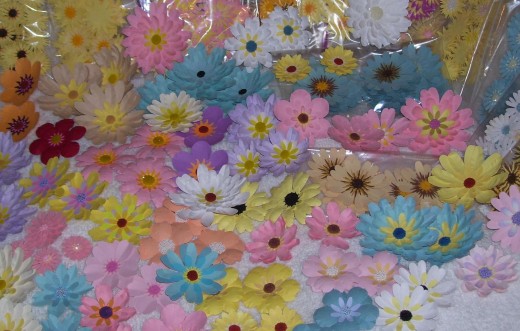
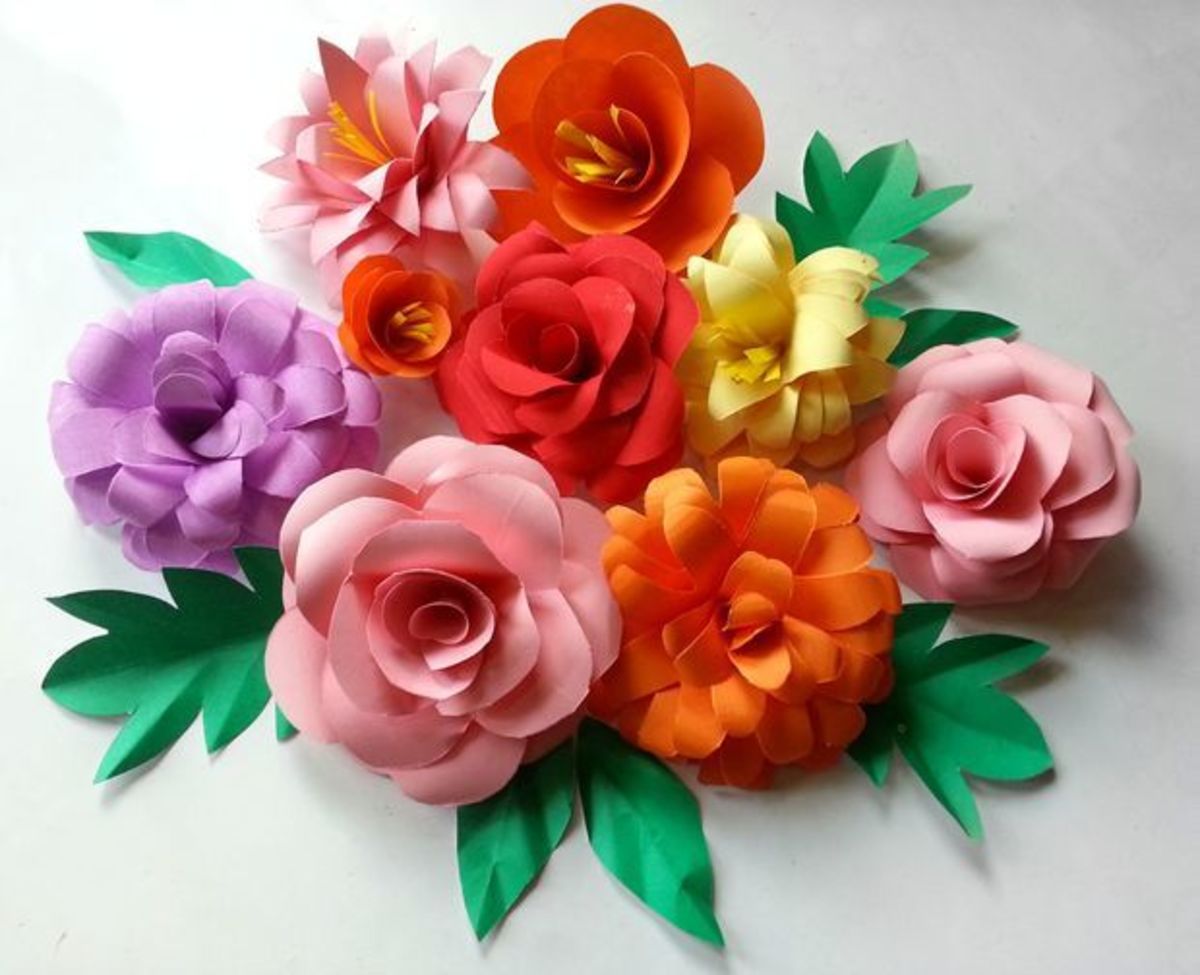
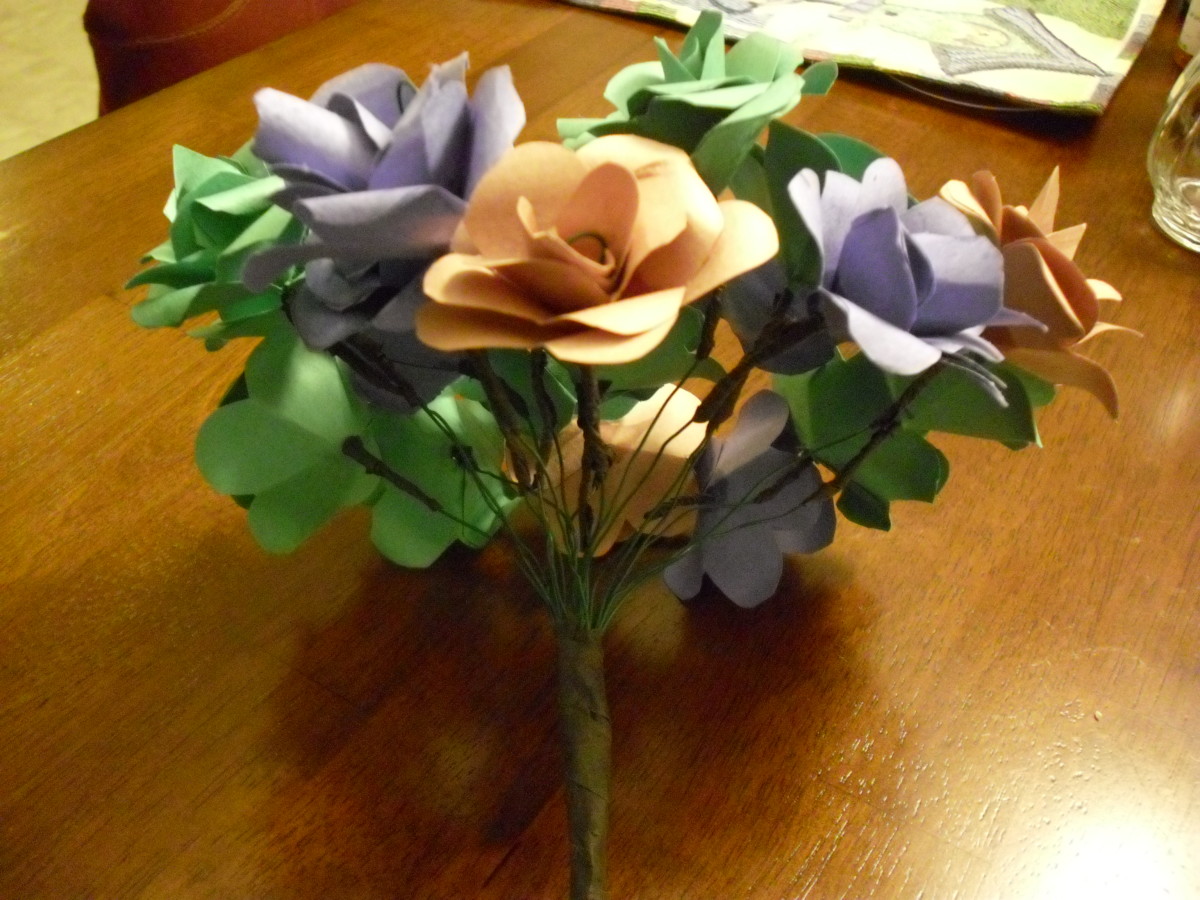
Cardstock variety of flowers. Some are curved upward, on others petals curve down.

The choices you make in cardstock texture and color, the size of the punch or cutout, the layers of the flower, the way you contour the petals and leaves, all make for wild and wonderful creations from your own fancy.
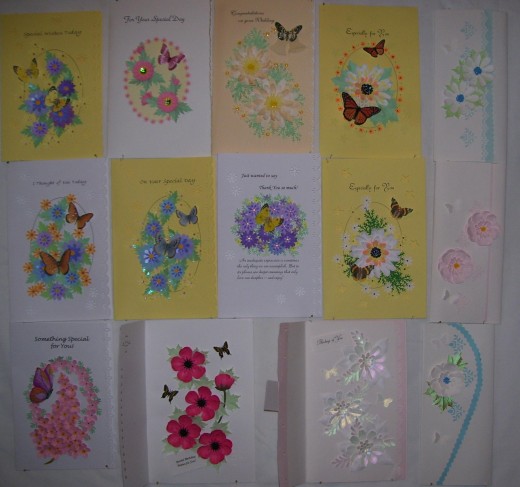
Whether a tiny love-me-not daisy or a large he-loves-me, it is matched only by the beauty of an apple blossom, or your favorite fantasy flower.

These illustrations show the progression of building your flower.
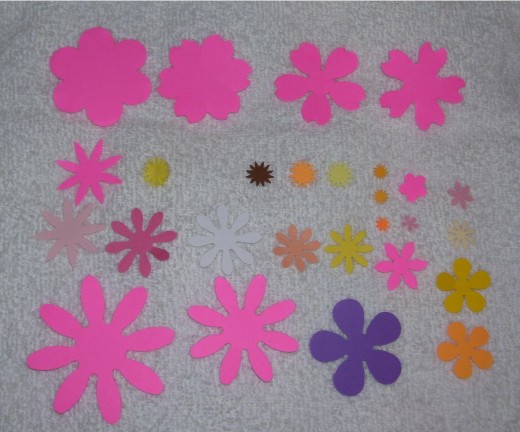
These are punched out shapes.  Work from largest shape on bottom of flower, adding consecutively smaller shapes as desired.
These are punched out shapes. Work from largest shape on bottom of flower, adding consecutively smaller shapes as desired.
These shapes have been partially contoured using a rounded 'tool' and a mousepad. The two lower petals of each one is not yet contoured.
The dimensional glue glob has just been applied and is ready for pouring on the craft sand -use lots and let it dry at least 3-5 minutes before checking to see if it is dry enough to mold the center shape.  Work fast so the glue does not skin over.
The dimensional glue glob has just been applied and is ready for pouring on the craft sand -use lots and let it dry at least 3-5 minutes before checking to see if it is dry enough to mold the center shape. Work fast so the glue does not skin over.
The sand is poured on and drying.  I used FolkArt's Papier glass finish and it does not take long to dry before checking.  Maybe 3-5 minutes at the most.
The sand is poured on and drying. I used FolkArt's Papier glass finish and it does not take long to dry before checking. Maybe 3-5 minutes at the most.

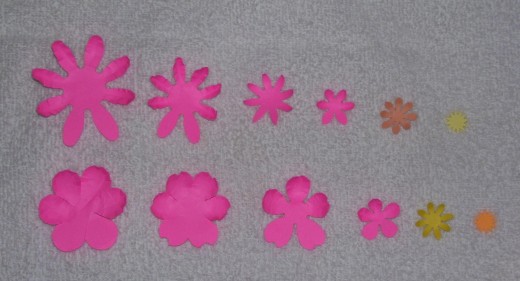
This layout shows varied sizes of punch-outs to glue together for the flower.

The pink petals range from large to smaller sizes. Each flower except for the tiny sizes, needs at least two layers and will sometimes have as many as five or six total layers, each glued atop the lower, until you are ready to choose what center you want-large or small, paper, glitter, craft sand, rhinestones, pom-poms.

I use an inexpensive thick white glue for all but the topmost layer for the glue-glob, which will be 'sanded' to make a raised textured center. The 'sanding' glue must be a dimensional type such as Glossy Accents by Inkssentials, Diamond Glaze, Aleene's Paper Glaze, FolkArt Papier Glass Finish, clear. Also Royal Coat Dimensional Magic, clear. These glues are more expensive so are used only for the 3D flower center. Hobby stores such as Hobby Lobby, Michaels, Martha Stewart's products, and many online stores like eBay and Amazon.com. will offer varieties of these dimensional glues. The sand is inexpensive kid's crafting sand and comes in several colors. Is available most commonly at craft stores.

With lighter colored sands, the color of the flower center paper will make a slight difference in the way the sand appears. Sometimes I will use a varied color wheel of centers for the same flower group, and thus the centers will have slightly varied centers to achieve a more realistic appearance.  Also, if  you use a colored dimensional glue (as above) or a 3D paint glue, the color of the finished sand center will change slightly.  This gives a subtle variation which looks very natural in the flower arrangements and is an attractive asset you can try. 

It pays to try your paper, glue, sand combination on a scrap center or piece of paper before you use it for your florals to see if it is a color combination you like.  I have used a yellow paper and transparent 3D paint glue in combination with another shade of yellow paper and the same paint glue, then two shades of yellow sand.  Center punch-outs may also be shaded with colored pencils to utilize the ascending color choices, but markers do not work as well as they tend to bleed when the glue is applied.  IF you are careful to fully sand the marker colored area, color bleeding is not a problem. 

The shapes are glued in layers and are ready to sand.

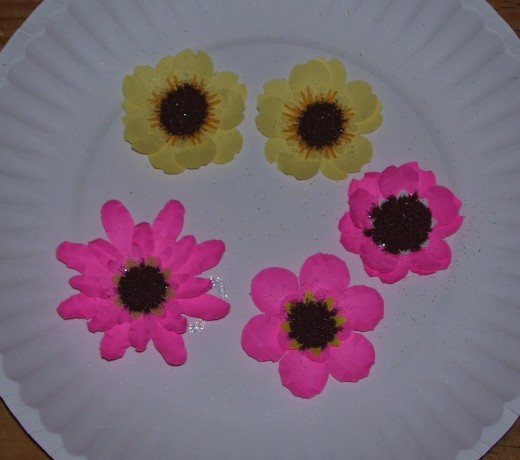
With contouring finished, the center area of the flower will receive a glob of clear dimensional glue. It is best to pour on the sand as quickly as possible after pouring on the glob as it does skim over and may dry too quickly to receive the sand properly. Pour on plenty to overly cover the glue glob and let dry for 3-8 minutes.

Different glues dry at varied times so you will learn how long to wait. Be aware that the darker sands will show more 'boo-boos' in the shape of the glue than the ligher ones. This sand is light chocolate brown. You may test check the drying condition of a flower by dumping off the sand and carefully touching the side of the raised center. If you have not waited til it is too hardened, you may very carefully adjust the shape of the sand-center with your fingernail or similar small flat tool.

 It does need to set for as long as an hour or two with some glues before it entirely hardens inside the whole glob.  Very careful glue-globbing helps form nice circles or ovals, but there is always a center that needs to be shape-adjusted before it gets completely hardened.
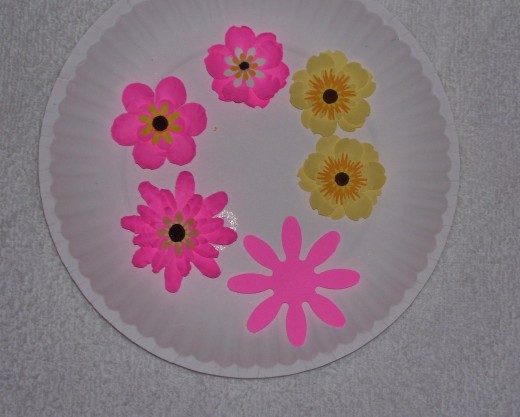
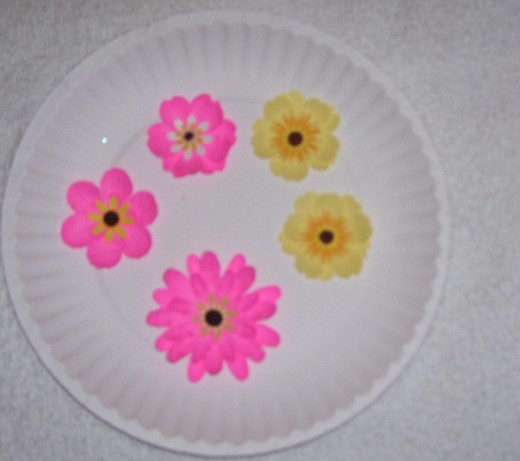
I have dumped off the 3-4 minute sanding and adjusted the glue centers.  I don't like the largest flower and will add another large set of petals to the bottom to make a fuller flower.
I have dumped off the 3-4 minute sanding and adjusted the glue centers. I don't like the largest flower and will add another large set of petals to the bottom to make a fuller flower.
The additional petal shape has been glued on.  The flower is fuller, nicer this way.
The additional petal shape has been glued on. The flower is fuller, nicer this way.
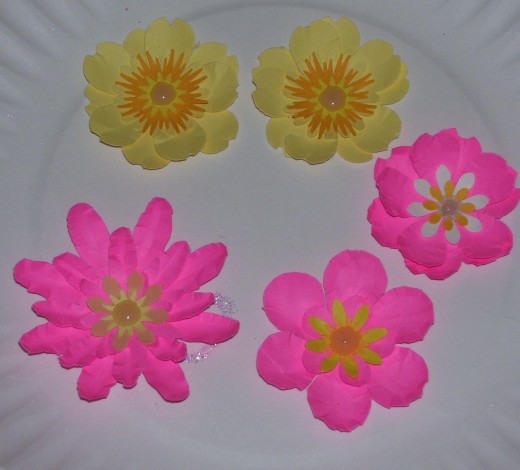
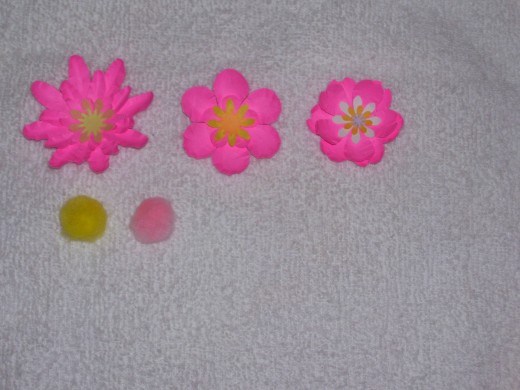
These three flowers are ready for centers.  Two pom-poms have been carefully trimmed on the bottom for this.
These three flowers are ready for centers. Two pom-poms have been carefully trimmed on the bottom for this.
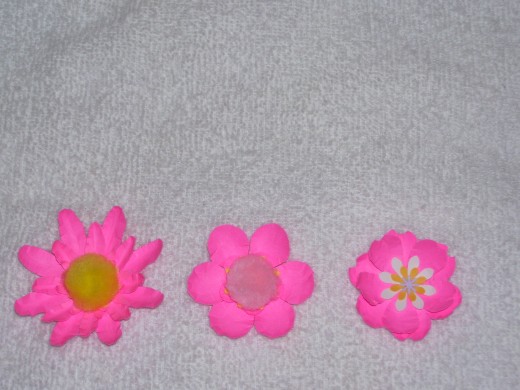
I just placed the trimmed pom-poms into the center for illustration as I will use a different type center.
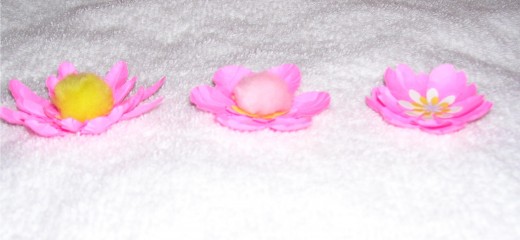
You can see how the petals have been contoured upward.  It gives the flower a 3D look.  This is a view with pom-pom centers.
You can see how the petals have been contoured upward. It gives the flower a 3D look. This is a view with pom-pom centers.

Petal shapes may be glued together with contoured tips up or down. This dramatically changes the look of the same punched petals and floral variation.
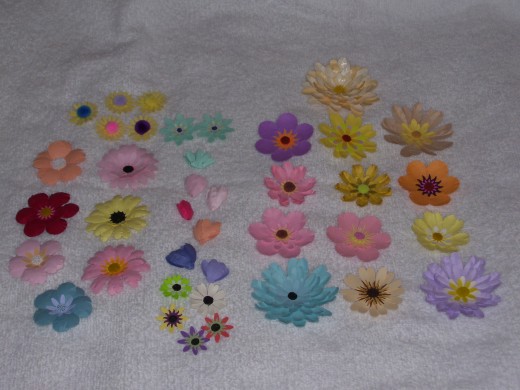
A small variety of flowers and buds. Contoured down petals on the left, up ones on right.
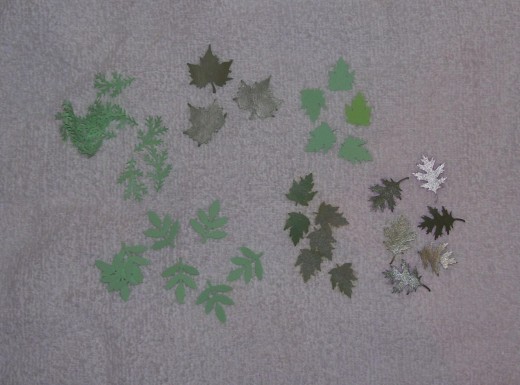
A few of the leaf types.  There are many variations. Some are quite large and these are suitable for a single large flower or two.
A few of the leaf types. There are many variations. Some are quite large and these are suitable for a single large flower or two.

Card size, weight, 3D all matter in mailing.

Whatever punch sizes you choose to use, each petal needs to be contoured for the 3D effect. I normally use plain colored cardstock but tiny polka-dots or stripes are nice to achieve a totally different look. The number of petal-punched layers affects the look of the flower, and also the weight and bumpiness of the finalized card, so if postage is a matter, remember this!

The cards do mail very well, but it is probably wise to save the larger heavier flowers for those cards you will deliver personally. However, I have mailed many to both coasts and Florida from the central USA and they arrived still being beautiful! You will need to request 'hand cancelling' for most of the cards so as not to risk a post-office jam-up!

I do computer-generate a tiny card with instructions to 'gently lift each petal, leaf or butterfly to achieve more prominent 3D effect' and place it inside each card mailed. However, you cannot flatten the flowers after contouring, though some flattening does occur when they are sent through the mail. Many cards are displayed by the receipent because they are so surprisingly beautiful!  You will love the thanks YOU get from the person who received your unique greeting card.

Contouring tips

Any sort of smooth-rounded-tip tool might work for contouring the cardstock petals or leaves. You will use the tool on a soft pad like a mouse pad or thin stiff foam and apply pressure to the cardstock petal or leaf to 'curl' it. More pressure means more curl. You may also curl flower tips like daisies between your fingers if desired.

I have used sanded-smooth toothbrush handles, dowels, old pens with round tips, knitting needles, cocktail stirrers, large nails, and various kid-craft items found in unexpected places. It is fun to gather your items and find one that works unexpectedly to suit your purposes.

The main action to be aware of when contouring the cardstock is to NOT pounce at a 'high angle' as this might pierce the paper. If you hold the shaping tool chosen at a nearly horizontal angle to the paper, you can curl and shape with vigorous motion and achieve varied kinds of contour effects. The angle and pressure are your choice to measure and obtain the type of floral or leaf shape you wish.

An easier and faster way to demonstrate the 3-D effect on the cardstock is to simply use the end of a crochet hook or knitting needle - or other tool item you choose - and use the small size to simply draw a 'pressure line' down the length of the petal or leaf. I usually do the leaves this way, as it gives them distinct veins like leaves should have. Some leaves do need more than one vein, such as the maple leaves with three veins; one to each tip.

Refer to the first hub to note how to glue leaves in place for your flowers. You may use several per blossom, or a very few, both depending on what type leaf it is and how busy you want the floral picture to appear. Leaf cardstock can be very light green or very dark Christmas green - and every shade in between. I like to have two or three close shades of leaves mixed and this gives an interesting slight color variation.

Some cards may be elegantly lovely with just one large flower and a large leaf or two.  This type works well to express a simple condolence from the heart - classy, not overworked, and sincere:  Your gift from the heart!

Mothers Day cards added late April, 2010

I made these three cards for relatives for Mothers Day next month.  Wanted them similar...yet each is lovely in its own way.
I made these three cards for relatives for Mothers Day next month. Wanted them similar...yet each is lovely in its own way.

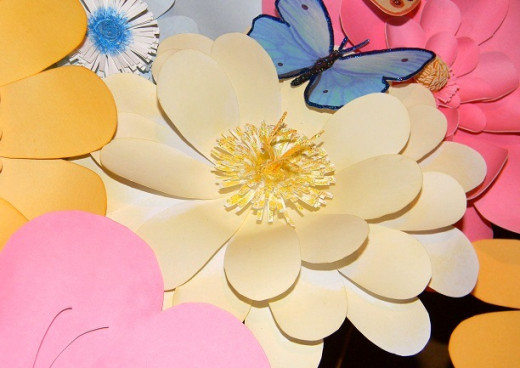
A few more heavy cardstock flowers - giant size!
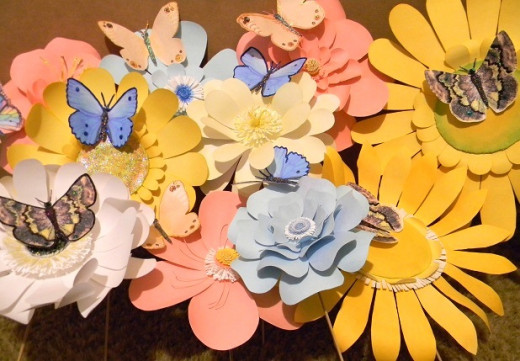
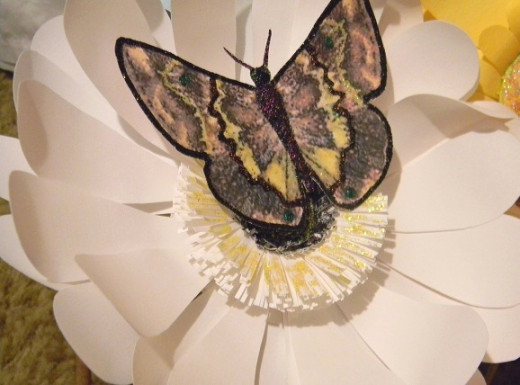
Butterflies landed beautifully on these lovely flowers.
Butterflies landed beautifully on these lovely flowers. | Source
The butterflies are also made of cardstock and glittered.
The butterflies are also made of cardstock and glittered. | Source
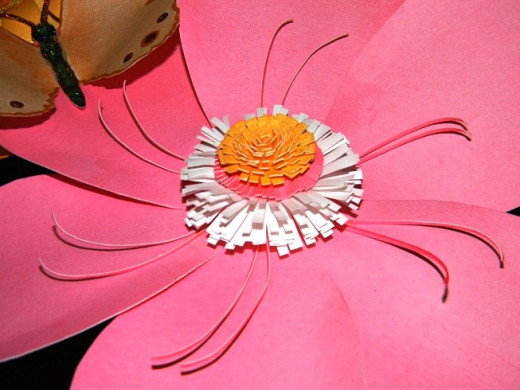
The short and high lengths of cardstock are glittered to make an interesting center.
The short and high lengths of cardstock are glittered to make an interesting center. | Source
Clipped and rolled, the cardstock is glued well for a 'button type' center.
Clipped and rolled, the cardstock is glued well for a 'button type' center. | Source
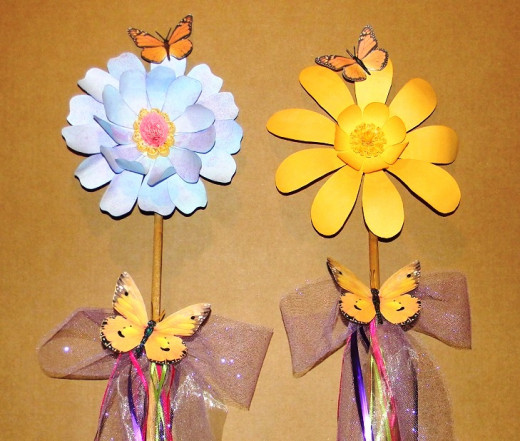
These 36" floral stakes were made for the Jerusalem Butterfly Festival 2012 - even though it rained!
These 36" floral stakes were made for the Jerusalem Butterfly Festival 2012 - even though it rained! | Source
working

This website uses cookies

As a user in the EEA, your approval is needed on a few things. To provide a better website experience, hubpages.com uses cookies (and other similar technologies) and may collect, process, and share personal data. Please choose which areas of our service you consent to our doing so.

For more information on managing or withdrawing consents and how we handle data, visit our Privacy Policy at: https://corp.maven.io/privacy-policy

Show Details
Necessary
HubPages Device IDThis is used to identify particular browsers or devices when the access the service, and is used for security reasons.
LoginThis is necessary to sign in to the HubPages Service.
Google RecaptchaThis is used to prevent bots and spam. (Privacy Policy)
AkismetThis is used to detect comment spam. (Privacy Policy)
HubPages Google AnalyticsThis is used to provide data on traffic to our website, all personally identifyable data is anonymized. (Privacy Policy)
HubPages Traffic PixelThis is used to collect data on traffic to articles and other pages on our site. Unless you are signed in to a HubPages account, all personally identifiable information is anonymized.
Amazon Web ServicesThis is a cloud services platform that we used to host our service. (Privacy Policy)
CloudflareThis is a cloud CDN service that we use to efficiently deliver files required for our service to operate such as javascript, cascading style sheets, images, and videos. (Privacy Policy)
Google Hosted LibrariesJavascript software libraries such as jQuery are loaded at endpoints on the googleapis.com or gstatic.com domains, for performance and efficiency reasons. (Privacy Policy)
Features
Google Custom SearchThis is feature allows you to search the site. (Privacy Policy)
Google MapsSome articles have Google Maps embedded in them. (Privacy Policy)
Google ChartsThis is used to display charts and graphs on articles and the author center. (Privacy Policy)
Google AdSense Host APIThis service allows you to sign up for or associate a Google AdSense account with HubPages, so that you can earn money from ads on your articles. No data is shared unless you engage with this feature. (Privacy Policy)
Google YouTubeSome articles have YouTube videos embedded in them. (Privacy Policy)
VimeoSome articles have Vimeo videos embedded in them. (Privacy Policy)
PaypalThis is used for a registered author who enrolls in the HubPages Earnings program and requests to be paid via PayPal. No data is shared with Paypal unless you engage with this feature. (Privacy Policy)
Facebook LoginYou can use this to streamline signing up for, or signing in to your Hubpages account. No data is shared with Facebook unless you engage with this feature. (Privacy Policy)
MavenThis supports the Maven widget and search functionality. (Privacy Policy)
Marketing
Google AdSenseThis is an ad network. (Privacy Policy)
Google DoubleClickGoogle provides ad serving technology and runs an ad network. (Privacy Policy)
Index ExchangeThis is an ad network. (Privacy Policy)
SovrnThis is an ad network. (Privacy Policy)
Facebook AdsThis is an ad network. (Privacy Policy)
Amazon Unified Ad MarketplaceThis is an ad network. (Privacy Policy)
AppNexusThis is an ad network. (Privacy Policy)
OpenxThis is an ad network. (Privacy Policy)
Rubicon ProjectThis is an ad network. (Privacy Policy)
TripleLiftThis is an ad network. (Privacy Policy)
Say MediaWe partner with Say Media to deliver ad campaigns on our sites. (Privacy Policy)
Remarketing PixelsWe may use remarketing pixels from advertising networks such as Google AdWords, Bing Ads, and Facebook in order to advertise the HubPages Service to people that have visited our sites.
Conversion Tracking PixelsWe may use conversion tracking pixels from advertising networks such as Google AdWords, Bing Ads, and Facebook in order to identify when an advertisement has successfully resulted in the desired action, such as signing up for the HubPages Service or publishing an article on the HubPages Service.
Statistics
Author Google AnalyticsThis is used to provide traffic data and reports to the authors of articles on the HubPages Service. (Privacy Policy)
ComscoreComScore is a media measurement and analytics company providing marketing data and analytics to enterprises, media and advertising agencies, and publishers. Non-consent will result in ComScore only processing obfuscated personal data. (Privacy Policy)
Amazon Tracking PixelSome articles display amazon products as part of the Amazon Affiliate program, this pixel provides traffic statistics for those products (Privacy Policy)
ClickscoThis is a data management platform studying reader behavior (Privacy Policy)