How to Make Your Own Liquid Chalk Marker?


Remember the chalk dust; that was created out of regular chalks you used during your childhood? Yeah, it was something that worked as an irritant to the people who are prone to allergies. My childhood memories make me mesmerize the chalk dust and the round chalk pieces that teacher used to write on the blackboard. I still remember that I loved eating it because of its taste that was always nice on my tongue.
Of course, it's an unhealthy practice that must not be encouraged at all.
It is a form of limestone made up of calcium carbonate. Though, modern blackboard chalk is made of calcium sulfate and is available in the market as a stick of 4 inches in a compressed powdered form.
Over the years people have been using chalks to write on blackboards, but as it produces a lot of dust, people suffering from asthma and other dust allergies may not tolerate the presence of the dusty cloud. Also, eating it can be dangerous because of the toxic elements it contains.
If you feel that you need to use the chalk for some reason, but a regular choice is not what you are looking for, you may need an advanced version to keep the dust at bay. Liquid chalk is an excellent remedy to enjoy the uses of a regular chalk. Buying a liquid chalk can be an expensive deal because even the 2oz bottle can cost you around $10-$15.
You can make your liquid chalk paint at home, and it's really very easy.
Liquid chalk recipe:
- A durable plastic bottle to store liquid chalk
-
A big chalk block
-
Isopropyl
-
An utensil to mix and sttir and a funnel to pour in a bottle meant to store the liquid
-
Alcohol
The great thing is that you can store it anywhere without the fear of getting spilled.
Method:
Take your chalk block and break it to make a fine powder out of it. Now scoop into a utensil and add alcohol to it. Stir it well when you add chalk powder to it. The consistency should be as thick as yogurt. Now pour in an airtight plastic container and store the liquid. You may change the ratio according to your requirement. I like the thicker consistency, so I make use of less alcohol and add more of dust to it.

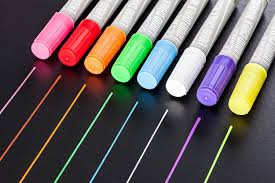
Believe me; you will love this liquid. You may add colors to it for deriving its colored version. You can use it for several purposes. I have seen people using it for several outdoor campaigns where you might need a liquid marker to make boundaries, lines and another sort of art. In fact, art lovers know how to make the best use of it.
Though, after you acquire a ready mix, you might be left with stained hands at the end of the day, but believe me making it at home will save you a lot of money.
I have my own set of reason to use liquid chalks, though I am not an artist. Some of them are:
- These are dust free, and that is the best features I love about it.
- It's easy to clean and can be erased with the help of liquid soap and water.
- One of the most appreciated features of liquid chalks is that you can use it in any of the surfaces, whether, mirrors, doors, windows, cabinet shelves. It's fun playing with them.
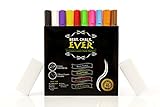
Making one's own liquid chalk at home can be bit messy. If you feel that it is not your cup of tea, you may buy it from the market. You can easily find it in the online or local shops. Though it can be a bit pricey affair to purchase from the market, but again it saves you time.
I often make my liquid chalk marker at home. I love trying DIY recipes at home and feel that there is always room to gather a lot of information in different subjects when we make it at home. Even my son involve himself with me whenever I try it at home and enjoys every bit of the fun activity.
So why not give it a try at home this time than purchasing it from ouside.