Make a Beautiful Wall Lamp


Metal Embossed Wall Lamps
Recently my husband and I decided that we needed lamps on either side of the bed to read by at night. We shopped around but didn't find anything that stood out. I remembered that I had done some metal embossing a few years back and an idea started to form in my head. What if I could make the lamps? I could emboss the metal, do cut-outs, add parchment paper behind the metal, and mount that on a board, with the light fixture between the metal and the board.
I soon began to look for designs on the internet and finally settled on a pattern that seemed feasible. What I didn't realize was that the design I settled on was going to be a lot of work! Fortunately I had plenty of time and it was a project that took me about a week in all.
I headed to the craft store to buy the aluminum sheets (usually come in a roll), some heavy parchment paper, a couple of boards, wood stain, a couple of light sockets and electrical cable. The first step involved tracing my design onto the aluminum. I taped the design onto the aluminum, and placed a thick layer of newspapers under it. Instead of using embossing tools, I used an orange stick (the ones used for nails) to trace over the design. Once the design was transferred onto the metal, I removed the pattern, and started embossing.


Cut-outs and staining
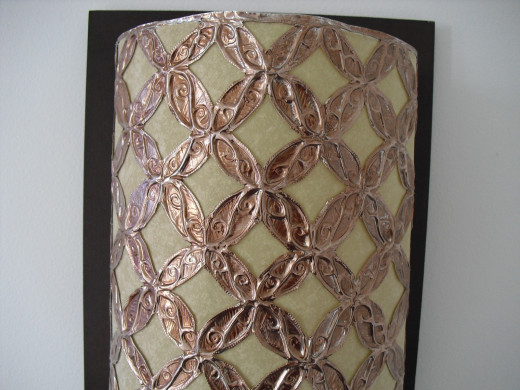
The embossing stage involves going over the design with your tool (I used the orange stick mostly), both on the front and the back. The idea is to make the design "pop out" and textured. There are great tutorials on how to emboss metal on Youtube. Once I completed the embossing stage, I cut out the spaces between the design. This can be done with an exacto blade or by punching tiny holes along the cut line, very close together. When the cut out areas were gone, I used the flat side of the orange stick to turn the rough edges under and finish the look.
Then I rubbed stain on the entire piece, which gives it an antique look. Usually a black stain is used but in this case I used a copper colored stain. Once that dried, I lined the back side of the embossed metal with a sheet of parchment paper of the same size. I gently curved the whole piece into a half-cylinder. I used a large round water bottle to help give it the right curve.
My husband stained the 2 boards (for 2 lamps), and drilled 2 holes in each board where we mounted the light socket (with electrical cord and switch) onto the board, wrapping heavy wire around the socket, through the holes and twisted on the back of the board. We attached a saw-toothed picture hanger at the top of each board on the back.
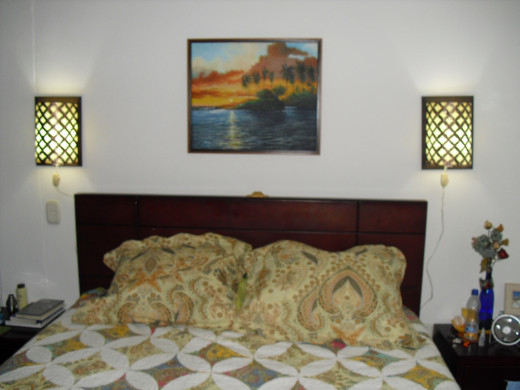
The last step involved gluing the embossed piece onto the lateral sides of the board. Once the glue was dry, we screwed a bulb into each socket, and hung the lamps on the wall!
I plan to make lamps for the living room using the same technique, but with a bamboo motif.
The finished product!