How to Paint Still Water Using Corel Painter 13.
Lesson 3: How to Paint Still Water.
In this lesson, I will demonstrate how to paint still water using Corel Painter 13. Still waters, such as a lake or pond have very different characteristics than running water such as rivers, streams, or even the ocean. Mainly the difference is in the reflections on the water. Reflections on still water are much clearer.
I will also show some of the new features of Corel Painter 13. It was just released last month and mainly the improvements were to the interface and memory usage. I really like this program because it mimics tradition mediums so well and covers so many of them. It has oils, watercolors, acrylics, charcoal, pencil, pastels, pen and ink, and much more. I used my Samsung Galaxy Note 10.1 tablet hooked up to my PC via the Splashtop Remote HD app to create this painting.
Tools for the Lesson.

Corel Painter 13
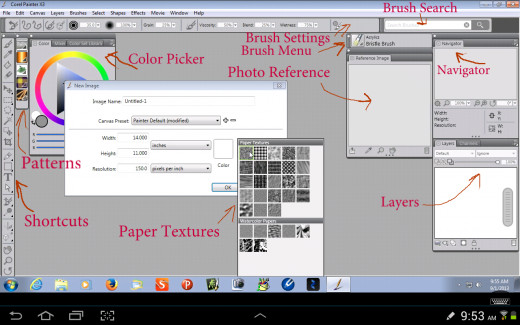
Corel Painter 13 Interface
This is the current interface of Painter 13. I have customized it to my liking and to fit with the Splashtop app. You can change it to fit your individual needs. The windows that I use are the navigator, layers, color picker/palette, and reference. The reference window is a new feature of Painter 13 and something I have been missing in Painter 12. You can also move the brush menu wherever you want it and the shortcuts and patterns bars, too. There are many more windows you can open such as brush settings, color panels, and paper panels.
In the initial setup for a project, you can choose resolution, size, and paper texture. For this lesson, I picked the gessoed canvas texture. Another great feature they've added to Painter 13 is the ability to search through the brushes and find the kind you want without looking through all the menus. However, the best new feature in Painter 13 is the use of less memory to operate. This makes the program run faster and smoother than Painter 12.
Splashtop Remote Desktop
- Splashtop is the #1 Remote Desktop Solution for Mobile Devices, over 18 Million Users
Top performing Remote Desktop Product with over 18 Million Users and highest ratings. Access Your PC / MAC from Any Mobile Devices Anywhere. Bridges PCs, Macs, iOS, Androids and more
Still Water: Step 1
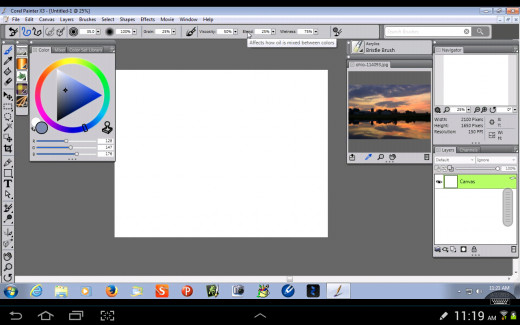
Photo References
When painting water, the sky plays a very important part in your picture. The water reflects the color of the sky and depending on how still it is, the reflection of clouds. In this lesson, I wanted to use a colorful sky to illustrate this principle. I found a good sky reference at pixabay.com. This website has many royalty free photos for anyone to download and use.
Pixabay
- Pixabay - Free Images
Search over 100,000 free photos, cliparts, and vector graphics or share your own pictures as Public Domain on Pixabay.
Still Water: Step 2
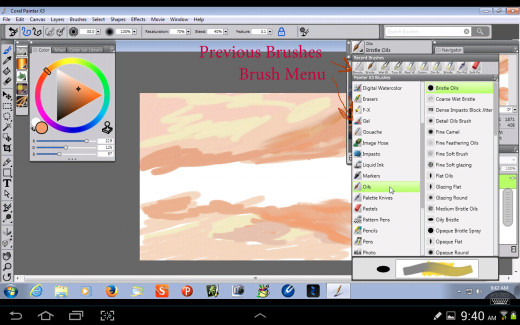
Painting the Sky and Its Reflection
In order to paint convincing water reflections, what you paint in the sky must be mirrored in the water. So in this step, I used the Bristle Oil brush to paint the first layer of clouds and mirrored it below in the water. I used a peach color, a darker orange, and a medium yellow color. One of the nice features in Painter is the previously used brushes are listed right above the brush menu. This makes it easy to switch back and forth between your current brushes.
Corel Painter 2018
![Corel Painter 2018 [PC Download] (Old Version)](https://m.media-amazon.com/images/I/31JZZvCnbWL._SL160_.jpg)
Still Water: Step 3
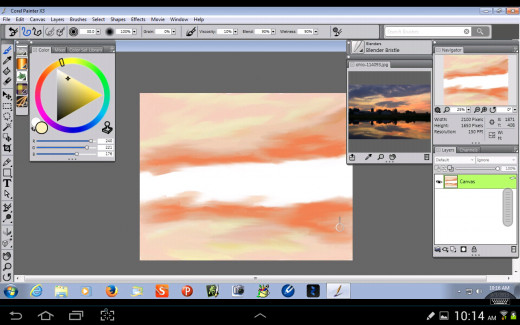
Blending the Sky and the Water
In this step, I used the Blender Bristle brush to blend the sky and water. I also added more orange to brighten the sky and water.
Still Water: Step 4
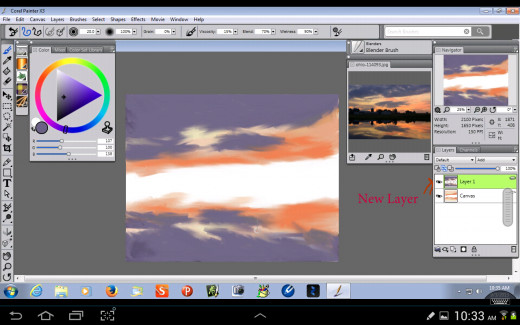
Adding a New Layer
In this step, I added a new layer for the dark clouds and blended them with the Bristle Blender. I used a dark purple color to add contrast to the picture.
Still Water: Step 5
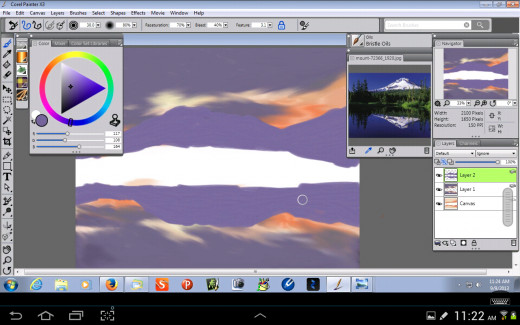
Adding Mountains
Here I used a new photo reference from pixabay.com for the shape of the hills and the trees. I added the mountains and their reflection on a new layer using the Bristle Oil brush. Keep in mind what you paint above the waterline, you must add below it.
Still Water: Step 6
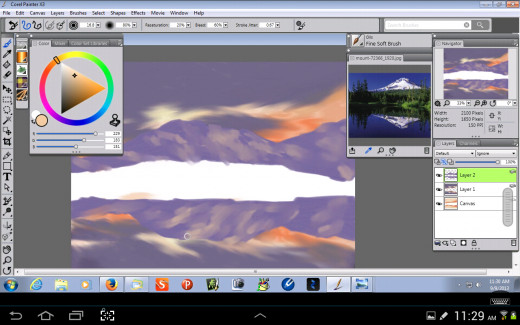
Adding Mountain Highlights
I used the Fine Soft Brush to add highlights on the mountains and their reflections in the water. The tricky part of painting the reflection is keeping it accurate. If you have trouble with this you can turn the painting upside down and paint the reflection that way.
Still Water: Step 7
Distant Trees
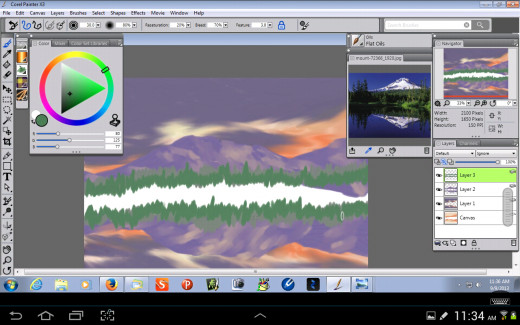
To make distant trees, I used the Flat Oil brush which makes a shape like a distant pine tree. When using a real paintbrush, you would use the chisel edge of a flat brush. This would give the same effect. I painted the two layers of distant trees and made the most distant layer a light grayish green. I then painted a darker tree layer. I also painted the reflection of these tree layers in the water.
Still Water: Step 8
Last Layer of Distant Trees
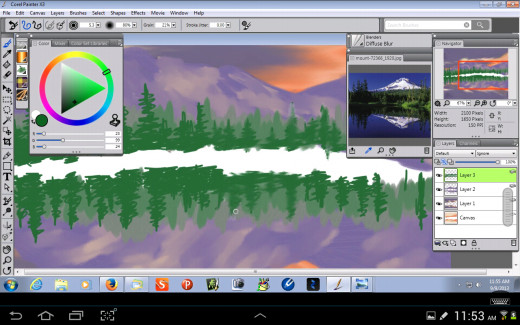
Using the Fine Camel brush, I added the final layer of distant trees. I chose a brighter green to show the closer distance of the trees. I used a scribbling z-shaped stroke (see my lesson on how to paint trees) to make the trees. Then I used the Diffuse Blur blender to soften the edges of the trees and give them a more realistic look.
Still Water: Step 9
Adding the Shoreline.
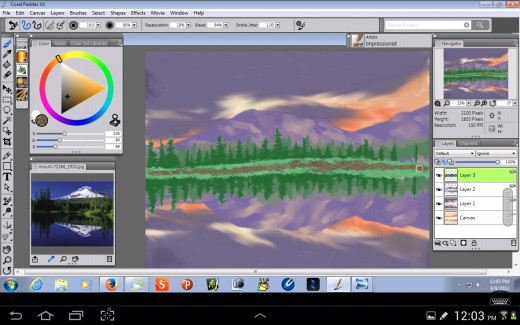
To add a shoreline, I used the Impressionist brush to add grass and a muddy bank.
Still Water: Step 10
Adding the Grass in the Foreground
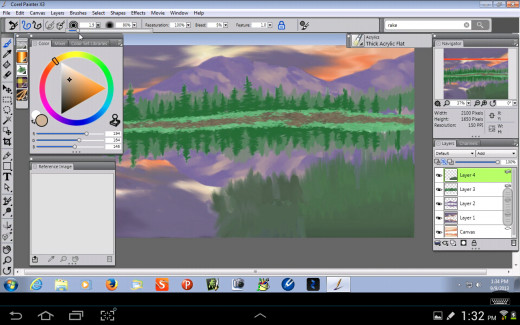
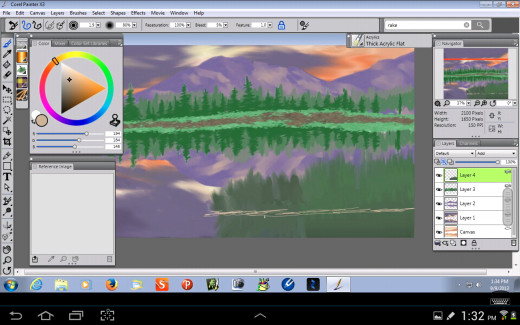
I picked the Thick Acrylic Flat brush to paint in the grass on a little bank jutting out in the water. In traditional painting, you would use a feathering stroke to make this grass and you also use a feathering stroke with the S Pen. To make the reflection of the grass, I pulled this feathering stroke down towards the bottom of the canvas. In this step, I used a varied grayish green for the grass color.
Still Water: Step 11
Adding Waterlines
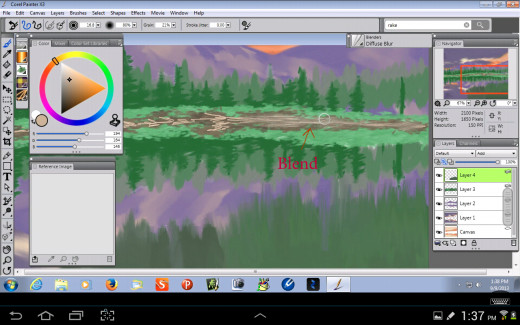
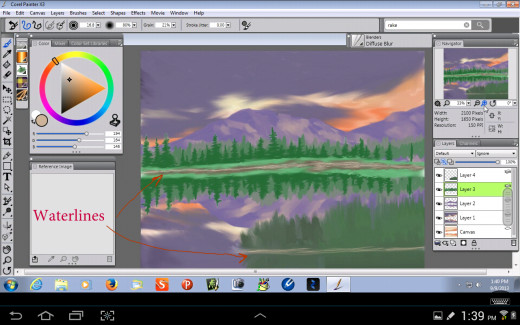
One way to make your water in the painting look real is to add waterlines. In this step, I added a waterline to the foreground grass, effectively separating the grass from its reflection. I also added a waterline to the distant shore and blended it in. This gives the impression of a distant reflection.
Still Water: Step 12
Glazing the Water
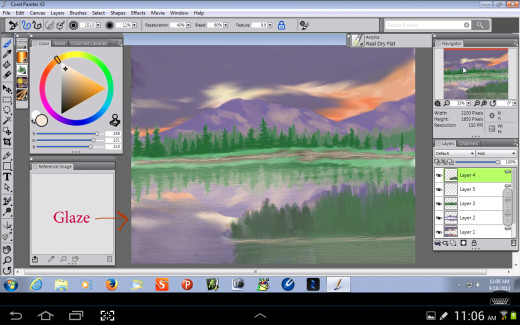
For this step, I wanted to replicate a traditional painting technique that I use for my acrylic paintings. This technique consists of using a thin glaze of paint over the water to give it a watery faded look. To replicate this look in Painter, I picked the Real Dry Flat brush and reduced the opacity to 7 percent. I added a layer between the background and the forground. I increased the brush size to 150. With traditional painting you would use a large flat brush. Then I glazed over all the reflections in the water to fade them. It worked just like a real acrylic glaze!
Books on How to Paint Water
Still Water: Step 13
Foreground Trees
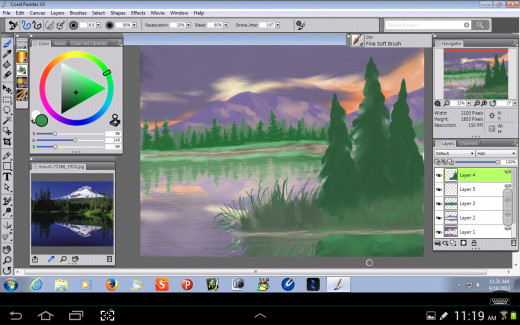
In this step, I added foreground pine trees to give the painting more depth. I used the Fine Soft Brush to make the trees. I also used the Oil Pencil to add detailed grass and I made sure to reflect the grass in the water.
Still Water: Final Steps
Final Steps
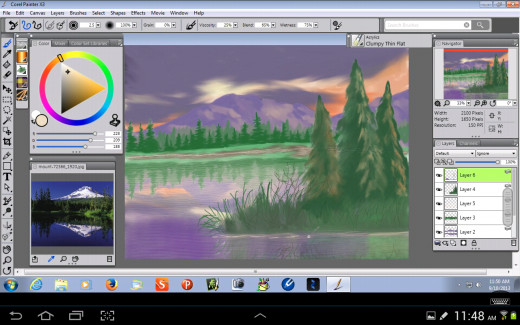
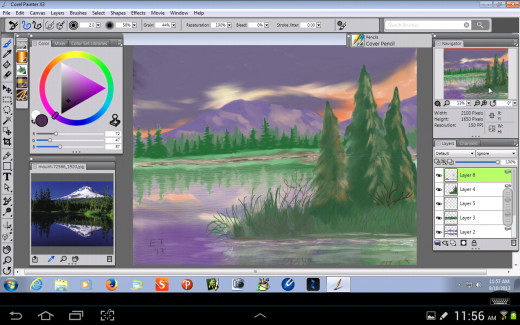
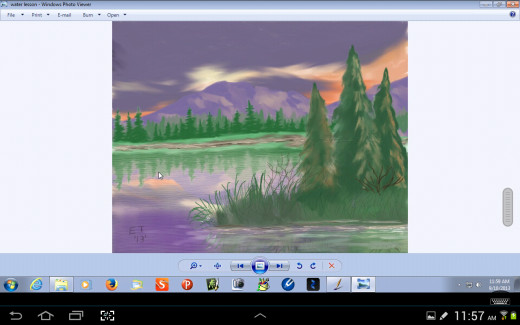
In the final steps, I added orange colored highlights to the trees to show the sunset color. I added some twiggy shrubs and more detail to the grass. I drew the reflections in the water and reglazed it to fade them into the water. I also added ripples around the edges of the grass and blended them in. Finally I exported the painting as a jpeg file.
Final Word
This lesson was about painting still water, but there are many more types of water including oceans, waterfalls, streams, and rivers. I have learned some neat tips and tricks to painting these types of water and I hope to cover them in future hubs.
Another Type of Water
