- HubPages»
- Arts and Design»
- Graphic Art & Design»
- Design Software
How to Use the Stamps Tool in Adobe Photoshop


There are two types of stamp tools in Photoshop. To activate Stamp Tool, hover the mouse over Stamp Tool icon, on the tools palette on the left side, and then left click. You can see two options:
1- Clone Stamp Tool
2- Pattern Stamp Tool
In this Photoshop tutorial, I’ll show how to use Clone Stamp Tool.
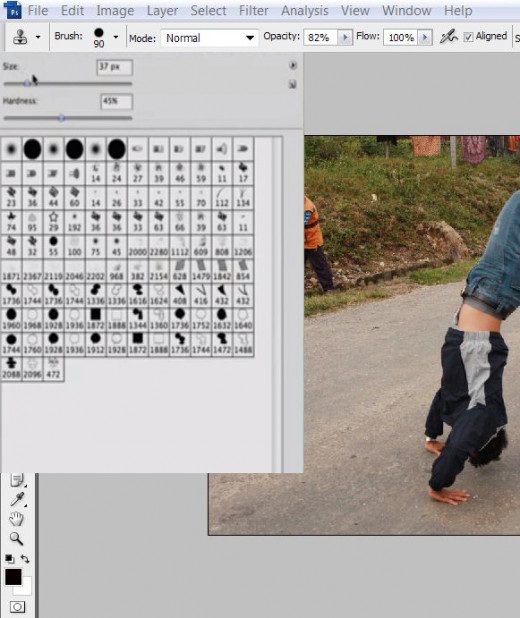
Stamp Tools in Photoshop
Clone Stamp Tool allows you to:
- Remove blemishes and skin flaws on the face of a person in a photo
- Get rid of unwanted objects and area from the images
- Duplicate objects in the image
- Copy certain part and past to another area in the photo
Pattern Stamp Tool allows you to use patterns on your pictures or documents. You can use patterns from your Photoshop program, create your own pattern, or load patterns in your program from external source.
How to Use Clone Stamp Tool in Photoshop
Clone Stamp Tool is used to create pixel-to-pixel carbon copy effects in images. However, it does not automatically blends area selected area and the target area like Spot Healing Brush Tool and Healing Brush Tool. Clone Stamp Tool is somewhat like Patch Tool.
In Clone Stamp mode, when you press Alt Click, Option Click on Mac, you can see a circle with cross mark. This indicates that clone source has been defined. As you stamp the Clone Tool over the desired area you can see, a cross following the stamping, which means the cross is selecting the source area for cloning, and showing what you are cloning.
Consider, texture, light and color while using Clone Stamp Tool. If you are retouching the photo, you have to select the source area multiple times until you get a perfect clone source point.

Using Clone Stamp Tool
Once the Clone Stamp Tool is selected, you have to set brush size, hardness of brush, Blending Mode, Opacity of the Clone tool and Flow of the Clone tool.
Setting for these tools depends on what you want to do with your image.
If you want to copy the exact source area from the picture, set Opacity and Flow at 100 percent, Blending Mode to Normal.
If you want to overlap something completely, you have to set hardness to maximum.
Don’t set the Opacity to 100 percent unless you want to completely overlap the area with the clone source.
If you are removing blemishes, Opacity between 40 to 60 will be perfect.
If the Flow is set to 100 percent, you will be able to clone exact area of the brush size of the Clone Tool. If you set less than 100 percent, you will rather get blur effect.
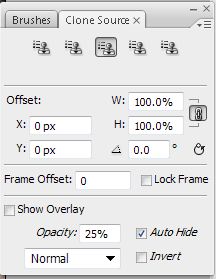
Using Clone Source Palette
When you activate Clone Source Palette (Go to Windows – Clone Source), you can use different clone source presets for image retouching. This tool is very useful when you want the cloning to be very precise.
In the Clone Source Palette, you have options to rotate, scale and preview your Clone Source points.
When you activate Clone Source, by default, the first clone source preset is activated. After using this preset to define clone area and cloning the desired part, you can go to the next preset and select different source point. You can go back to edit the first source point, if you want to.
If you want to be precise, enter the values for X and Y, and W and H.
You can see the preview of your clone source by selecting Show Overlay.
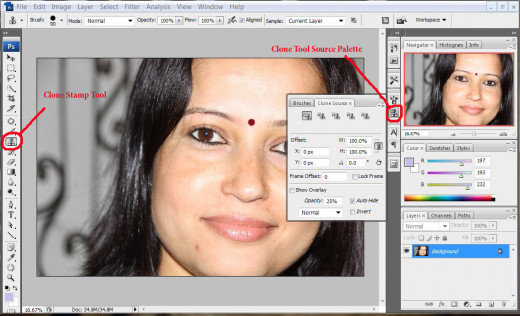
Remove Blemishes Using Clone Stamp Tool
Open the photo, and create a new layer.
Left click the stamp icon, and choose Clone Stamp Tool. Short Cut key for Stamp Tool is S.
When the Clone Stamp Tool is selected, you can look for Clone Source Tool on the Right side of your workspace. Click on the icon and you will see Clone Source Tool palette. If you don’t see Clone Source icon, you can open Clone Source dialogue box by going to Windows – Clone Source.
On the Menu Ribbon, you can see a dropdown menu box. Choose current and below. This option allows you to work on the new layer without damaging the original layer. This option selects clone source point from the background layer and paint over the new layer.
When the Clone Source Palette opens, you can see five different presets for clone source. These presets help you to clone different area with different source points. You can easily switch between these presets.
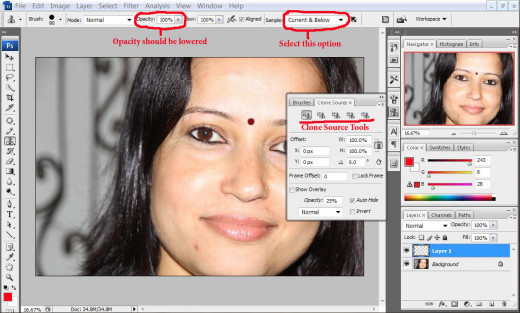
Adjust the Opacity around 50 percent and Flow around 70 percent.
Press Alt Click to define a source point for cloning.
Now paint gently over the area you want to clone.

Remove Unwanted Objects Using Clone Tool
Open the photo and duplicate the layer.
Select Clone Stamp Tool.
On the Menu Ribbon, click Brush and select brush size and hardness for Clone Tool.
Set the Opacity to 100 percent, and Flow to 100 percent.
Press Alt Click to define clone source point. Source point is the area on your photo which will cover the object you want to remove.
Stamp on the area, you want to remove.
If you want to select different source point, select the area by pressing Alt Click.

Duplicate Object in the Photo Using Clone Tool
Select Clone Stamp Tool.
Set Flow and Opacity to 100 percent.
Brush size for Clone Tool must match the size of the object you want to duplicate.
Hover the Clone Tool over the object you want to duplicate.
Press Alt Click and define the source point.
Stamp on the area where you want the duplicate effect.


