How to do Two Needle Ladder Stitch

The ladder stitch is an easy to do stitch that offers a great look. Simple bead changes can make for a huge variety of styles and looks. It is also easy to use for necklaces, bracelets, and even earrings all while providing great looks. There are actually a couple of different ways to do the ladder stitch. Both of them are fairly easy, but I prefer the two needle ladder stitch method because it works faster for me, my thread is less likely to become tangled, and it is easier for me to remember where I am at in the project.
Supplies
For this project you will need two needles that will fit through all of your beads (this means fairly small needles for seed beads if you are using them). Additionally you will need bead thread, wax or thread conditioner, beads, a clasp, and beads of your choice. I also recommend using a small amount of glue to make your piece even more secure. Bead Fix is always my glue of choice because it dries fast, clear, and doesn't leave a film on your beads. You will need to be careful not to use too much or it will make your thread hard and no longer flexible.
The Project
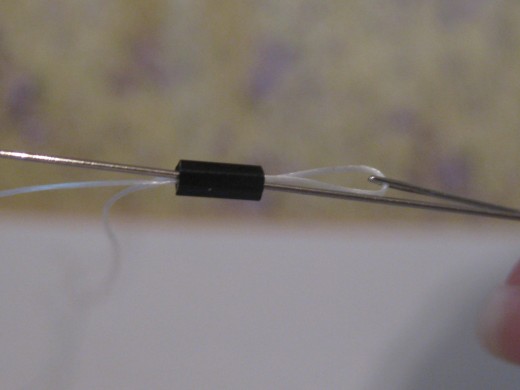
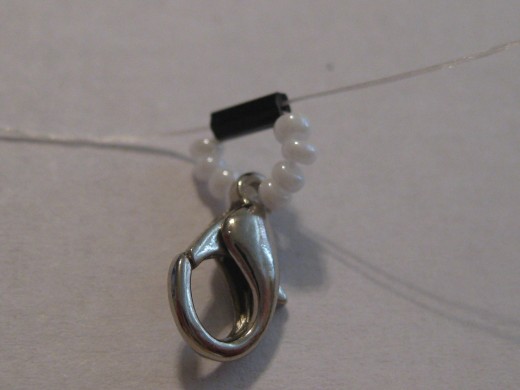
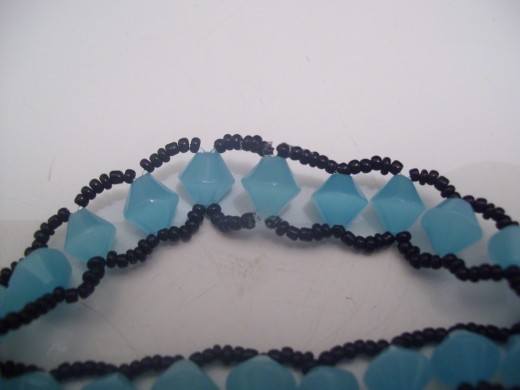
To begin your project you will want to thread a needle on each end of your thread. You should then run one half of your clasp onto the thread and let it rest in the middle. Next string on a few "side" beads on each needle and let them go down your thread. I often do three or four depending on the thickness of my "rung" beads and the size of my side beads. Next place your "rung" bead, or beads if you choose, onto one of your needles, but don't let it go down the thread. Then run your other needle, in the opposite direction through the bead. Pull both needles out of the bead at the same time. this will cause your bead to go down the threads horizontally and rest on your "side" beads like the rung on a ladder.
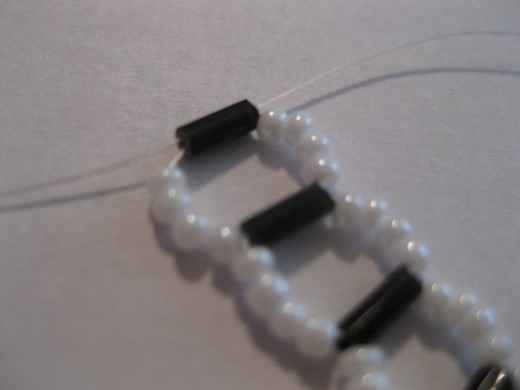
Continue to work your project. Add "side" beads to each thread, then a "rung" bead to both threads, a set of "side" beads, and finally another "rung" bead. Make sure you pay attention to make sure that you aren't going to make the piece longer then your intended length. Using a fabric measuring tape is usually easiest to measure out your piece, but not completely necessary. When you get to the desired length add one last set of "side" beads. This time instead of adding a "rung" to the ladder you will finish it with the last half of the clasp. Removing one needle can make finishing easier and also make it less likely that you will poke yourself with it. Next run the needle through the "side" beads nearest it, then through one "rung", and at least one last set of "side" beads. Carefully tie a knot around the thread of the project. Tighten the knot as much as possible and as close to the "rung" bead as possible. Next repeat the process on the other side, but try to tie the second knot near a different "rung" bead. When you are all done trim your threads close to the knots and add a small dab of glue to both of them.
*Beading tip: With smaller "rung" beads your needles may not fit through at the same time. You have two options to solve this problem. The first is to gently slide the bead onto one of the threads a little way and use your second needle to go through it here. Make sure you are careful not to split your beading thread with your needle and make sure you are going through the bead in the correct direction. It is very important that if this is the case that your thread is really well conditioned. Another option is to use twisted wire needles, sometimes called big eye needles. These are very thin and will go through your beads at the same time. The only downside is that they are very flexible and it is a little harder to bead with them because of it.
Alternative Finishing Options
If you want a different look for your finished piece you can finish it in a few different ways. One is to skip adding the clasp at the start of making your piece. Instead begin with your first "rung" bead. Then when the project is finished and you have tied it off without a clasp on either end you can add a jump ring or use a piece of wire to attach it to the clasp. This can give the piece more movement and if you get fancy with your wire can add a different look to your back. It is also easier to add an extension chain this way. Another possibility is also to make a very long piece without a clasp and use it as a lariat instead of a regular necklace. Then you can simply tie it for a great look. A final option is to use stretchy cord for stretchy bracelets. You can then run the stretchy cord back through the first "rung" and tie it off. Make sure you add a dab of glue for security. Once the glue is dry you have an easy to wear ladder stitch bracelet.
Conditioning Your Thread
You will want a piece of thread that is about three times the length of your desired finished size. Before beginning your project you should condition your thread. This actually applies to any time you are using thread for your beading project. To do this place the thread on the pot of conditioner or wax. Hold it in place with your forefinger or thumb and use the other hand to pull the thread through. You will want to repeat two or three times. As a final measure pinch the thread between your forefinger and thumb and pull it through, this will help the conditioner or wax coat the thread evenly and thoroughly. The reason you want to condition your thread is that this will make it less susceptible to knotting, fraying, and damage from the beads giving your project more durability and a longer life.
A Note on Bead Choices
Bead choices are the heart of any beadwork project. While the ladder stitch offers a wide variety of options there are a few things that tend to look better then others. You will need at least two types of beads. The first is the "side" beads that will go up the sides of the ladder (or the top and bottom when it is turned to wear). These beads tend to be smaller and are often best if rounded. I tend to enjoy using seed beads for the "side" beads. Your "rung" beads are often thin and longer. This offers the look of a ladder. Bugle beads are one option as are rice shaped beads. This is a general rule and can be broken with successful results. I have used rectangle beads and even large bi-cone shaped beads for my "rungs" with great success. This project also works well with contrasting colors such as black and white which make the beads stand out. However, there are beautiful pieces that are also done in complementary colors such as red and gold. It should also be noted that you can choose more then two colors or bead types.
This is only one way to make a ladder stitch piece. However as you practice you can become very quick with this method and be whipping out great necklaces, bracelets, and earrings using this method. Have fun with it and try new things. You just may come up with the perfect new look!

Related

Hand sewing Needles--- An Illustrated Guide to the Types and Uses of Hand Sewing Needles

Beading Tutorials: Spiral Rope Seed Bead Pattern

Bead Looming - Make a Matching Bead Belt, Bead Ring & Bead Bracelet

DIY Jewelry Tutorial: How to Hand-Paint Beads With Acrylics

Upcycled Magazine Charm Bracelet Project


