How to keep baker's twine organized in your craft room!

All in the details
When I was growing up here in my hometown (a small military town with rich history) there was an Italian bakery that my family frequented for breakfast, lunch and dinner.
What interested me was not the chicken parmesan or deluxe breakfasts. It was the wax sleeves encasing the donuts they baked fresh daily.
The bakery created massive wedding cakes, cookies, cupcakes, etc. Anything your mouth could imagine biting into was fully stocked in their built-in sliding glass door wall units.
There were no chain donut shops on every street corner in that generation. My grandfather would bring me there for a donut treat. The wax paper sleeve covering the donut was my favorite part. Just like Pavlov's dog was conditioned to salivate at the sound of a bell before dinner, whenever I felt that wax paper, I knew something yummy was inside with gooey rich icing and sprinkles. Just what a child's heart desired.
To this day, that wax paper has never been duplicated by any bakery or chain coffee shop that has moved in to this area. It's a memory that serves my taste buds and desires of a time of a more simple life.
What do you crave?
When I think about those donuts, to this day, I still remember those wax paper sleeves. I've never seen them since the restaurant closed down years ago.
That one element, the wax paper, appealed to my senses. Just thinking about it now and all those delicious memories come back to me.
- What did I see? I remember the huge glass-door sliding cabinets that were taller than me and the massive wedding cakes displayed so prominently behind them.
- What did I smell? I can still smell the sweet aroma mixed with authentic Italian cuisine. It still reminds me of my great-grandmother's home when I would visit her and have freshly-baked cookies out of her oven.
- What did I feel? I felt so happy being handed a donut. The wax paper covering crinkled and inside the gooey richness of the pastry appealed to my heart's desires.
....Packages tied up with string...
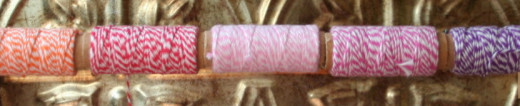
Baker's twine
The invention of baker's twine for craft purposes brought me back to that time of my life when life was simple and sweet.
The only baker's twine I had ever seen at the local Italian deli or pastry shop in town was brown. It was the same type of twine we started using to tie up our recycled cardboard.
Then one day, I came across multi-colored twine. I found it online in spools, bolts, handmade cardboard holders, popsicle sticks, loose yards, fancy packages by craft companies.
I was on a quest for baker's twine and I was tied in knots over such a find!
I found these adorable toadstool spools online with coordinating twine. This was my first twine purchase.
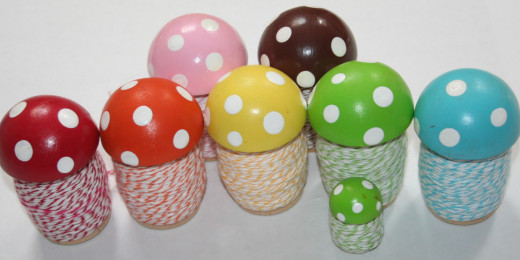
I had to have that colorful twine in every color. Not just one color was good enough for my desire. I found a seller online who offered the mutli-colored twine on handmade mushrooms spools painted the same color as the twine she rolled up on them.
I displayed those little spools in my craft room and they soon became everyone else's desire.
Unwrapped
Baker's twine began unwinding all over the place. I started finding it online and displayed at local craft stores. It can be found in bulk at restaurant supply stores and packaging retailers who cater to bakeries.
It comes in novelty colors and in unique packaging.
Soon I found myself buying different types of containers to store it all in so my craft room wouldn't become a tangled mess.
Just recently, we went to a bakery and our box of pastries were wrapped up with red and white baker's twine! I would have saved it had I not gotten yellow frosting on it from my child's cupcake!
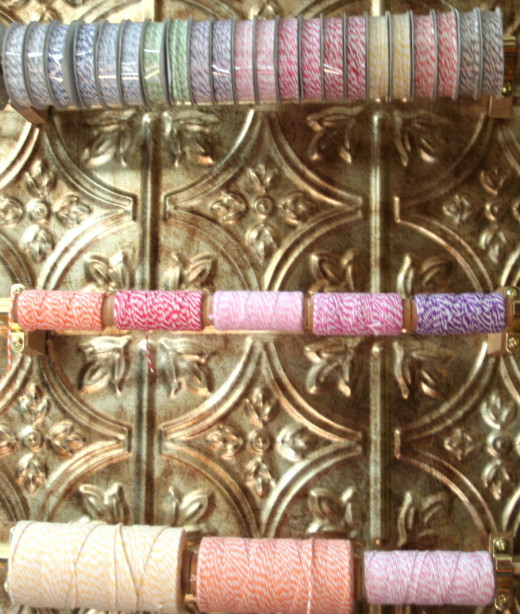
Spools
I had made myself a ribbon holder out of a couple inexpensive dowels. My ribbon supply tripled when I accidentally drove past a yard sale and made the mistake of stopping at it. It's a bittersweet surprise when I do things like that. It happened to be a yard sale at the home of crafters which is always my biggest indulgence. They had ribbon spools by the garbage bag for a few dollars. I bought them all so when I got home I had to find a different storage solution for my ribbon.
I now keep my spooled ribbon collection in stackable baskets.
My baker's twine collection had grown out of hand. What was I to do with all those colorful spools and loose pieces? Thinking about it and looking up at my handmade ribbon holder, I came up with a twiney idea!
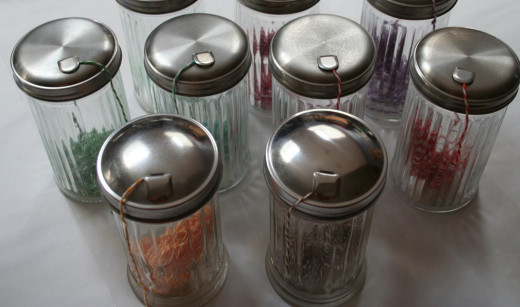
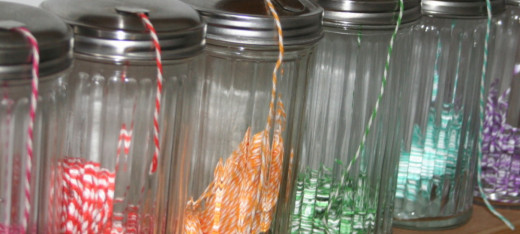
These are sugar shakers with screw-top caps. The top opens for easy access to as little twine as you want at a time.
Glass storage containers
Glass storage containers have recently become all the rage. Even the local department store sells old-fashioned cookie jars for craft storage now.
Our small-town local hardware store stocks shelves full of canning jars. Not because people actually do any canning of their garden produce in this area any more, but because crafters are buying every glass jar they can find to furnish their craft rooms.
I've even found myself at the local thrift store buying up every jar with a lid and re-purposing it for small craft items.
When I came across these glass beauties, I felt like I was a kid in the donut shop again. My mouth could nearly taste the sweetness.
Many ways to organize twine
There are many ways to organize twine. These are few ideas I've seen online or that I have done in my own craft room:
- Loose pieces can be wrapped around popsicle sticks. The color can be labeled on the stick with a marker.
- More substantial yards, unwrapped, can be stored in glass jars, like the sugar shakers I have in my own craft room.
- Unique twine holders can be purchased from online artisans like the mushroom holders I purchased to display in my craft room. They give a colorful focal point to your room.
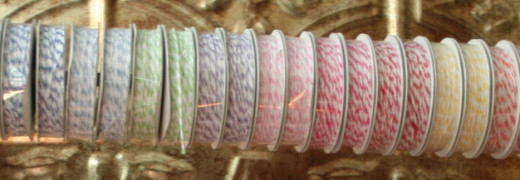
- Small spools can be displayed on a ribbon holder like the one I created out of dowels and hung on my craft room wall.
- Huge spools can be stored upright on a book shelf.
Curtain holder brackets
How to make a twine spool holder out of dowels
Materials:
- Brackets of your choice
- Dowels thick enough to hold your spools
- A background
- A picture hanger
- Extra blocks of wood
- Screws
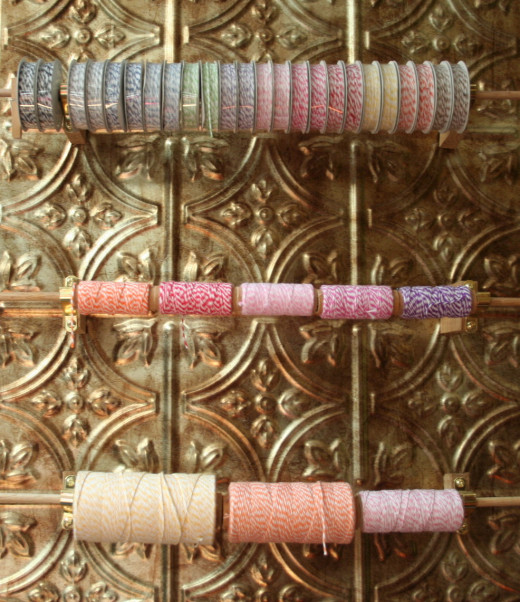
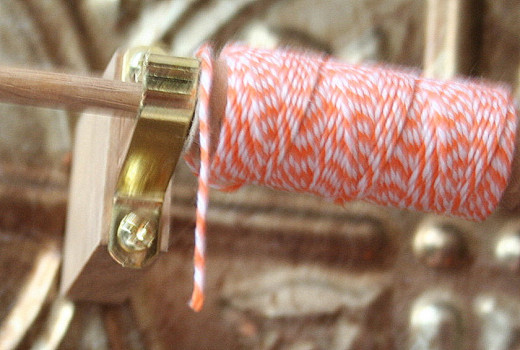
I purchased this bronzed looking background from the hardware store. It's actually a kitchen backsplash. You can purchase them online too. Any background of your choice will work. It has to be durable enough to hold multiple spools of twine.
Measure the amount of spools so that you will know how many sections of dowels you will need. I chose to use three dowels.
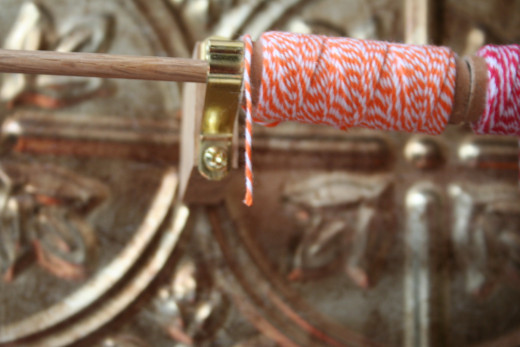
You will need two brackets for each dowel you use. In my design, I used 6 brackets. These are relatively inexpensive. They might be found in general hardware or in the curtain section. Most of them come with screws. If not, have some on hand to make sure you have enough for your project.
Make sure the brackets are small or large enough to fit the dowels. Dowels and brackets come in small to large sizes. If you choose large dowels, make sure that your ribbon spools have openings large enough to slide over the dowels. I used small dowels, but ones strong enough to hold the spools. Any smaller and the dowels would have broken under the weight of the spools.
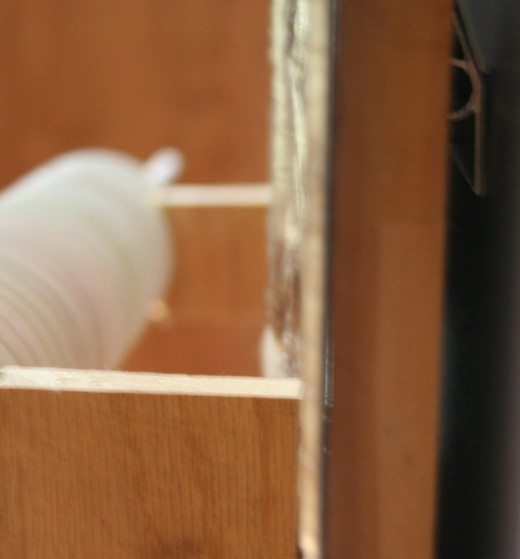
These blocks of wood were cut in my woodshop in my garage. You can purchase something similar or have your local hardware store cut them if you don't have available wood working tools.
Measure the depth of the blocks to make sure your spools will hang loosely and not be a tight fit against the background. My blocks were cut 1 3/4" deep so that the spools would hang loosely. When I need to cut twine, they spin freely and not get stuck against the background.
If you are hanging your spool holder on the wall, you need to attach a picture hanger on the back. Make sure the picture hanger or hangers are strong enough to hold the backsplash on the wall with all of the spools on the dowels.
I cut small wood blocks to 1 3/4" depth so the twine would spin freely on the dowels without getting stuck on the backsplash.
Attach the wood blocks using screws. This particular backsplash was easy to drill through.
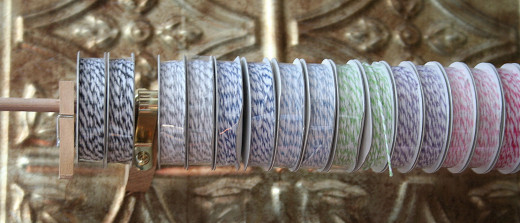
Shown here: the hanger on back is a large picture hanger that goes the length of the backsplash. It's durable to hold up the weight with all the spools.
Tip!
Space your wood blocks out far enough that all of your spools fit. However, don't space the blocks out far enough that they break at the weight of the spools.
I bought a lot of coordinating twine in a large package of 24 spools. My blocks were only spaced far enough apart to hold 22 spools. Two spools remained outside of the brackets and kept falling off the end. I found some small clothes pins in the local craft store and use those as a decorative way to keep any spools on outside of the brackets.
Fun way to store extra spools: clip the end with a mini clothespin clip!
Cross-stitch holders re-purposed
If you buy your twine in one yard lengths or have loose twine pieces leftover from craft projects, you can store them easily on cardboard inserts in plastic cross-stitch floss containers. This will help keep your twine dust-free and organized. The box can be stored easily out-of-sight in a drawer.
I keep my cross-stitch floss in a decorative hat box on my book shelf. I re-purposed previously used plastic floss boxes for beads.
I store my glass jars on a small shelf in my craft room closet.
Finding Inspiration
I find that when I get really busy with other things that are happening in life, my creative intuitions seem to go on vacation. I can't come up with scrapbook layouts or greeting card designs as easily as when my mind has had time to rest.
A lot of life's displeasures can cause periods of crafter's block as well. Grief, sickness, parenting, working, stress, any of these factors can play a role in our ability to think about and create expressive artistic works.
For now, my inspiration comes from color. I organize my craft room in a way that allows me to visually see all of the elements that help inspire me. Buttons, flowers, twine, paper, and organization all have a huge role in helping my mind relax and find inspiration for my next project.
Being overworked and too stressed can negatively impact your ability to be crafty. A lot of times I give up and come back later when I'm feeling less overtired with everything else I have going on.
Organizing your craft supplies in fun ways can be a relaxation method of its own. Finding time to do it on the other hand, might be a challenge.
Conclusion
Decorating with your craft supplies can bring new life to your craft room.
Like the smell of lavender is calming, a visual crafty storage solution can help you become more productive. When my craft room is a disheveled mess, I can't think of anything to do besides clean.
Coming up with ideas about how to organize my craft room helps me get inspired for my next project!
Like the feel of those wax paper sleeves around those gooey donuts my grandfather used to buy me at the local bakery, colorful and enticing elements can add a new feel to your finished projects!
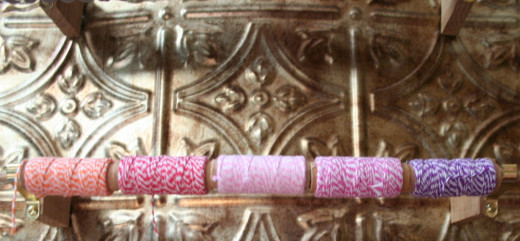
I usually use the basic "rainbow" method of organizing color. Red, orange, yellow, green, blue, purple. I put pinks next to reds. Grays, black, browns and white go on the end.
If you would rather not make this into a do-it-yourself project, there are pre-made ribbon holders you can buy that are already crafted with dowels. Some stand individually so you can display them on a bookshelf or table.


