How to make a paracord cross

Paracord cross
Introduction
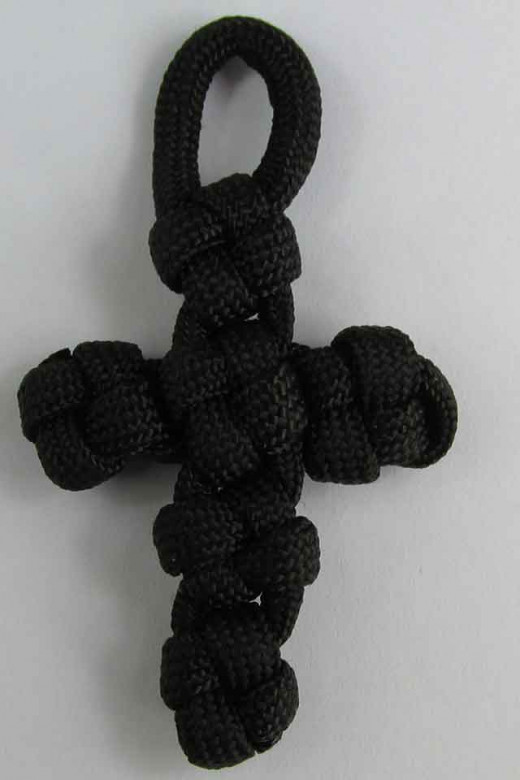
See the image on the right. This is the cross design I will show you how to make. It is great as a pendant, keychain or any other decoration.
It is fairly easy to make and requires the tools you most likely already have at hand. These include some paracord 550, a lighter, scissors and a pair of pliers or even better a hemostat to help you pull the cord.
The technique
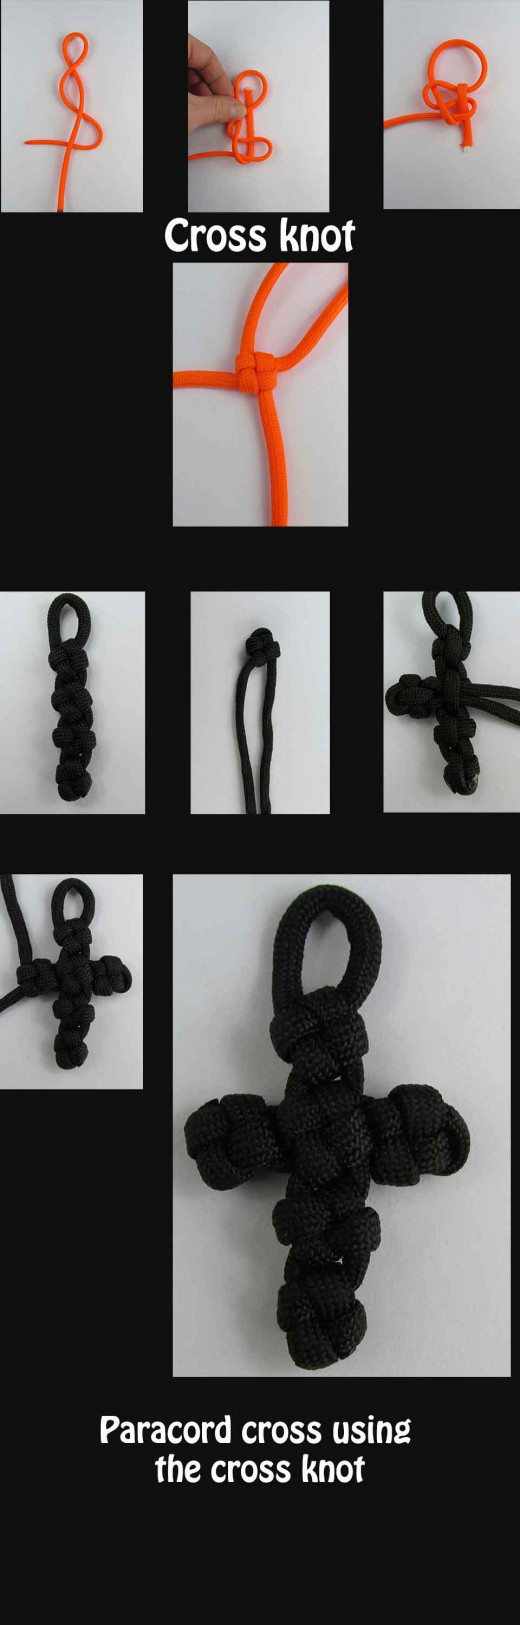
For making this project you will need to know how to make a single knot, which is called the cross knot, also sometimes named the square knot (it is the same knot, just shown from the other side).
The technique for making the square knot will be shown in the tutorial, so no need to worry about having to find a separate tutorial for the knot.
In essence the paracord cross is made by taking two pieces of paracord. For the vertical knots we make a series of four cross knots. After yo make the very first cross knot you may want to pull out a small loop you can use to attach the cross to various objects.
With the second piece of paracord we fold it in half, then make a single square knot on the middle. We take a hemostat and pull the cord through the back of the vertical four knots. At that point you only need to make another square knot and your cross is done. Snip the ends of the paracord and melt them.
You now have a beautiful cross you can be proud of!
As you will notice, this project is not time consuming, so you can really make these paracord crosses as gifts for example. For more paracord projects, please visit my website at paracord-projects.net. I feature many cool paracord ideas you may be interested in learning about.
See the following section for the step by step tutorial.
An image step by step tutorial
Conclusion
I hope you enjoyed my brief tutorial. I have yet to find a similar one with step by step instructions, so I think this will be of value for you, the reader. Please, do not forget to comment or even post your work!
Related
")
How to Tie Basic Macramé Knots (With Chain, Braid and Cording Patterns)

49 Outstanding Christian Craft Ideas for Kids

Free Jewelry Making Tutorials: Crafting Handmade Pins, Bracelets, Necklaces and More

How to Make Polymer Clay Mokume Gane Cabochons for Jewelry

How To Make Stunning Ribbon Bracelets, Boxed Stitch Style. DIY Ribbon Craft Tutorial


