How to make a quilt with a dust ruffle


Tools of the trade
Quilting can be fun but are very time consuming. Once you have completed 1 quilt you will be looking for ways to make more of them especially if you have lots of people to sew for. Due to lack of space in my home I have tried to come up with ways to make quilting as easy as possible. Also finding a quilting rack has become my unicorn, ever elusive, even if I managed to find one, where would I put it? To top all of that I have a King size bed, so washing my new quilt will pose a problem, right? I have found a solution that I would like to share.
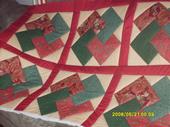
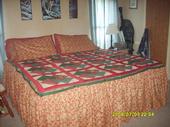
I like to ‘Quilt as I go’ which means putting the top, batting and backing all together in blocks, when all blocks are completed, then I sew them all together to make my quilt. I have found to make a nice quilt that fits in my washing machine I had to make a few adjustments. One in particular was rather than make a quilt that over lapped the edges of my bed, I made one with a detachable dust ruffle. Sound intriguing? Read on!
You will want to start with good quality material, there is nothing worse than having a completed project start to fall apart within weeks of completion. Select your desired batting, deciding on how think you want your finished quilt is important. Your backing should also be of good quality material. Decent math skills are needed to make a quilt, if this is difficult, you might want to get someone to help you with the math. Most fabric stores are more than happy to help with this.
Depending on your fabric it will usually be what is termed 45” wide. This does not mean it is exactly 45” wide, just a measurement that is used. Cotton fabric comes in 45” , 60” or 108”. You purchase it by the yard which is 36”, this measurement is usually accurate. So for this instance we will be using the basic 45”. Adjusting for selvage (the edge of fabric that is wasted), we will now determine that 40” of fabric is usable. You don’t want to get almost finished with your project only to find out you don’t have enough fabric to finish, then go back to the store to discover it has all been sold. Better to buy too much than not enough with this.
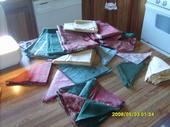
It will take a while to cut your fabric so there is no need to get out your machine just yet. Use a good rotary cutter and mat, and a nice straight edge, preferably something clear with measuring markings on it. A tape measure is also necessary for this project, I use the kind that is purchased from a fabric store, it is very flexible, as opposed to the kind found in a hardware store.
On to the good part, the removable dust ruffle. Knowing the length and width of the bed comes in handy here along with the height from floor to bed edge. To make a good ruffle you should have at least 3 times the amount of what it would be if it was a straight edge. If your bed is 90 inches long you will need 270 inches, in length. For this project I buy a whole bolt of (about 15 yards) of fabric for this. Any that is left over can be used to make throw pillows or other accessories.
We'll assume the height of your bed is 15 inches from the floor, for these purposes. You should make your ruffle 18 inches by 270 inches. This makes the ruffle fairly full. I like to hem my ruffle before gathering, it makes it a lot easier. You will need to gather the material, using either your machine or by hand taking big stitches, what ever is your preference. Once your material is gathered you will want to put it up against the quilt ‘top’ to make sure it fits exact.
Next you will want to have a strip of fabric sewn to this, it locks the gathers in place and will be what you use to attach to the quilt top. I use a piece of fabric that is approximately 3 inches in width, the length of the piece that I am working on. Fold this in half, turning in ¼ inch on raw edges using an iron. I slip the raw edges of the ruffle in between my ironed piece, pinning where necessary. Stitch this together, as close to the fold as possible. Finish 2 other pieces in the same way. You will have 3 finished ruffles.
To attach the ruffle to the quilt top there are a few different ways to do this. You can use Velcro, buttons, or snaps whatever you desire. For mine I used buttons. I made button holes on my ruffle piece and sewed the buttons on my quilt top. When it comes time to wash my quilt all I do is remove the ruffles and wash separately.
I hope you find this project as much fun to do as I did!
This addition can be used for those who happen to have a finished quilt in their closet but find the bed is too large to make the quilt work. Just make a dust ruffle and make it detachable, you have been able to put those old quilts to use again!

