- HubPages»
- Arts and Design»
- Crafts & Handiwork»
- Flower Crafts
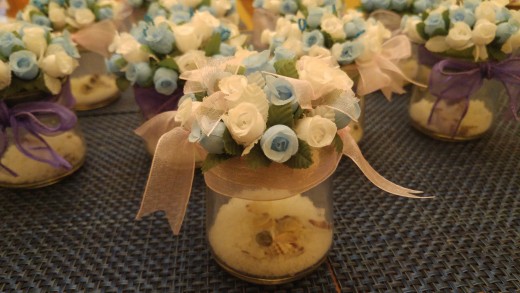
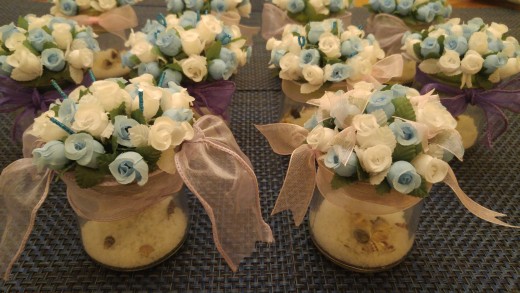
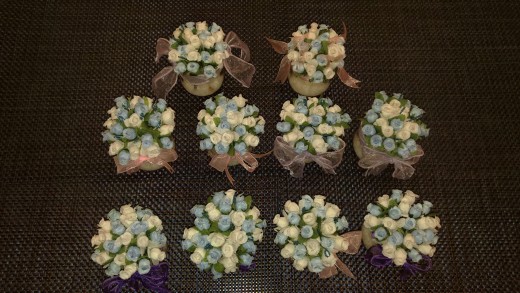
How to make cute flower arrangement using recycled jars- ocean and beach scene

Flower Arrangement using recycled yogurt jar. (Yoplait French Style Glass Jars)

I found Yoplait French Style Yogurt in the Glass Jars at the Store. Should I buy it?
Production Packaging are very important for the business! When you see the new product, the most people are cautious about purchasing. To break that wall, you need to make it so attractive and tell the customer, "This product will worth to buy it". When I found this 5 oz French Style Yogurt by Yoplait, my thought was below.
1. How cute is the packaging!
2. $1.49 for 5 oz yogurt is not reasonable.
3. Well, it is made of Glass and if I think buying a glass jar and 5 oz yogurt, it probably the same cost.
4. OK. I will reuse the jar and buy this product!
So, that is how I purchased the yogurt and start thinking about this project. :)
Yoplait French Style Yogurt in Glass Jar.

So....What to use for?
I thought about using this jar for another desserts, such as layered jelly. It will make very attractive dessert and I am pretty sure I will have fun decorating.
Then, I remembered that I promised my friend , I will make some table decorations for a fund-raising event! Yes, that is right, I need to make something using this jars!
Luckily, I had small silk flowers and sponges/foams from fixing my chairs. I think I cam make this flower arrangement with the items I have at home.
How to make a silk flower arrangement -Tools, Materials
Tools and Materials:
- Glue Gun and Glue Sticks
- Scissors and Wire Cutter
- Silk Flowers (Small / Corsage size)
- Foam/Sponge/Silk Flower Oasis (You could use simple kitchen sponge also)
- Flower Tape
- Ribbon
- Sand or Coarse Salt
- Shells
- Beads and Jewelry wire (Optional)
- Glass Jar
How to make a silk flower arrangement - Images
Click thumbnail to view full-size


How to make a silk flower arrangement - Directions
- If you are using any food container (jar), please wash well with soap and hot water. If you want to sanitize, clean with hot water or rubbing alcohol. Please be careful to sanitize if you are using hot water. If it is too hot, the glass jar might break or you might get burn.
- After you clean the jar and dried, use it to measure the size of the foam to cut. Please see the image to see how I attach the jar to mark the lid size. Make sure you mark a little larger than the opening, so the foam stay on the top of the glass.
- Put some salt or sand and shell as much as you would like into the jar. I put in about 1/3 inches so shell can be seen.
- Tape around the foam by flower tape. This is just cover the foam for the looks.
- Cut the flower stems about 1/2 inches by wire cutter.
- Start poking the flower stems into the foam. I used hot glue to glue and stable the flowers.
- You can add some spiky, shinny items like beads on the wire to make eye catching arrangement.
- When you have enough flowers, you can place the whole arrangement onto the jar. squeeze a little on the bottom of the sponge/foam to stay in.
- Tie a ribbon around the top side of the jar to hide the foam.
- You can make different styles for each season. Flower seeds for Springs, Dried Herbs for Summer, Pumpkin seeds or dried corn for Fall, Small candy canes for Winter instead of Salt and Shells.