How to make paper pop up card of indian pot


PAPER POP UPS
INTRODUCTION
Paper pop up many fold and many cuts technique is what i have done here. Understanding of geometry is really helpful here, and in children this really helps in learning the concept of geometry. As we all know that it is not possible to fold a curve as we can easily do for straight lines so here we actually creating a circular shape by paper folding.
Here you will learn how to use paper to create beautiful and amazing pop up designs.As I mentioned earlier the technique is called as may cuts and many folds. It looks amazing and intricate on first look but this one is really very easy to make. It goes with following levels ,
Folding paper
Drawing,
Horizontal lines or the cut lines, see image,
Perfect vertical lines or fold lines, see image
Cutting,
Folding,
Pushing these folds inwardly.
Not just for this particular pot pop up but for any form or design same steps can be used.
Out of these proper drawing is very important to get the best result. Cutting and folding part is like kids play. Using the same technique you can make several different designs.
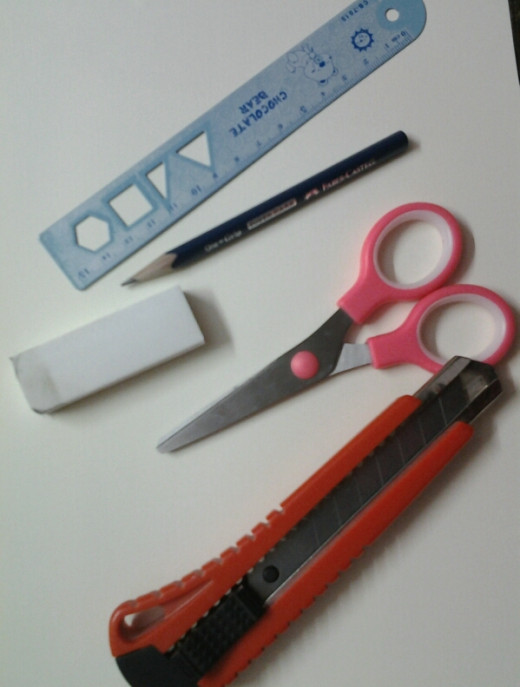
MATERIALS REQUIRED
All that you need is,
1. A4 or A3 size pastel sheet of nice earthy colors for the pot, i choose it to be traditional otherwise color can be your own choice.
2. Scissor, ruler, pencil, glue.
3. Another same size pastel sheet to be used for the front layer.
4. Colors or your choice, acrylic paints or sketch pens.


Steps to make the pop up
Step 1 - Keep the sheet flat on table and fold this into half, press the folding line firmly.
Step 2 - Considering fold line as the center line of the pot, draw half image of the pot, as the pop up is symmetrical.
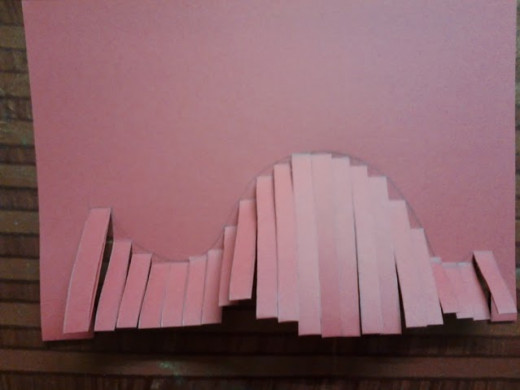
Step 3 - Draw continuous horizontal lines each at a gap of approximately 1 cm all through the pot from top to bottom.
Ste 4 - Now since the pot is curvy and it is not possible to fold the curves and we need vertical lines to fold. For the draw vertical lines after each line all through the pot as seen in the image. The dotted lines are the folding lines.
Step 5 - Now using scissors cut all the horizontal lines.
Step 6 - Now fold each cut carefully towards right side and press each fold line firmly.
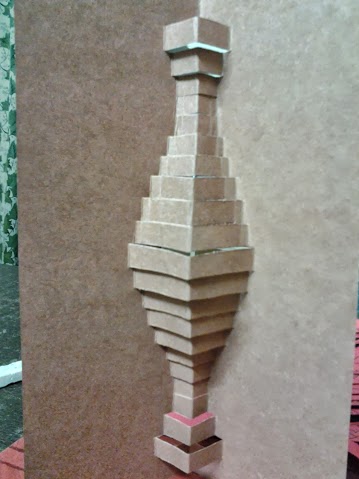
Step 7 - Now open each cut and push all these cuts inside the card.
Step 8 - Now your pop up is ready, add white color design using brush and little water.
Some variation using same technique
- Using same technique of cutting and folding and after little practice you can create various other designs, some of these are shown in the images.
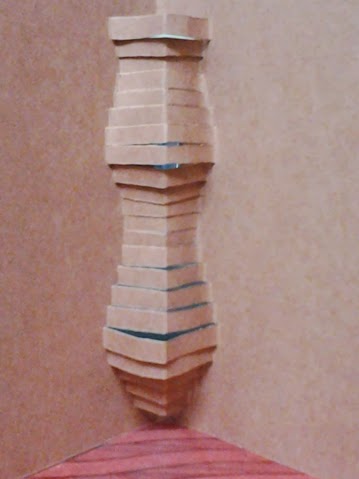
- Have a look at the these pots, here the paper is folded lengthwise to get the sleek pot design. It is easy to create many such designs using same technique.
- For straight pots this is even more easier, for the curve shape pot a little practice is required as sometimes the final result doesn't come out as a proper curve.

Adding a back sheet
Adding a back paper is important because it hides the hollow part which occurs when the paper is pushed inside. Just fold the sheet into half, apply glue and insert the pop up part inside this upper part. Press it on all the sides and your pop up is ready.Use a contrast color sheet for the upper part and you can also draw something on the front panel or just write a message.
Some tips while making pop ups
- One must try the beginner level first like starting with one cut and one fold techniques then 2 cuts two folds and so on. It helps in understanding the subject better specially the inward push step comes with practice.
- The inward push step is sometimes most difficult for children so they must know that by folding and pressing the folds correctly the pop up portion goes inside very easily.
- In pop ups we need to cut many lengths of lines and sometimes we have to cut out something from in between like a window if we are making a house pop up, so here you can use cutters, but scissors are the best most of the times specially for kids.
Hope you will try making this beautiful mud pot with paper and will teach your children the same. Watch my other hub on simple one cut and one fold technique to start with the basics.


