How to post process sunset images in GIMP 2.8


Unfortunately, our cameras perceive a scene differently to the way our eyes can see it. In this case GIMP comes in very handy to bring back the beauty of what we actually seen. Editing using this method will take you about 2 minutes, but it will make a big difference to your sunset images.
If you don't have GIMP yet, download it from here: www.gimp.org
Prefer video tutorials, click below:
Step 1
Open your image in GIMP by dropping it on the canvas from a folder.
Create a New Transparent layer by going to Layer / New Layer / Transparency.
Set this layer to Overlay.
Set your Foreground colour to Black.
Take Blend Tool and in Tool Options set:
Gradient – FG to Transparency
Shape – Linear
Repeat – None
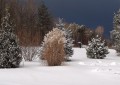
Pull the gradient from the top of the sky to the dark part of the image, see fig 1.

For the effect see fig 2.

Step 2
Go to Tools / Color Picker.
Using the Color Picker, click on a dark part of the sky to select the colour.
Now click on the Foreground Colour and select a much brighter and saturated shade of the colour you picked from the sky. Compare my colours: I picked the colour #a0b2c0, and then changed it to #0070c6.
Select your Background Layer.
Create a New Transparent layer by going to Layer / New Layer / Transparency.
Set this Layer to Overlay.
Take Blend Tool and using the previous settings pull the gradient over the blue part of the sky see fig 3.

Reduce Opacity of this Layer to about 40%.
See result in fig 4.

Step 3
Select your Background Layer.
Create a New Transparent layer by going to Layer / New Layer / Transparency.
Set this Layer to Overlay.
Set your Foreground colour to White.
Take Blend Tool and without changing any settings pull the gradient over the dark area of the image see fig 5.

Duplicate the Layer with White gradient by going to Layer / Duplicate Layer, see fig 6.

Tutorial requests
What GIMP tutorial would you be interested in?
Step 4
Go to Image / Flatten Image.
To save the Image, go to File / Export (for GIMP 2.8) / give name / save with JPEG extension.
Hope you enjoyed this tutorial and learned something new with me today about GIMP.
If you have any questions about this tutorial or GIMP in general, leave those in the comments.