Design a Professional Business Card - Using Adobe Photoshop and Illustrator
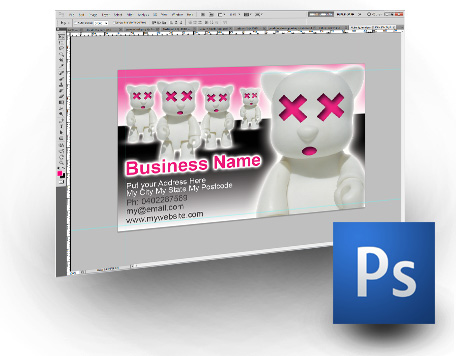
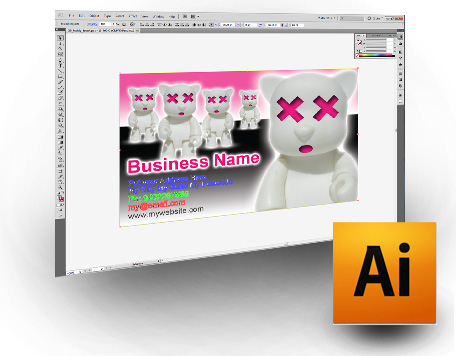
Create a Professional Business Card using Photoshop & Illustator
Ok so your a new up and coming graphic designer, you have photoshop and illustrator but you are still in the learning phase and want to learn how to get things print-ready then this tutorial is for you. For this lesson we will be creating a business card but the same process can be applied to all projects that need to be printed. So lets get started.
What you will need to create your new business card:
- Adobe Photoshop
- Adobe Illustrator
- A nice background Image for your business card
- The will to succeed
OK so if you have all of these four things then you are ready to get this show underway. So lets begin the process:
- Lets begin by opening photoshop. Once photoshop is open click on "file" from the top menu then select "new".
- In the new window that appeared labeled "new" you will see the dimensions for your new business card. Change the "width" to 99mm, the "height" to 55mm and most importantly the "resolutions" to 300 pixels/inch and change the "color mode" from RGB Colour to CYMK color.( if you desire a different sized business card then the dimensions i have suggested feel free to enter what ever size you like for your card here i am just using 90mm x 55mm as an example but make sure you still have the "resolution" on 300 pixels/inch- all jobs that are going to print have to be a minimum of 300 pixels/inch and also CYMK Color so note that for future reference).
- From the top menu click "file" then "open" and browse to where you have your background image for your business card you can choose a photo or maybe you have made something in photoshop that you would like to use like i have in my example business card. The main thing to make sure of when selecting this background image is that is it large enough to fit your business card size, it can be larger but not smaller as you cannot scale up images without losing quality and we want to make a business card that is professional.( make sure this background has a nice area for your text information to sit, you don't want something that is busy all over otherwise your text will get lost in the background- this is fine if you want a busy card but for the most part it will look better if they text on the card has a nice area that is not so busy like the example pic on this tutorial).
- Now that you have you chosen background image select the whole canvas ( use the command ctrl+a for windows computers or command+a if you are using a mac). you should now see your entire images is selected ( you can tell this by seeing the flashing white lines all around your image). Now that it is selected copy the image ( ctrl+c for windows command+c for mac) and then close the image.
- You should now be looking at your blank business card, now paste your image in ( ctrl+v for windows command+v for mac). Ok your image is now on your business card ( if your image is smaller then the size of your business card then you will need to choose a new larger image- remember what you learned in "step 3." you can not scale up images without losing resolution) you image will need to be moved into place where you have pictured in your head that it should sit and it might also need to be scaled down.
- Lets do both of these actions at once, to do this we will "transform" the image, so press ctrl+t (for windows and command+t for mac) you will now see a box around the image, if your image needs to be scaled then simply hold "shift" and pull one of the small squares on the corners inwards until your picture is sized how you like. Once it is the correct size you can now simply pull the picture into place with your mouse holding down the left mouse button ( for windows and command+mouse for mac) and drag the image to where it sits nicely.
- ok now we are getting ready to put our text in but firstly we need to set the bleed area so that we know our fonts will be inside the safety zone (bleed area) for the printer. To do this click ctrl+r ( for windows and command+r for mac) and you will now see rulers appear around your window. move your mouse over the ruler on the left and then hold down the mouse and drag towards your business card. You will see a white vertical line appear- drag this to 5mm inside your business card from the left and let go of the mouse. You should now have a blue vertical line 5mm from the left of your business card. Again move your mouse over the left ruler and drag a white line out to 5mm from the right hand side of your business card and let go of the mouse. Next move your mouse over the ruler at the top of the screen and drag down to 5mm inside the top of your business card and let go. Next do this again and drag the new ruler down to 5mm inside the bottom of your business card. Your card should now have 4 blue lines all 5mm in from each edge of your business card. These lines will serve as guides when we are placing our text in. Note now that you can see the bleed area of your card you should take notice if there are any parts of your background image that are in this area that shouldn't be. You want your background image flowing through the bleed area but any main focus points of the image within the inside of this area)
- We are now ready to put the text in. We will put your business name in first. On your tool bar located down the left of your screen click on the icon that has the letter "T" now move your mouse the the area on your business card that you want your business name to begin and click. Now simply type your business name ( for this lesson my business name is going to be " Business Name" as you will see in the image of the finished business card.) Once you have typed your business name if need to move it into position simply move your mouse an inch away from you business and hold down the mouse and drage you business name to where you would like it.
- Now lets choose a nice font and the color of the font. To do this you will see all of the options you need across the top of your page. Select a font you like from the drop down menu on the left of the menu bar then choose a size for the font then finally choose the color you would like. Once you have chosen these three things you can now click the small tick found on the right of the same menu bar. Now lets make your font stand out a bit ( this part is optional and will only suit some business cards and companies but do it just for future reference if you don't like it you can undo it). On your layers panel located on your right you will see a layer that has a small "T" for its icon. Double click this layer. A window appears labeled "Layer Style" and in this window you will see a list running down the left hand side. from this list click the tick box to the left of the option "Outer Glow" then click on the word "Outer Glow" to show the options for "Outer Glow" These setting will differ for all different business cards so you will need to play with them until it looks great for you. First thing to adjust is click the drop down menu for "blending mode" and change this to "normal" next click the small colour square and choose a color ( i am choosing white for mine) now adjust the "Spread" and "Size" sliders until it looks great. If you like the outer glow click "ok" now to apply the "outer glow" if you don't think it suites your business card the simply click "cancel".
- Now lets put in our details that we want on the business card. To do this Repeat "Step 8." and "Step 9" for all the details you want on your business card. For my business card i will only be putting an "outer glow" on my business name and the other details will be plain font so that my business name stands out more then the rest of my details and also this makes your details easier to read. I will also be making my details smaller once again to make my business name stand out and also so the details fit in easier. I also have chosen different colors for my details to make them sit nicely on my business card something that may or may not apply to your business card.
- Ok there it is, your new business card. But now its time to get it ready for print. First things first we need to flatten the background image leaving the fonts ready for illustrator. To do this move your mouse over to the layers menu on the right hand side and holding control ( command on mac) select the background layer, then your background image layer then you business name layer ( only select the business name layer if you have a "outer glow" on it, if you didn't apply an "outer glow" then leave it unselected). Now right click ( for windows or command click for mac) on your background image layer, from the drop down menu that appeared click "merge layers". In your layers menu you should now have your background image down the bottom of the layers and above that only layers with the letter "T" for their icon.
- Ok lets take it to illustrator. Save your new business card in photoshop then close photoshop. Now we can open illustrator.
- In illustrator now click on "file" then "open" from the menu at the top of the screen. Browse to where you saved your new business card and click "open". A window appears labeled "Photoshop Import Options". In the window make sure that the option "Convert Layers to Objects" is selected down the bottom of the window and then click "OK".
- We are now going to "outline" our fonts so they print very clear. To do this select all using ctrl+a (for windows and command+a for mac) and then from the menu at the top of the screen click "type" and from the drop down menu select "create outlines". You will now see that all of your fonts (except for the business name if this has a "outer glow" on it) are highlighted in different colors. This means they are now outlined and ready for print.
- Nearly there now. Lets save this as a pdf. From the menu at the top of the screen click "file" then click "save as copy" and down the bottom of the window that appears you will see a drop down menu labeled " Save as type" from this menu choose "Adobe PDF" then give your pdf a name and click "Save"
- A new window appears label " Save Adobe PDF". At the top of this window there is a drop down menu labeled "Adobe PDF Preset" from this menu select "[High Quality Print]. Now finally click "Save PDF" at the bottom of this window.
- All done, give yourself a pat on the back and smile.
There you go, from start to finish how to make a professional business card using photoshop and illustrator. Note as i said before this process can be repeated for any printing project that you may need be professionally printed. I hope this beginners guide helps you learning in the wonderful world of graphic arts and congrats on your new business card.
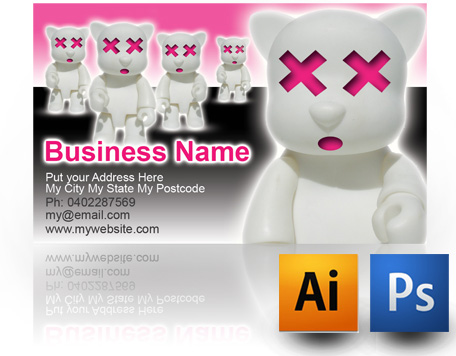
Here is A video of the Process of making a Business Card In Photoshop and Illustrator
Time to get your business card printed
All Done.
Now your all finished the last thing you need to do is get it printed. Here are a few sites I use to print my business cards.
Cheap Printing Services
Great printing company for people in Australia.
Vista Print
Good value world wide printer
What did you learn about getting your business card print-ready
view quiz statisticsFeedback Loop
Did this business card tutorial help you on your way?
Links for getting desing ideas for your new business card
- Business card templates
these guys have some amazing layouts for their business cards.Very good for just getting some inspiration for your new business card. - Vistaprint
These guys have a lot more templates to look through but i think the design element is a little lower then the other site. Still if the other site doesn't spark anything maybe you will find that spark here.


