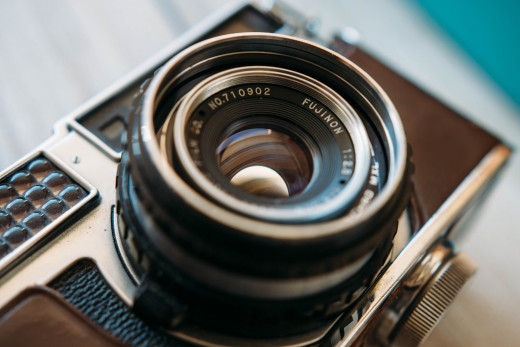
Guide to Getting Brilliant Photographs Without Using Auto-mode

The presence of tiny colourful speckles in digital photographs is called noise. Noise is sometimes referred to as grains that give photographs a snowy appearance, which is far from desired. There are many reasons why noise appears in photographs. It could be due to the overheating of the camera sensor, an unjustified ISO number, an outdated camera, a low-light conditions, or any other unusual setting.
The tips listed in the article are for those who regularly use their digital camera and want to enhance their knowledge about the various associated technicalities. Stay there! Something good is coming your way!
What is ISO and How is it affecting quality of the image?
This is the most important and highly reiterated point when it comes to the noise reduction in photographs. The ISO number is defined as the measure of image sensor’s sensitivity towards light. The higher the number of ISO, the higher will be the sensitivity, and as a result of this, your camera’s sensor will capture more light.
A high ISO number is desirable in shooting in the low light conditions for the reason stated above, but high ISO introduces noise. The lower the ISO number, the lower will be the level of grains in a digital image. So, for the optimum result, keep the ISO number to a minimum and tweak other settings manually. Ideally, the ISO number should be kept at 100 or 200, depending upon the output.
Tip: Click photographs and keep changing ISO (don't max it out) as per the light-conditions. After a while, you will be knowing the ISO that your DSLR likes.
You can use a slightly higher ISO number if you tend to shoot at night or indoors.
Let Me tell you something about Semi-Auto and Manual Modes
There are two terminologies you should be aware of before manually adjusting the settings for a perfect click:
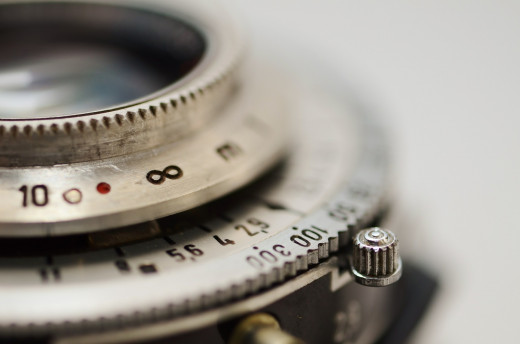
- Aperture: It is a gate through which light enters the image sensor of your camera. If Aperture number is high (f/8), then the sensor will get much less light compared to that when Aperture number is low (f/1.4). Also, the depth of field will be larger in the former than that in the latter.
- Shutter Speed: It is the length of the time for which you expose your sensors to the scene you want to capture. A higher shutter speed means a lower time taken by shutter to close itself, and thus lower is the light gathered by the image sensor. The low shutter speed of the camera may cause blur in the image, if the objects in the scene are moving or if the camera is shaking.
Your camera must balance out “Aperture” and “Shutter Speed” to take care of the exposure as well as the ISO number. For this to happen, there is a Semi-automatic mode.
Semi-automatic: Generally, Semi-automatic has two important modes, Aperture Priority mode and Shutter Priority mode.
In Aperture-Priority mode, you change the aperture and shutter speed is taken care of automatically. A low aperture number suggests the aperture of the camera is large and that it is letting more light into the image sensor. As the amount of light received, in this case, is high, the shutter speed gets automatically upped in order to compensate for the increased light.
In Shutter-Priority mode, you control the shutter speed and aperture number gets adjusted accordingly. If you lower down the shutter speed, it means a high amount of light is entering sensor and thus aperture number shifts to a higher side so as to keep the aperture small.
In manual mode, all the settings are in your control. So, if you are keeping the ISO number to a moderately low level (again, to reduce noise), it should be compensated by a lower aperture number (which results in a larger aperture) and a lower shutter speed. Both will ensure a proper exposure of image to the light. Again, aperture number and shutter speed heavily influence the depth of field and image blurriness, respectively, so you have to think what trade-offs are there with such settings.
Can you tell what could be the optimum settings for clicking a fast moving object so that it does not result in blur?
You must increase the shutter speed to freeze the moment. As the shutter speed is increased, lower the aperture number to open up aperture further so as to maintain the optimum exposure of the scene by allowing more light to enter the camera sensor. ISO settings, here, should neither be too high, nor too low.
Overall, being hell-bent on reducing noise is not always favorable. A low level of noise in an image may also imply that the image is under-exposed and too smooth.
Use third-party noise remover software
Even after tweaking the settings, if you still find considerable noise, you can use any third-party noise reduction software. Professional photographers prefer Adobe Photoshop to manually remove noise from photographs, but if you don’t want to involve yourself too much, you can use Systweak’s Noise Reducer Pro for Mac. It is an easy, nice and efficient way of getting rid of noise.
So, this is everything you need to know about getting minimum noise in your clicks. Now take your DSLR, go out, click photographs, and share them with the world. You might also like to share this article though.


