Mini Mokume Gane and Altoid Tin Covering
Mokume gane (pronounced mokume gane) is a Japanese technique of "Damascene" of non-ferrous metals: traditionally the gold, silver, copper and alloys like the shakudo, the shibuishi and the kuromido. This technique was developed in the 17th century and was intended for the manufacture of the guards of the katanas. It was then applied to the manufacture of ornamental objects before falling into disuse. It will be "rediscovery", which and espoused by Western contemporary jewelers such as Steve Midgett, James Binnion and Ian Freguson (see links at the bottom of the article). In finding and improving the revenue of this discipline, they have also broadened the range of usable metals among other things including aluminum, titanium, Platinum, palladium, iron and steel.
In simple terms, mokume gane is to entremeler and to merge different metals (compositions and different colors) to form a homogeneous and travaillable mass without provided the mix (such as playdough from our childhood that always ended in blob marronasse). This is all the difficulty and the beauty of this technique since that working with materials with different properties (melting temperature, annealing, conductivity, maleabilite etc.). The different metals fused, it's manipulate this "pastry" to create a pattern.
Mokume gane therefore allows the development of motifs in the mass of the object. "Mokune gane" means also "the knot of the wood", emblematic reason this technique. The reasons of mokume gane can be trained and handled by the twisting, abrasion, engraving, chasing, corrosion, the patination... It can be forged, welded, shaped, enamelled, set, etc. Its working temperature will depend on the alloys which make it up. It allows a huge variety of patterns and shades, from subtle to the more contrasts.
Supplies
2 Contrasting Colors of Premo Clay
Pasta Machine
Tissue Blade
Texture Sheet (Shade Tex Rubbing Sheet)
Misting Bottle of Water
Mokume Gane step by step
Step 1
Roll clay out on thickest setting of pasta machine. Stack and cut to square up edges. Run this stacked sheet through pasta machine on thickest setting.
Cut the sheet in half, and stack again. You will now have a sheet made up of 4 layers. Run this sheet through pasta machine on the thickest setting.
Cut the sheet in half again, and stack. You will now have a sheet made up of 8 layers. Run this sheet through pasta machine on the thickest setting.
Step 2
Cut this sheet in half yet again, and stack. Now you have a sheet made up of 16 layers of clay.
Run the sheet through the pasta machine on the thickest setting.
Step 3
Choose which texture sheet you want to use. You will get very different results, depending on which one you use! I like the one with dots, because it looks like snakeskin when completed. Mist texture sheet with water, and put your stacked sheet of clay down on it.
Run the texture sheet and clay through the pasta machine on the thickest setting.
Let this textured sheet of clay rest for awhile before starting on the next step.
Step 4
Using a very sharp tissue blade begin to slice off the raised bumps from the textured sheet of clay. Slightly curving your blade helps, and you can brush off those pesky little pieces of clay from the sheet with your fingertip. DON"T slice too deeply!!!!! Once you get all the little bumps sliced off, you can roll this sheet through the pasta machine for a final smoothing.
Step 5
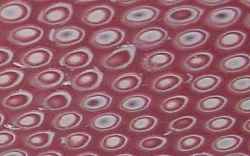
This is what the finished sheet of claylooks like. You can now use this to cover a variety of projects. I am going to use mine to cover an Altoid tin! Once it is baked and sanded, it will bring out even more detail in the mini mokume gane
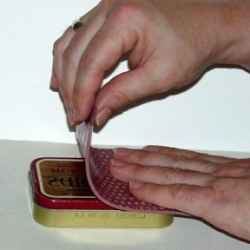
Supplies required to altoid a tin covering
Supplies
Altoid Tin
Premo Clay
Pasta Machine
TLS
Tissue Blade
Wet/Dry Sandpaper (I use 400, 600, 800, 1000, and 1500 grits)
First step
To cover my tins, I use a sheet of clay that has been run through the pasta machine on the #2 setting. (On my Atlas pasta machine, #1 is the thickest setting.) I tend to sand the crud out of my tins, so I like the clay to be fairly thick. You can use a thinner sheet of clay if you like.
Since my mini mokume gane sheet is thinner than the #2 setting on my pasta machine, I have backed it with a thin sheet of scrap clay. Then I run this stacked sheet through the pasta machine to get my #2 thickness.
Apply an extremely small amount of TLS to the lid of your tin. Smear this around with your fingertip to cover top and side rim of tin lid. (If the TLS is too thick, you will have a problem with your clay sheet sliding around on the tin.)
Starting at one end of the tin, press down your sheet of clay. Working slowly to the other side of the tin. This will help keep air bubbles from getting trapped between the tin and the clay.
Second step
Smooth the clay down onto the sides of the tin lid. Take out little "V" shaped darts in the clay at the corners to get a smooth fit. Cut the excess clay off at the rim of the lid.
Third step
Cut out clay around hinges as shown in picture.
Fourth step
Smooth the cut edges down to the rolled rim of the tin lid, rounding a bit. Make sure you smooth those seams where the darts are!!! Do not cover the holes where the hinges are. Just ease the clay down to cover the tin around the hinges. Gently open you tin lid all the way to be sure no clay is blocking the hinges. Now, bake the tin, and we will cover the bottom after baking!
After your tin has cooled, apply a very small amount of TLS to the bottom of the tin. Smear around to cover the bottom and the sides of the tin. Apply a #2 thickness sheet of clay to the bottom of the tin. Be sure to start at one side, and work slowly across, pressing down the clay. Smooth the clay up the sides, taking "V" shaped darts in the sides to get a nice fit. Cut off just below the tin lid. Smooth edges, and seams where you made the darts. I do all this with the tin lid closed.
Fifth step
After all the smoothing is done, carefully open you tin lid and rock it back and forth, opening it all the way. This will leave an indention in the clay below the hinges, so you can open your tin all the way once it is baked. See the picture below to see what the indention looks like
Sixth step
Okay! Now you can bake your tin again! After your tin has baked, and cooled off, you can start the sanding. I sand over a bowl of water that has a drop of liquid dish soap in it. I just keep dunking my tin, and the sandpaper to keep them both wet. Start with your lowest grit, and slowly work your way up to the highest grit. Buff to a high shine!

