UpCycling Explained with Examples
TLDR
With so many ways to UpCycle this article looks at those different ways while providing examples so you can give it a go yourself! Wether you're reusing rubbish, turning trash into treasure, transforming something new, or starting with something blank, there's a style of UpCycling for everyone!
- Reusing rubbish
- Taking something old and making it new
- Transforming something new, and
- Starting with a blank canvas.
I'll also discuss a few key questions at the end. Specifically: Can I upcycle?; Why do people do it?; and Is it worth it?
Turn Trash into Treasure
Reusing rubbish!
Reusing Rubbish
The most common image upcycling brings to mind for most people is turning rubbish into something of use. This can require some creativity or arise out of necessity. Usually, this can be done with general household rubbish and doesn't necessarily require any fancy tools at all. That becomes a little more complex when you get into restoration but that's not the focus of this article.
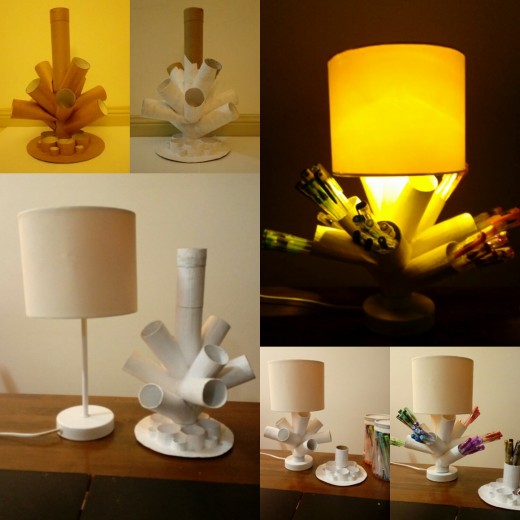
The following examples of recent rubbish upcycle's of mine required nothing out of the ordinary. With my toilet paper roll creation, I didn't even know what I was making to start, I just started!
- Toilet roll gel pen holder
- Bottle mobile volume booster
Toilet Paper Roll Gell Pen Holder
What you'll need
Tools:
- Old toilet paper rolls
- Four and water for paper mache mix
- Scrap paper shredded (can also use newspaper, magazines, or paper bags)
- Paintbrush to apply paper mache glue (optional)
- Paint to decorate afterward (optional)
I choose to put the base on to a lamp I picked up second-hand for extra effect but as you'll notice still created a base so it was also able to support itself.
I'd also recommend using this method to make other abstract structures to hold household nicknacks. Done with enough care you can create an aesthetic feature that doubles up as a practical space saver.
For an article on how to paper mache check out this helpful hubbers hub here.
- Paper Mache as an Art Medium
Paper Mache requires few tools, simple materials, and recycles old paper into art. Now we associate it with children's school projects but paper mache started out as and remains a medium for fine art. Read on to learn more about this great medium...
Bottle Mobile Volume Booster
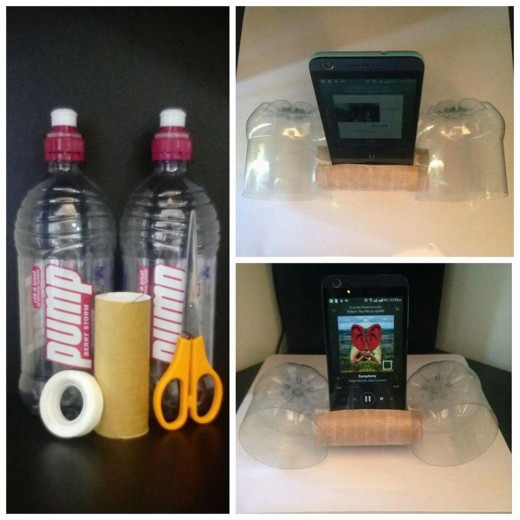
What you'll need
Tools:
- Adhesive tape
- Scissors
- One toilet roll or tube, and
- Two bottles.
Simply cut a rectangle in the centre of your tube large enough to fit your phone snugly. Then cut off the base of the two bottles. Furthermore cut one circle in each of your bottle bases to snugly fit each end of the roll. Then secure all the parts with tape and try out your new volume booster. Lastly decorate as desired, if desired.
Turn Someone Else's Trash into Your Treasure
Reusing other people's rubbish!
Taking Something Old and Making it New
If you don't have enough rubbish lying around to find something you'd like to make, why not use someone else's rubbish? One mans trash is another's treasure after all. This style of UpCycling is my absolute favourite, seeing old things become new.
- Upcycled birdhouse
- Table and chairs, and
- Second-hand canvas abstracted.
Upcycled Birdhouse
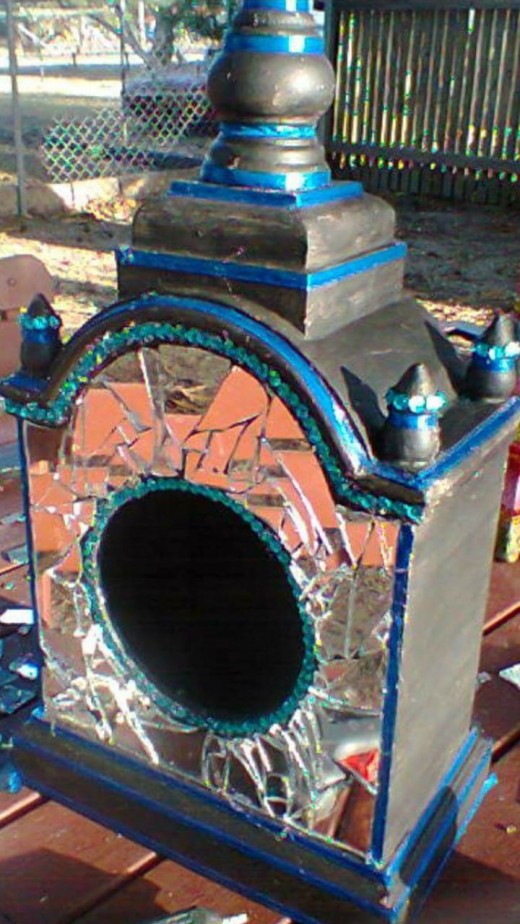
What you'll need
Tools:
- Mirror or mosaic tiles.
- Hot Glue
- Paint
- Ribbon (Optional), and
- Sequence (Optional)
Start by painting the base coat of the item you're upcycling. Then use the glue to add ribbon and sequence. Finally, puzzle in broken pieces of mirror, or mosaic tiles if you're worried about bad luck from breaking a mirror.
This project was a beautiful accident for me as I was decorating the border of the mirror and didn't actually mean to break the glass. But once it was done, this seemed like the perfect alternative project for the day!
Table and Chairs
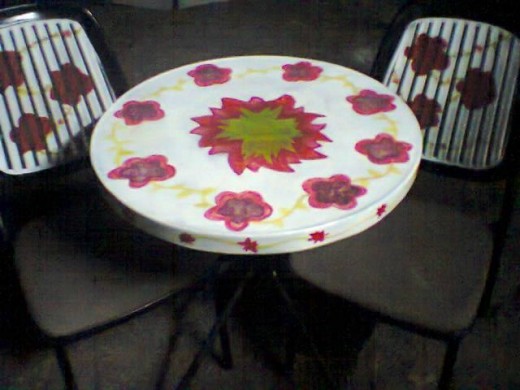
What you'll need
Tools:
- Surface preparer (depending on the age and rust level of your surfaces), and
- Paint
You'll need to spray the surface with surface preparer depending on the age of the piece you've acquired. This is just to make sure the paint is able to stick. Once you've prepared your surface all that's left to do is to paint!
Second-hand Canvas Abstracted
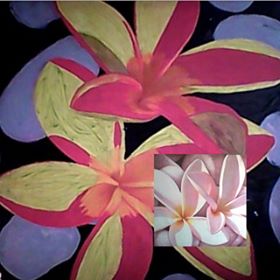
What you'll need
Tools:
- Old faded canvas
- Paint
This one is probably the easiest but can seriously enhance your painting skills. Using an already created but old and faded canvas image you can paint over it with new colours. If you choose to stick to the shading scheme already there this can help you learn. If not you can end up with an amazing abstract image after you're done!
Turn Ordinary Into Amazing
Make something new newer!
Transforming Something New
Upcycling doesn't have to take something old and make it look newer. You can also take something reasonably new and mix it up.
- Fairy Statue
- Decorated Wooden letters
- Decorated Gift boxes
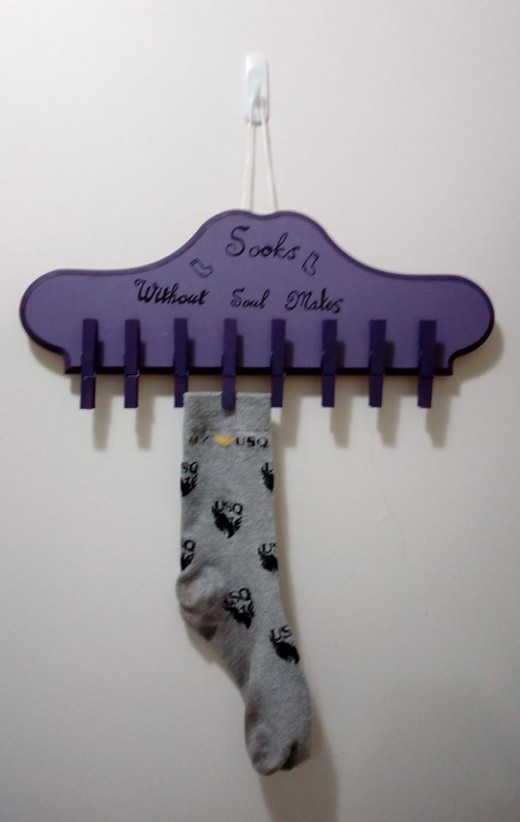
- Socks without soul mates
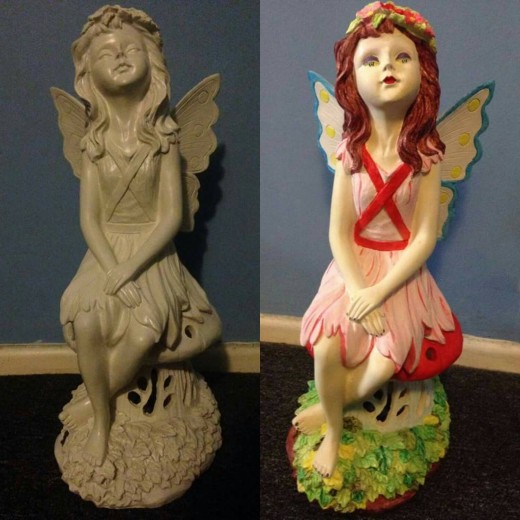
Painted Fairy Statue
What you'll need
Tools:
- A plain statue, or even a rock, and
- Some paint
This statue I knew I wanted to paint the moment I first saw it. I went with nothing more than the primary colours and black and white mixing paint as needed. And I think it turned out rather well if I do say so myself.
Revived Fairy Statue and Some Mushrooms
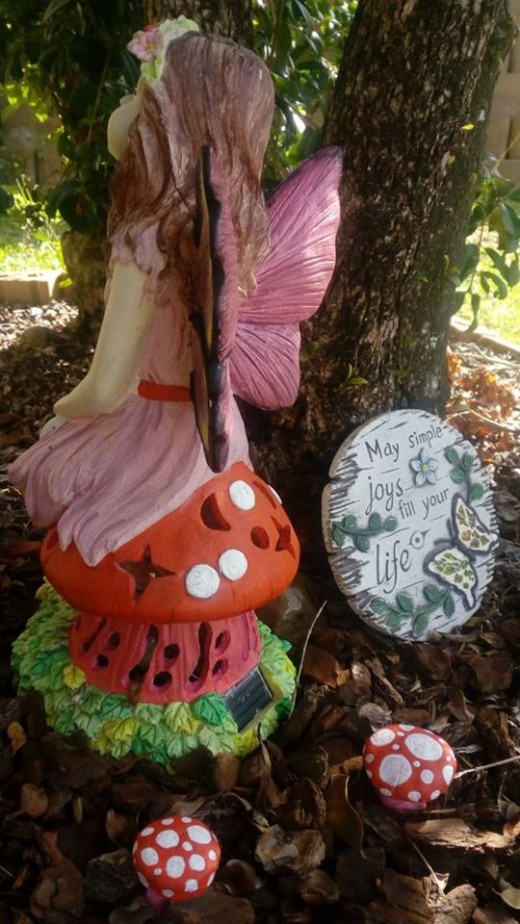
This was a revised edition of my fairy statue as the paint did sun bleach a little over the years. I recommend painting with a sealant but it isn't absolutely necessary. I also added some fairy mushrooms molded out of some leftover clay from another project.
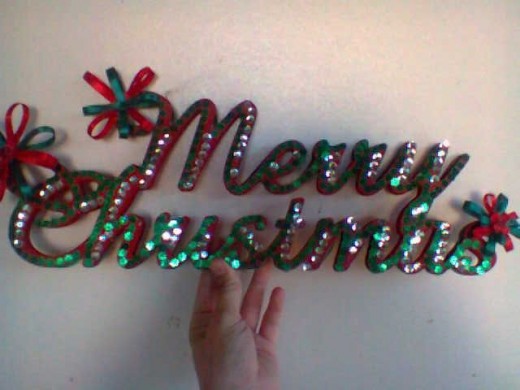
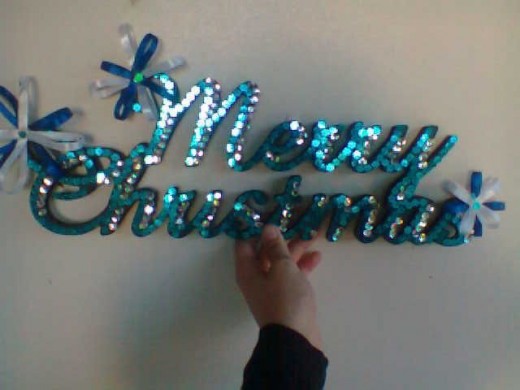
Decorated Wooden Letters
What you'll need
Tools:
- Wooden letters (bought or made)
- Glue
- Ribbon, and
- Paint.
Paint the wooden letters your desired colour then leave to dry. Using glue and ribbon, follow the edges of the letters with ribbon. Decorate with sequence and more ribbon. Finish decorating as desired and leave to dry thoroughly.
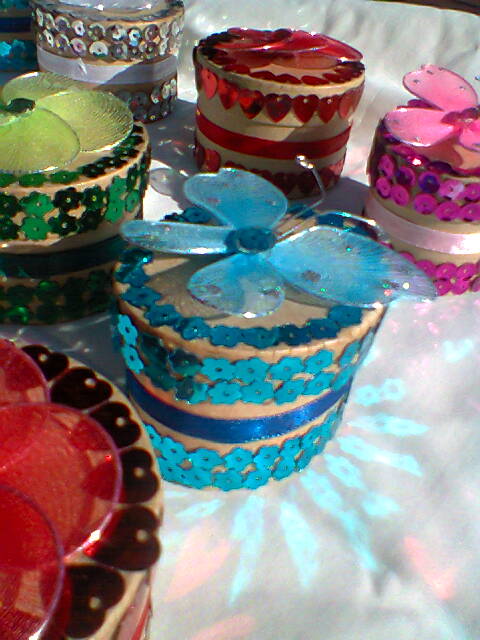
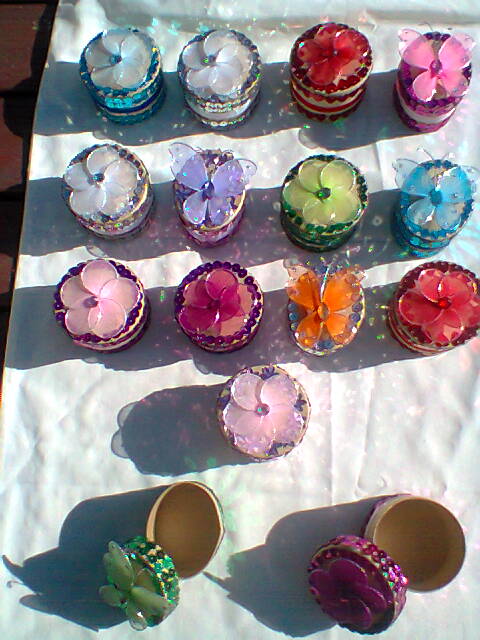
Decorated Gift Boxes
What you'll need
Tools:
- Small plain gift boxes
- Glue
- Sequence
- Feature decoration
- Ribbon, and
- Additional decorations as desired.
Glue a piece of ribbon in the middle. Glue sequence around the tops and bottom as shown. Glue feature item to the top. Decorate with additional decorations as desired.
What you'll need
Tools:
- Wooden board
- Wooden pegs
- String, and
- Paint.
First start by painting your board and pegs, leaving until completely dry. Then glue your pegs to your board, again leaving until completely dry. Now to hang up with the string I found it easiest to glue pegs onto the back of the board and loop the string through them. Finish decorating as desired. Now use to store all your lonely socks until they can find there soul mate again. Happy sock matchmaking.
Turn Nothing into Something
Turn blank into breathtaking!
Starting with a Blank Canvas
You don't always need something old, broken, or about to be discarded to upcycle. You can start from nothing and create something. Limited only by your imagination.
- Texter and stickers, and
- Rainbow canvas.
Texter and Stickers
What you'll need
Tools:
- A pencil
- Baking or tracing paper.
- Markers
- Stickers
- Scissors, and
- Glitter glue.
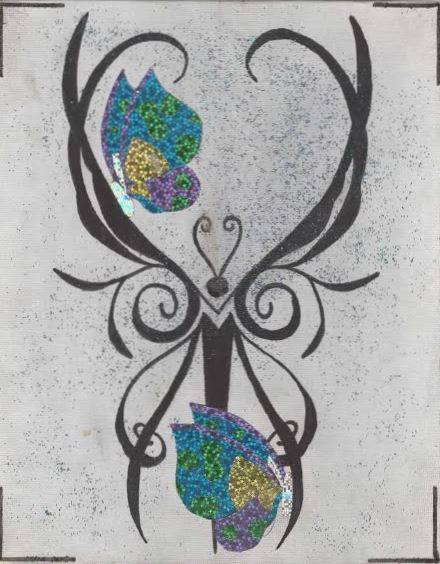
Start by tracing out one half of the picture in pencil. Now use the baking or tracing paper to mirror this image onto the other side of the picture. Once you're happy with the image in pencil, colour it in with markers. Use the scissors to cut out stickers to your desired shapes and sizes and then use the tracing method to mirror the image for a butterfly facing the other way. Don't forget to flip the paper so the butterflies are going to be facing the same way. And lastly, finish with a smear of glitter glue.
For a better explanation on how to rotate traced images, see this hubbers hub here:
- Rotations Math. How to rotate a shape 90, 180 or 270...
If you are asked to rotate a shape then you need to turn the shape around. In most questions the rotations will be: ¼ turn or 90⁰ turn ½ turn or 180⁰ turn ¾ turn or 270⁰ turn Also make sure that the shape is turned the correct way...
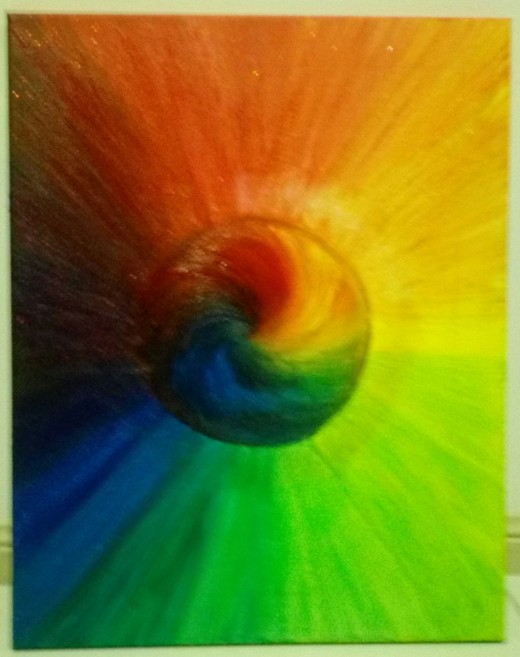
Rainbow Canvas
What you'll need
Tools:
- A blank canvas, and
- Paint.
This one's pretty simple and straightforward. Add a splash of colour to a boring blank canvas. For this project, I wanted something I could look at while painting other things and immediately know what colours to mix together to get the one I want. Something I should just know right? I know, but this has been a huge help.
Can I UpCycle?
Yes! Anyone can upcycle. You don't need to be particularly crafty, artsy, imaginative or creative. As this article has shown there are many different ways to upcycle with many different but equally fabulous outcomes. No special talent needed.
Why Do People UpCycle?
People upcycle for many different reasons. Some want to reduce their carbon footprint by reusing rubbish. Others want to reduce there spending by reusing what they already have. Others still want to revamp some ordinary objects lying around. Most of all I think people who get really into upcycling just genuinely enjoy doing it. I've always loved upcycling and to prevent myself ending up with a landfill of finished projects I usually sell them once completed. But I enjoy it, so I keep doing it.
Is It Worth It?
It depends. It depends on the cost of the materials, how much you enjoy doing it and if it's going to save you money in the long run. All of these questions matter.
Personally, I tend to sell my projects for the cost they took to create and I enjoy doing it. So for me, it is definitely worth it. Your reasons will give you your answer.
Summary
We've looked at numerous ways to upcycle while presenting examples along the way. I think it's safe to say whether you're reusing rubbish, reusing someone else's rubbish, transforming something new, or starting from nothing, there is an upcycling style for everyone. You can upcycle! People do it for all sorts of reasons, from reducing waste to a love of creating things. And it's almost certainly worth it but ultimately by how much is and always will be up to you. I hope I've inspired you to try upcycling and given you some good starting points.
The Burning Question
Has this hub inspired you to try UpCycling something for yourself?
Forever Grateful for Feedback
Would you like to see more hubs on UpCycling?
Closing Comments
Follow for my upcoming article, How to UpCycle a Bookshelf into a Coffee Bar! I've moved into a smaller place recently and am intent to show that not only is UpCycling possible in a smaller space but that it can be used to create more space! And if you'd like to see any specific upcycling projects, leave me a note in the comments!
© 2017 Ricki-Lee Keeley

