- HubPages»
- Arts and Design»
- Crafts & Handiwork»
- Textiles
Origins of Knitting
When did Knitting Begin?
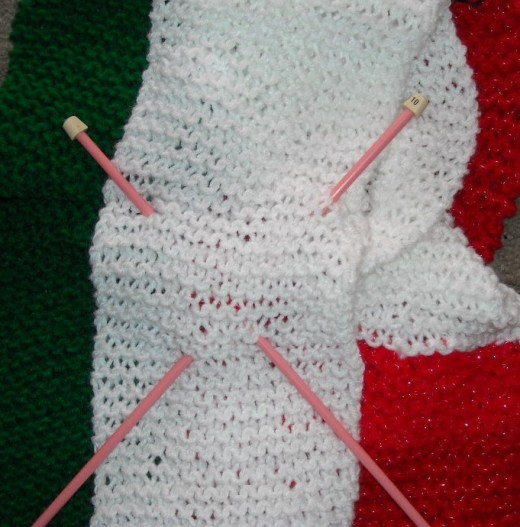
The exact date knitting began is arguable. Knit clothing was used by fishermen to ward off the elements in the 12th Century. A glove making peg frame was developed in the 14th Century. Knitting schools opened in the 16th Century and whole families began making blankets, socks, stockings, sweaters, bags, lace curtains, dollies, hats, and toys for extra cash. During the Industrial Revolution a knitting machine with machine spun wool was first made. Resurgence of hand knitting began during World War II. Knitting factories were converted to make weapons. Governments issued patterns requesting families knit for the military and Artisans developed thousands of patterns. Today, Artisans worldwide share knit patterns In social networking sites. Hand knitting is here to stay!
Finger Knit

Finger Knitting
It hasn't been proved but before there were knitting needles it is possible that people used their fingers to knit. Finger knitting is a technique that I learned in the Girl Scouts as a child. Perhaps you did as well.
Row 1- Cast On - Take your bulky weight yarn and make a slip knot, hold the yarn with the thumb and place slip knot on pointer finger. Begin making loops on your fingers like pegs. Note: some use the thumb as the fifth finger - most use the thumb to hold the yarn when starting only. Loop fingers moving yarn from back of hand to front and over. Start with the pointer finger and proceed to the small finger or "pinky".
Row 2 - Cast on a second time. You now have 2 rows on each finger and thumb if you are using the thumb.
Row 3 - Knit this row. Lift Row 1 loop up and over Row 2 loop and pull to make taught. Note: how tight you pull the yarn will make a difference in the width of the piece. Repeat till row is finished.
Row 4 - Repeat Row 2 and 3 until you have reached the desired length for your belt or scarf.
Last Row - Cast Off. Take loop on pointer and place on next finger to make a second loop. Move yarn from back of hand to front and over on that loop . Place the remaining loop on next finger over and repeat until you finish the pinkie finger. Make a second loop for your pinkie and your fingers and move yarn from back of hand to front and over on that loop. You have released your fingers. Weave in the yarn you have left either sewing or crocheting to finish the piece then tie a knot at the end.
Row 6- Trim if desired adding embellishment like flowers, etc.
Arm Knitting
Arm Knitting
Now it has been said that they started arm knitting after they decided finger knitting wasn't making material that was long enough, but it hasn't been proved yet.
Arm knitting is a form of knitting where a person uses his or her arms instead of knitting needles. The gauge of each stitch will be determined by the width of that persons' arm and how many strands of yarn used. If one wants a fuller stitch they need to use multiple skeins of yarn at one time. I tend to use sashay yarn as one of the yarns because material gives the stitches more bulk and not increased weight.
Let's Start -Make a large slip knot 3 yards from the end of the ball.
Make a slip knot - Make a loop about 4 inches from the skein of yarn. Hold the loop together with a thumb and forefinger. Let the yarn fall behind the loop. Use your hand to draw the strand in back forward through the loop. Slide loop onto your right arm Tighten loop around your right arm by pulling the ends of the yarn. (Do not pull so tight that yarn cannot pass through the loop easily.)
Make a Long Tail Cast On -
- Hold the working yarn (from the ball) and the tail in your left hand as if doing a regular long-tail cast-on,
- The tail is in front (around your thumb) and the working yarn is in the back (around your index finger). Move your right hand under the front strand, pick up loop on finger and pull through loop on thumb, place on right arm
- Continue as many times as the pattern calls for. If your pattern calls for 4 stitches [sts], you would repeat 3 more times after your cast on until you have a total of 4 sts on your right arm. Note: make sure sts are not too tight,: Start Knitting
- Hold the strand of the yarn attached to the skein of yarn in your right hand before the sts you have.
- With your left hand, pull the first stitch on your right arm over your knuckles and off of your right hand down below the yarn you are holding,
- Pick up the yarn you are holding in your right hand and it becomes a loop now that you put on your left arm. You have now knit your first stitch,
- Continue to pull loops off the right and pulling up new loops of the left hand until your left hand now has 4 sts and your right hand has none.
You are Arm Knitting. You now need to do the same thing again. Move the sts from the left arm holding yarn in the left hand and moving the new loop to the right arm.
Continue until you have enough material to make your belt, scarf, cowl, hat, blanket, etc.
Compact Knitting Needle Case
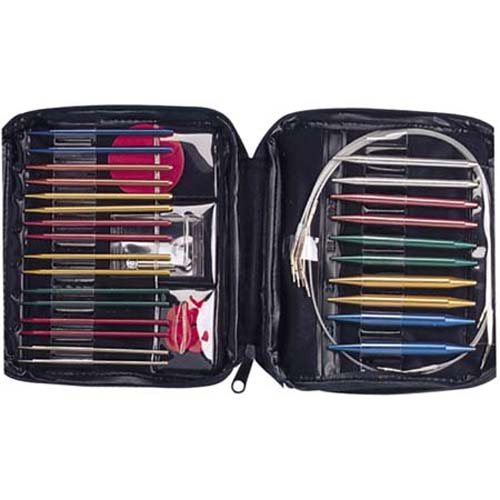
Where did Knitting Needles come from?
Origins of the knitting needles are many. This authors research on the topic comes to the Art of Tunisian Crochet using a long knitting needle. Eventually in the 12th Century people decided to start knitting using long crochet hooks in the Tunisian Style. Eventually they decided that the end hooks were more a problem than a help and began making knitting needles without the hook.
The knitting needle size corresponds to the same size regular crochet hook [because we started crochet long before knitting]; not the small steel crochet hooks. The reason for this is that it makes it easy to insert crochet into knitted work and vice versa without changing the tension of the piece.
Knitting needles come in three main styles: Straight, Circular and Double Pointed. There are many different sets of knitting needles you can purchase. And various companies that make them now. Most avid knitters eventually purchase a Knitting Needle Collection. This provides a compact and easy to carry their needles with them in a zipped or snap carrying case.
Because I teach knitting I have a large variety of knitting needles including the shorter needles to accommodate smaller hands. Size does matter when younger students or elder students are attempting to learn knitting. The larger knitting needles sometimes prove cumbersome and more difficult. Smaller knitting needles are easy to use for a beginner and perfect for knitting a hat, scarf, dish cloth, etc.
Knitting Yarn Categories
When you begin a knitting project you need to review the pattern and then carefully select the correct yarn for what article you intend to make.Yarn comes in different Dye Lot and Color. The Dye lot color varies with each lot. So white in one lot is not white in another even though it may be the same brand of yarn..Because of this It is best to get all the skeins you need before you start the project and if you are not certain get more than the pattern calls for to be certain your work isn't made with white colors that don't match each other; unless you intend for it to be that way.
Yarn has the following categories:
- Fingering:10-count crochet thread - Size 0 also called lace
- Sock, Fingering, Baby Size - Size 1 also called super fine
- Sport, Baby - Size 2 also called fine
- D. K. or [Double Knitting], Light Worsted - Size 3 also called light
- Worsted, Afghan, Aran - Size 4 also called medium
- Chunky, Craft, Rug - Size 5 also called bulky
- Bulky, Roving - Size 6 also called super bulky
One selects their knitting needle according to the size of yarn they choose. Yarn size is as follows:
- Size 0 yarn calls for needle size 000-1
- Size 1 yarn calls for needle size 1 - 3
- Size 2 yarn calls for needle size 3 - 5
- Size 3 yarn calls for needle size 5 - 7
- Size 4 yarn calls for needle size 7 - 9
- Size 5 yarn calls for needle size 11 - larger
Special Note: Don’t mix yarn with different bulk unless pattern asks you to.
Remember, manufactures put Dye Lot or Color, Bulk weight, Gauge of yarn. and suggested hook size on each skein of yarn to help the crafter. Most patterns also call for yarn of a specific texture or material, so make sure you read the instructions and know the implications of deviating from them
Knitting Gauge
Knitting Needles have an average gauge based on the same gauge as the Crochet Hooks.. Because each person knits using their own personal gauge, a standard category of "gauge" was developed to assist knitters in making articles. So knitters can exchange patterns with each other and have the same result.
Each pattern lists a stated "gauge" based on the knitted piece being described. The pattern states the needle size the artisan used to make their original work. Then a gauge lists how many stitches make standard 4 - 5 inches or centimeters across as well as how many stitched rows make the standard 4-5 rows listed in inches or centimeters.
Armed with this information, a knitter makes a swatch or small sample of knitting. This will demonstrate the look of a larger piece and tell the knitter if their gauge matches the pattern piece. If it does not, the knitter can exchange needles to get a larger or smaller needle until they are able to produce a "swatch" having the correct gauge of the pattern they have chosen. This way their piece will resemble what they intend to make.
Knit Gauge Range* in Stockinette Stitch to 4 inches is as follows:
- Needle Size 000-1 gauge 33-40sts [stitches]
- Needle Size 1-3 gauge 27-32sts
- Needle Size 3-5 gauge 23-26sts
- Needle Size 5-7 gauge 21-24sts
- Needle Size 7-9 gauge 16-20sts
- Needle Size 9-11 gauge 12-15sts
- Needle Size 11 - larger gauge 6-11sts
Remember the "Gauge" is found in your pattern. Gauge is made when you use yarn and hook to make rows. Be sure to make a swatch the size of the gauge to make sure you will get the desired result. Change the bulk of the yarn and or the hook size as needed to reach the correct gauge shown or your project will turn out smaller or larger than expected.
Knitting Skill Levels
Skill levels for knitting patterns was developed to assist a knitter in selecting patterns. With the definitions below a knitter can go to the patterns and judge whether or not they will have difficulty in completing the pattern piece. These are standard skill levels however they are still broad enough that some knitters may feel a piece is so easy they mark it easy but in fact it might be better served n another category.
The knitter who is attempting the piece should carefully review the stitches mentioned in the pattern and do practice swatches with the patterns to make sure they are up to the task before starting. This way they will not become overwhelmed and stop before the piece is finished. Many toss away perfectly good yarn because they became confused somewhere within the pattern piece and don't want to tear it out to start over or use the yarn for another piece of work. Here is the standard list of levels:
Beginner - Projects for first-time knitters using basic knit and purl stitches.
Minimal shaping.
Easy - Projects using basic stitches, repetitive stitch patterns, simple color changes, and simple shaping and finishing.
Intermediate - Projects with a variety of stitches, such as basic cables and lace, simple intarsia, double-pointed needles and knitting in the round needle techniques, mid-level shaping and finishing.
Experienced - Projects using advanced techniques and stitches, such as short rows, fair isle, more intricate intarsia, cables, lace patterns, and numerous color changes.
Slow Cast On
Knit Language
Knitting has it's own language. Looking at a pattern can seem like looking at Greek, if you aren't Greek. Learning the basic stitches, the terns to describe the stitches and the uniform symbols to indicate the stitches is most important for anyone who wishes to knit. For the experienced knitter a graph pattern with symbols is easy to maneuver through. For a beginner it seems incomprehensible.Over the years I have added stitches to my own journal of knitting including symbols to help me along. There are multiple of websites that are available to assist in this venture, including yarn companies as well as websites designed to sell patterns.
When you are ready cast on.
- Make a slip knot on the shaft of one needle. This counts as your first stitch. Place this needle in left hand.
- Hold other needle in right hand to control the yarn. Insert point of right needle, from front to back, into the slip knot and under the left needle.
- Hold left needle still in left hand, & move left fingers over to brace right needle
- Using right index finger, pick up the yarn from the skein.
- Release right hand’s grip on the needle, use index finger to bring yarn under & over the point of right needle
- Return right fingers to right needle, & draw yarn through stitch with point of right needle.
- Slide point of left needle into back of new stitch, then remove right needle.
- Pull skein gently to make the st fit snug not tight on needle. You’ve made 1 st or cast on 1 st. But, there are 2 sts on your needle because the sl knot is counted as your 1st st [unless otherwise indicated in the pattern].
- Continue Cast On process until you have the correct number of sts on your needle indicated by the pattern. CO inserting the point of right needle, from front to back, into stitch just made, & under left needle.
Knit or Garter Stitch
Let's Knit
Now that you have cast on, knit your first row:
- Hold needle with st in your left hand; insert point of right needle in 1st st, from front to back, just like casting on
- With right index finger, bring yarn from skein under & over point of right needle.
- Draw yarn through stitch with right needle point
- Slip loop on left needle off, so new st is entirely on right needle thus completing a knit stitch.
The knit stitch is the first stitch made. When knitting, each loop is drawn through other loops using The right side of the fabric. When you knit every stitch it looks like a purl stitch on each side of the fabric.It has been said that people knit for over 200 years before they discovered how to purl.
Purl Stitch
Let's Purl
Let's Purl
- With the yarn in front of the needles, insert the right needle into the first stitch on the left needle from right to left
- Bring the yarn over the right needle to the back, then forward under the right needle
- Bring the right needle with the loop of yarn away from you and through the stitch
- Slip the old stitch off the left needle
- Continue to purl
Like knitting each row, if you purl every row, your stitch pattern produces a stand up texture on both sides of the work. To purl, you put your yarn between the needles to the front before you make the next stitch.
Stockinette Stitch
Let's make a Stockinette Stitch
The stockinette stitch is the first stitch used for centuries to make material knitting. Particularly popular when making socks and stockings for the Gentry in the 15th and 16th Centuries.
Since you already learned how to knit and you learned how to purl. Stockinette is the next basic knitting pattern. In the stockinette knit, the first row in your knitted project is knit. The following row is purled. Because the second row is purled the material you have made is bumpy on the purl side and smooth on the knit side.
Let's make something stockinette.
There are numerous stitch patterns using a variety of knit, purl, slipping stitches, and grouping stitches. Once you have mastered the stockinette stitch you are well on your way.
Here is a list of some other patterns you may like to try:
- 3 Color Tweed Stitch
- All Over Cross Stitch
- Basic Rib Stitch
- Basket Cable Stitch
- Basket Stitch
- Bell Stitch
- Block Stitch
- Brioche Stitch
- Broken Rib Stitch
- Cable Stitch
- Cable Stitch
- Cross Barred Stitch
- Diagonal Rib Stitch
- Diamon Rib Stitch
- Diamond Weave Stitch
- Double Bead Edge Stitch
- Double Moss Stitch
- Drooping Elm Leaf Stitch
- Eyelet Stitch
- Fagoting Stitch
- Fancy Rib Stitch
- Fancy Slip Stitch
- Rib Feather & Fan Stitch
- Fern or Feather Lace Stitch
- Filet Flat Stitch
- Fisherman Rib Stitch
- Garter Stitch
- Honeycomb Stitch
- Horizontal Ridge Stitch
- Indian Cross Stitch
- Knit stitch
- Lace Stitch
- Large Diamond Stitch
- Lattice Cable Stitch
- Linen Ridge Stitch
- Little Pyramid Stitch
- Lotus Flower Stitch
- Mitered Square Stitch
- Mock Cable Stitch
- Moss Stitch
- Open Star Stitch
- Openwork Stitch
- Overlapping Waves Stitch
- Owl Cable Stitch
- Oyster Stitch
- Pebble Stitch
- Ray of Honey Cable Stitch
- Reversible Cable Stitch
- Reversible Diamond Stitch
- Rib Stitch
- Rice Stitch
- Seed Stitch
- Spiral Pillar Stitch
- Stockinette Stitch
- Tunisian Knit Stitch
- Welsh Stitch
- Windmill Stitch
I'm certain that there are many more stitches people have discovered over the centuries, but these will get you started on your way to being a well versed knitter. Enjoy!
Finishing a Garment
Knitting a Garment Hints
Make sure you have a pattern that is your Skill levels for Knitting so it can be accomplished with ease, or get help.Here are some Common Term Definitions found in Patterns:
- Left Front (or Left Sleeve): The piece that will be worn on the left front and left arm of your body.
- Right Front (or Right Sleeve):The piece that will be worn on the right front and right arm of your body.
- At the Same Time:This is used when you are asked to work two different steps (perhaps shaping at the armhole and at the neck) at the same time. Work same as Left (or Right) piece,
- Reversing shaping: Writing instructions in reverse may help alleviate any confusion when doing a pattern with this type of instruction.
Pattern instructions will tell you to cast on a certain number of stitches[sts]. But remember to make a swatch to check your gauge first.
Most patterns will not tell you but before most start casting on, they place a slip knot on one of the needles. There is a long tail cast on method that does not use a slip knot first, but most knitters prefer to use a slip knot first.
Making a Swatch -
- Work Rows 1 through 4 in every stitch. When your last stitch is worked, you have finished one row of knitting. Now is the time to measure your Work.
- Remember the Gauge tells you what you need to knit in inches or centimeters. Usually x number of sts & x number of rows = x number of inches. Don't forget to check your gauge.
- If your swatch is too wide, start over, Change needle stitches to less than the pattern calls for or get a smaller knitting needle and try again.or CO fewer stitches so the correct knitting needle will work for you [Keeping the same needle will cause you more headaches as you will have to divide the number of stitches on every instruction to match your gauge. Easier to change and get a needle that will provide you with the same gauged swatch..
- If your swatch is too narrow, start over & CO more stitches or get a larger knitting needle. As before changing the needle is the best way to proceed as you will not have to change the directions row by row.
- Once your swatch gauge is correct in length and width, you can begin your project.
Read the pattern before starting the work. Look up the meaning of each term before you start so you will become familiar with the knitting abbreviations the author of the pattern used.Also make note of any special knitting stitches. Be certain you can do that stitch; practice.
There is a common knitting language used in most patterns, however there are differences according to what Country of Origin the author came from, and the knowledge of the author. Note the measurements. They can be listed as CM [centimeters] or IN [inches].
- CO: Cast on - This is how you begin each knitted piece. There are many methods of casting on. Methods change edges: making stretch or firm base. Unless the pattern tells you differently, use the method you were first taught as it will be the easy way. Note: Some authors use CO to mean Cast On and Cast Off.
- BO: Bind off - is sometimes called casting off and sometimes backing out. They mean the same thing.
- Inc: Increase - Add one or more stitch is usually done by K or P in the front & back, of the same stitch.
- Dec: Decrease - A basic decrease is to work 2 stitches together as one.
- Rep*: repeat or do the same thing again note* Repeats are indicated by asterisks (*) rather than rewriting same steps over & over. Brackets [ ] & Parentheses also used to repeat or group sts such as: “(K1, P1, K1) next st.” means you work all sts in one st.
- Sl Sl: Slip Slip is a common space holder. Also commonly found is Sl Sl K {slip, slip, knit] Moving a stitch or stitches from one needle to the other, without working it.
- YO: yarn over Inc wrap yarn over the needle.
- Tog: Together - Decrease made Working 2 stitches or more together makes a decrease. This will make decorative and delicate holes in the piece done in some lace patterns. K2tog - knit 2 sts together or P2tog - purl 2 sts together also commonly seen.
Some patterns require that you change colors.
- The key to this method is organizing your yarn, keeping one ball on your right side of you and the other on your left. You should hold the main color in whichever hand you feel the most comfortable.The knitter "wraps the yarn" by dropping the color no longer in use ans picking up the color being added. Add the new color with the right needle tip and pull it through the stitch using the left needle
- There are various devises to wrap yarn and allow on to hang multiple colors from the knitting work if you have multiple areas to change out like in the fair isle knitting. However many prefer to carry the non active yarn color on the back of the work and pick it up as they go along. Changing the active and non active colors as required in the pattern.
- If you do this type of color change it is best to YO when changing colors to give the work some breath or it may not be as flexible as intended and end up puckered instead of flat.
Once your piece is completed it is time to BO [bind off]
- 1. Knit the first 2 sts; insert left needle into 1st st you knitted, pull it over the 2nd st & completely off the needle. 1 st is now bound off.
- 2. Knit one more stitch, insert left needle into 1st st on right needle, pull it over the new stitch & off the needle. Another st is bound off.
- 3. Repeat Step 2 until one stitch Remains. Cut yarn from skein, leave a 6" end. Using yarn needle, thread yarn end into yarn needle and draw through last st to secure it then weave/sew end Into several stitches to secure it.
If you are Binding Off BO in the round:
- Step 1: Bind off your stitches as usual, stopping at the last stitch.
- Step 2: (This is the secret trick!) Instead of drawing your yarn through the last loop, use your knitting needle to pull that loop to about 6-8 inches long. Use your scissors to cut the yarn right where your needle is (where the yarn loops).
- Step 3: Pull the working yarn/tail end right out and set it aside. You won't need it anymore.
- Step 4: Grab the other strand and pull it snug.
Kitchener's stitch
Kitchener's Stitch Grafting
Two sets of matching live stitches can be grafted together invisibly with a technique known as Kitchener's stitch making the seam, seamless to the eye. You can graft sets of knit or purl stitches together, and you can graft combinations of knit and purl as long as the stitches on the two sets are identical in number and type.
Knitting lore has it that this stitch was named after British Field Marshall Horatio Herbert Kitchener's, who developed a pattern for knitted socks with a grafted toe to be used by British and American women during World War I. Begin Gafting:
- Thread a yarn needle with the color of the work you are using.
- Place the needles together with fronts and backs lined up.Start with the back knitting needle.
- Take yarn needle and thread through the first stitch on the back knitting needle as if knitting carefully so stitch stays on the needle.
- Then, move the needle through the first 1st stitch on the front knitting needle as if knitting.
- Once it is through both you can drop the stitches from the needle.
- Take yarn needle and thread through the back of the 2nd stitch on the front needle as if purling carefully so stitch stays on the needle.
- Then, move the needle through the first 2nd stitch on the back knitting needle as if purling.
- Once it is through both you can drop the stitches from the needle.
- Repeat -Graft again with the next stitches. Remember to Knit 1st and then purl 2nd. Once you have gone through all the stitches on both knitting needles the seamless seam has been created..
.
Short Row Shaping
Short Row Shaping
When knitting patterns of varying row gauges, short rows can be used to add rows to the shorter sections, allowing the finished, piece to lie flat. Short row shaping can also be used for darts, back necks on circular yokes, hats and medallions with circular pieces, and sock heels. When you add an extra row into the knit piece, you must make a smooth transition between the edge where one row is worked and the edge that has the extra row. Wrapping a slipped stitch does this. Use one technique for knit stitches and another for purl stitches
Making a Knit Wrap
- 1. Prevent holes in your work using Short row wraps. wrap a knit stitch as follows: With the yarn in back, slip the next stitch as if to purl.
- 2. Move the yarn between the needles to the front of the work.
- 3. Slip the same stitch back to the Left needle. Turn the work, bringing the yarn to the purl side between the needles. One stitch is wrapped.
- 4. When you have completed all the short rows, you must hide the wraps. Work to just before the wrapped stitch. Insert the right needle under the wrap and as if to knit into the wrapped stitch. Knit them together
Making a Purl Wrap -
- 1. Wrap a purl stitch as follows: With the yarn at the front, slip the next stitch as if to purl.
- 2. Move the yarn between the needles to the back of the work.
- 3. Slip the same stitch back to the left needle. Turn the work, bringing the yarn back to the purl side between the needles. One stitch is wrapped.
- 4. After working the short rows, hide your wraps. Work to just before the wrapped stitch. Insert the right needle from behind into the back loop of the wrap. Place it on the left needle, as shown. Purl it together with the stitch on the left needle
Illusion Knitting
Shadow & Illusion Knitting
Reversible Knitting
Double Knitting
Double Knit Tutorial
Shadow or Illusion Knitting & Reversible or Double Knitting
I looked at my hub and realized that I had forgotten to list the "newest craze" in knitting: Shadow Box Knitting or Illusion Art Knitting and, Reversible Knitting or Double Knitting. Sometimes each of these separate types are put together. Shadow or Illusion, Illusion and Reversible, Reversible and Shadow, Reversible Double Knit, etc. Each type of knit involves a different texture and causes a different view of the finished product. I have attached some videos of shadow, Illusion, reversible and, double knits so you can see how artisans have interpreted these styles of knitting.
Shadow Knitting is basically the same as mosaic knitting. In this type of knitting the artisan varies between two colors and each mimic the other on a different side. The visual effect of shadow knitting is due to the different height of the knit stitches on the wrong side rows. A knit stitch is flat, while a purl stitch is raised. Therefore, one can change which color (dark or light) stands out by changing from knit to purl. So the basic idea is to create a pattern in knit stitches in the colors one wants and purl stitches in the background color. When looking straight at the knitted piece, the stitches look approximately the same, but from an angle, only the raised purl stitches are visible.
Illusion Knitting has an artistic flare and some say this artistic style originated in Japanese Design. While it might sound complicated, the technique of illusion knitting is surprisingly simple. By carefully designing your knitted work using different colors, you can create a illusions in the piece you knit. You can even hide a picture in the piece that gives the viewer a surprise. Illusion Knitting gives way to your artistic design with a variety of texture and depth.
Reversible Knitting - This knitting idea some say was started by artisans who wanted the back of their fair isle stockinette piece not to show as strings on the reverse side of their work. Reversible Knit requires time because you are knitting the front and back pieces at the same time and together. Kind of if you used a circular knitting needle in the round but instead of knitting the front first and the back second you did them at the same time. It is a great knitting idea especially for decorative scarves. There is a front picture and the reversed picture on the back. Most prefer to just use two colors in this technique because the knitter needs to keep accurate counting and remember which color is purl and which color is knit. Reversible knitting hasn't captured all the artisans yet but it is fun to work a piece and have people think it is machine made. I always enjoy a finished project!
Double Knitting - Double knit is a cool knitting technique that became popular in the 70's with "double-knit reversible slacks" and most finely made machines items come double knit as well. Double knitting can be done in a variety of ways. Using circular or double pointed needles the knitted makes one row, then the knitter slides the stitches to the other end of the needle and begins the same row again using the next yarn. Only half the stitches are knitted with any one yarn; the rest are slipped ahead for the other color. After both passes are done, the knitter then turns the work and begins another row. Double knitting allows you to produce a double layer of Stockinette Stitch fabric while knitting both layers at the same time. This leaves both sides of the work smooth and the insides purl stitches are not seen. Because you are knitting both sides at the same time you need twice as many stitches to accommodate both sides of the fabric at the same time. It is sometimes mixed with Reverse knitting.
Knitting is not always made with just yarn. Some use fabric, ribbon, cloth, jute, rope, plastic bags, wrapping paper, newspaper, cut up t-shirts, and many more. Using different textures is what art design is all about and those who specialize in illusion knitting have devised an illusion pattern generator as well as several illusion patterns that change appearance according to the way the viewer stands.
Vogue - Correcting Common Knitting Mistakes
- Correcting Common Mistakes
The Ultimate Knitting Experience
Correcting Common Knitting Errors
How to pickup a dropped knit stitch: Insert right needle or right hand through the next loop under the dropped strand. With left needle or left hand, insert needle or hand from the back to front of your work and through the top loop on your right needle or hand pulling dropped strand gently up and towards the place where it should have been [add stitch to the right needle or hand]. At this point the dropped stitch is facing the wrong way. To correct, insert left needle or hand from front to back. Slip the stitch onto the left needle or hand then continue knitting.
How to pickup a dropped purl stitch. Insert right needle or right hand through the next loop and under the dropped strand. With left needle or left hand, insert loop dropped front to back into the top of the only. Gently pull dropped loop up and forward pulling the through next stitch on the right hand or needle. The new loop/stitch is on the right needle or hand. Transfer the new stitch/loop using the left needle. Pick up new stitch front to back and slip it onto right needle then continue knitting
How to catch a run in stocking knit. Using a crochet hook or stitch corrector and with the right side of the work facing you, begin picking up knit stitches front to back of work. Make sure your hook is over the horizontal bar and draw through a loop until you get to the top where the loop should be in the next row. Then proceed with retrieval of the knit stitch or purl stitch.
Correct multiple dropped stitches - Mark error row use a stitch saver then pull out stitches within one row of the error with right side facing you then,
- Correct knit stitch hold yarn behind using left needle or hand moving front to back pull out dropped stitch and place where it belongs.
- Correct purl stitch hold yarn in front using needle or hand moving front to back pull out dropped stitch and place where it belongs.
Using the wrong yarn – Most patterns call for a specific gauge of yarn. They do this because using a different gauge will create an end product of a different size. If you use too large of a gauge, your project will turn out larger than expected. If you use too small of a gauge, it will turn out smaller.
Uneven tension – Maintaining an even tension is important if you want your finished product to look like it should. Beginners often have trouble with this, but it becomes easier once you’ve gained some experience.
Miscounting stitches – Making the correct number of stitches is important for every project. Even the most experienced crocheter can make a counting mistake, so don’t be afraid to double check if you’re not sure. You can also use stitch markers to help.
Knitting in the wrong loop – In most cases, you should insert your needle through the front and back loops for each stitch for knitting and back to front for purling. Some knitters make the mistake of only going through the front loop or splitting the yarn, and that throws the whole project off. Unless the instructions tell you otherwise, it’s important to go through both loops. Going through only the front loop makes the work thinner, and going through only the back loop makes a ridge pattern.
Turning mistakes is quite common for beginners, so many prefer to use a circular knitting neele to avoid the issue. Don’t get discouraged if you make a mistake, just go back and fix it and learn so you will know what to do next time.
Misunderstanding knitting terms – Knit terminology for the United States and the United Kingdom is quite different and each progressive stitch is different as well. If you’re not sure about where your pattern originated, be sure to double check. It could save you a lot of headaches once the project is complete! The word "color" is a good tell that the pattern has come from overseas and not the USA. Their measurement system is different that the USA so you will need to convert the pattern or it will be too small.
Knitting Help
There are a great many ways a knitter can seek help. There are knitting clubs, knitting blogs, yarn companies who have instructions, and craft stores who have training hand-on-hand for students to learn. Personally I work as a Michael's Trainer and have lots of students who attend classes and text me for additional help.
Here are some of my favorite places to go on-line:
- http://www.antiquepatternlibrary.org/ http://cascadeyarns.blogspot.com/
- http://www.CreativeKnittingMagazine.com http://www.craftelf.com/knitting-stitch-pattern
- http://www.craftyarncouncil.com/project.html http://www.freevintageknitting.com/
- http://www.interweave.com/knitting/ http://www.lionbrand.com/freePatterns.html
- http://www.lionbrand.com/content-knittingPatternIndex.htm
- lhttp://www.knittingfool.com/
- http://www.premieryarns.com/dept/patterns.aspx http://www.redheart.com/free-patterns
- http://www.redheart.com/free-patterns
- http://tahkistacycharles.com/t/pattern_list?format=free http://www.yarnspirations.com/
Whatever you choose to do, knitting is fun and relaxing. If you find that you have RA or another disease that hinders your use of knitting needles and you don't care to finger or arm knit. You can use a knitting Loom. They are fun to use and I teach people of all ages how to knit using these looms as well. Enjoy!


