Photographing Smoke Trails
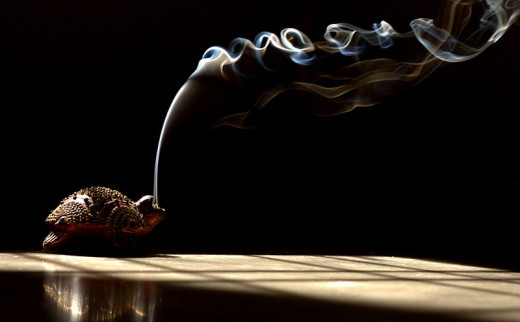
Many will never think of photographing smoke or smoke trails. Many will think that it is almost impossible to do or cannot see the purpose of it. Photographing smoke trails is an abstract art and can yield beautiful examples fit for a fine art gallery.
This project is not hard to create, but it does take some patience and persistence. You will probably end up with many images that for one reason or another are not usable. However the usable images will be more than enough to justify the other wasted shots. It takes practice and a little preparation, a few pieces of equipment and a hit or miss acceptance of the facts.
You will need to have a semi darkened room, devoid of air currents while taking the shot, a small table to work with, a tripod, several long incense sticks, something to light them with, a regular 50mm lens, a cable release, a remotely fired flash unit or a separate light fixture ideally with a snoot attached, and a non glossy black background.
It also helps if you have a lap top computer connected to the camera to instantly see the images, also good to have is a white reflector. You will not be using automatic modes with the project, since they might not work properly.
Set the shutter speed at around 250 and use a shallow depth of field of about f 4 or slightly higher. This should result in a fast enough shutter speed to freeze the smoke and a depth of field to render the background completely dark.
Place the incense sticks (two at time) next to each other on the table, set your tripod, camera in front of the incense sticks. Light up the sticks with the flash unit or light source from behind the incenses sticks.
Set up the reflector at a 45 angle opposite the light source. Once you have the set up ready to go, light up the incense, since it will take a little while before they start producing smoke. Setting two sticks next to each other helps produce smoke trails that react to the heat produced by each other, thus giving movement to the smoke. Pre-focus your camera on the top of the sticks and slightly raise it up.
Use care when framing the scene to avoid including outside elements such as portions of the incense, the corners of the background, table top etc. Keep in mind that smoke quickly disperses at it rises, so a good idea is to capture the image quickly as the smoke begins to rise.
The main point to be aware of and pay extra attention to is to set up the flash/light unit so that it is positioned several feet away from the incense and slightly below it and it should be aimed directly above the top of the incense so it goes through the smoke and away from the background at 45 degree angle to the reflector, this is a key step. Otherwise you risk illuminating the background and ruining the effect. This set up produces a desired effect of also making the black background slightly underexposed, thus rendering black in a deeper shade.
The flash unit or light source must be strong enough to illuminate the smoke. The use of a snoot is to allow the focusing of a narrow beam of light unto the smoke itself without allowing for any light to fall on the background. Making a snoot is an easy D.I.Y project. See link for such a project DIY snoots.
Since smoke is naturally a light gray and almost translucent, you can experiment with placing colored filters on top of the light source to add color to the smoke. But this is much better done post shoot and with a digital editing software.
The camera and the flash unit are triggered remotely due to the risk of causing blur when depressing the shutter and for the flash since it needs to be away from the camera and at an angle.
Once you have taken several shots, try slowly adding movement to the sticks to cause patterns. Better yet have an assistant help you with this.
The entire project should be shot in a vertical format since smoke naturally creates a naturally tall subject, however, presenting the final images can be done in any format.
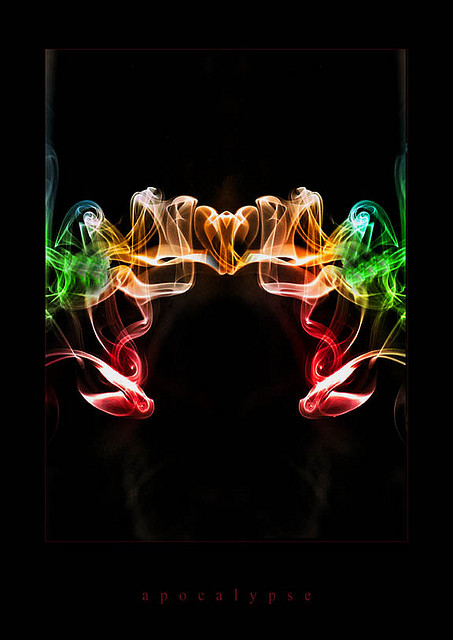
Although it is easiest to add color to the smoke trails with a digital software program, there are some products that produce colored smoke.
But care should be exercised with these as they normally use chemicals which can be noxious when in close proximity and when used in an enclosed space.
If you must add color, and the images with color are usually breathtaking, then try the colored filter on the light source variant or do it digitally.
Here is a Youtube video indicating how to add color to smoke with Photoshop: Photoshop tutorial.
Once you are finished with the project consider presenting the best images to photo stock houses and art galleries.
Show the samples in a good presentation format such as glass framed and use enlargements of at least 11X14 to create a more visually stunning presentation.
It is also worth considering selling individual prints separately as many of the best photographers who conduct this type of work do.


